How to Configure Task Labeling in WP Project Manager
Task labeling is an outstanding feature to manage your tasks in a more organized way. When you create a project, it may include lots of tasks and functions. Managing all of them without any type of specifying capability may annoy both you and your team members.
Task labeling isn't an independent module or integration; it's a built-in feature for WordPress Project Manager Pro users.
Requirements
- Your WordPress Business/Blogging site
- WP project manager (Free version)
- WP Project Manager Pro (Label is a built-in feature under this package)
Configuration
Step 1
Go to the Project Manager Dashboard.
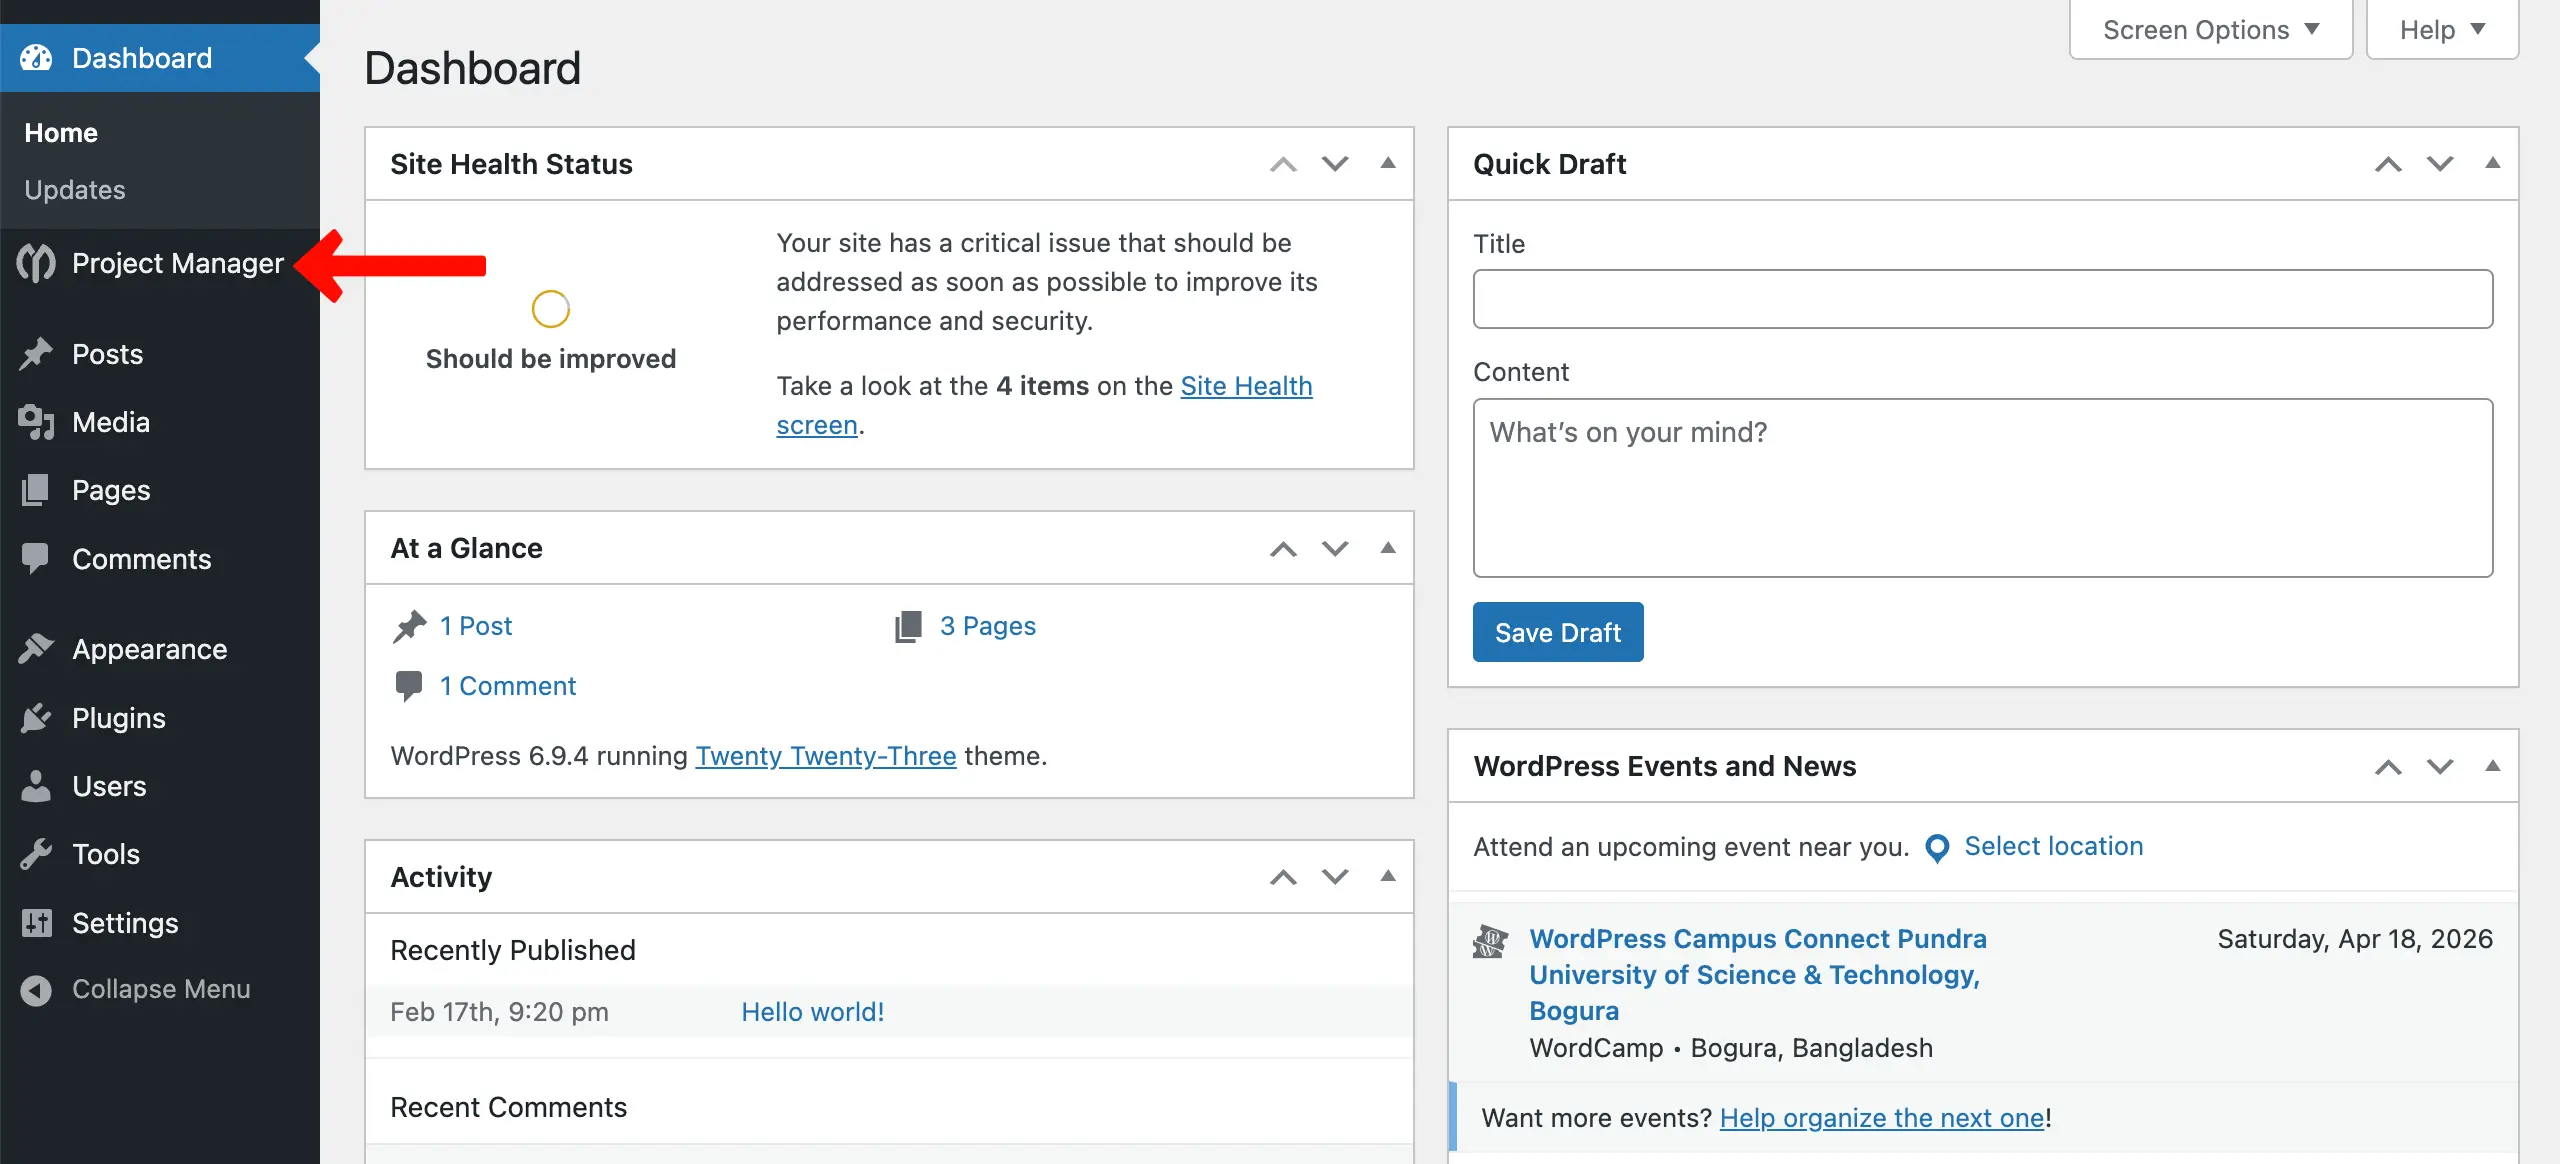
Now, navigate to Select Any Project → Settings → Label on the left sidebar.
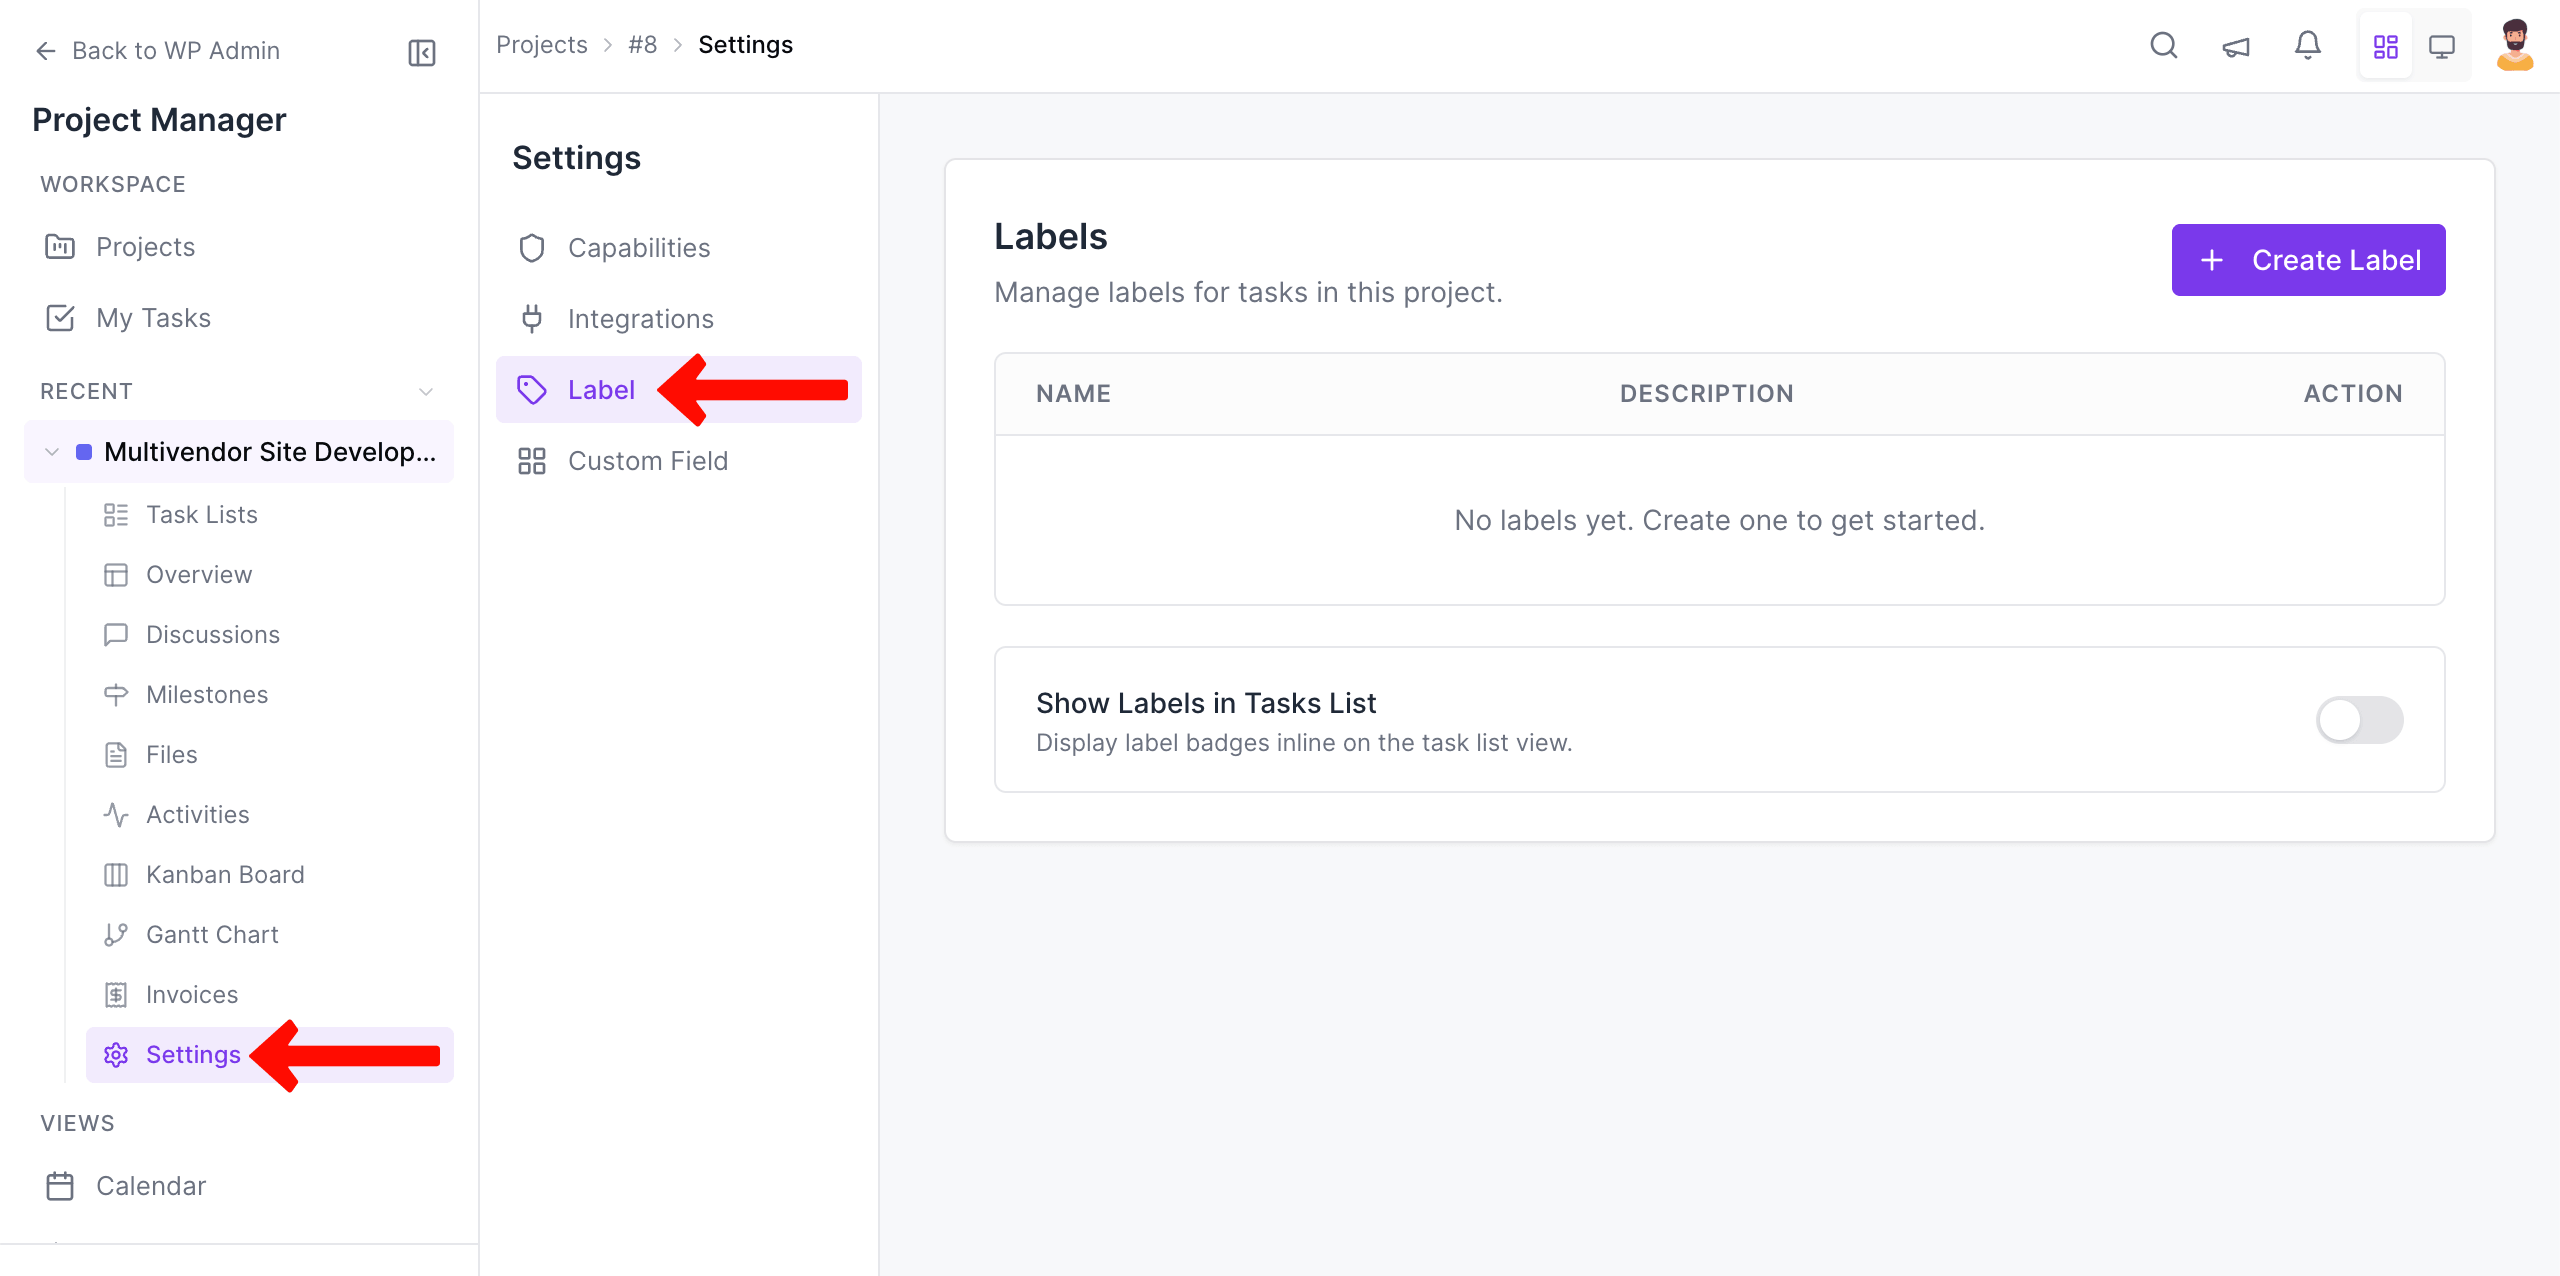
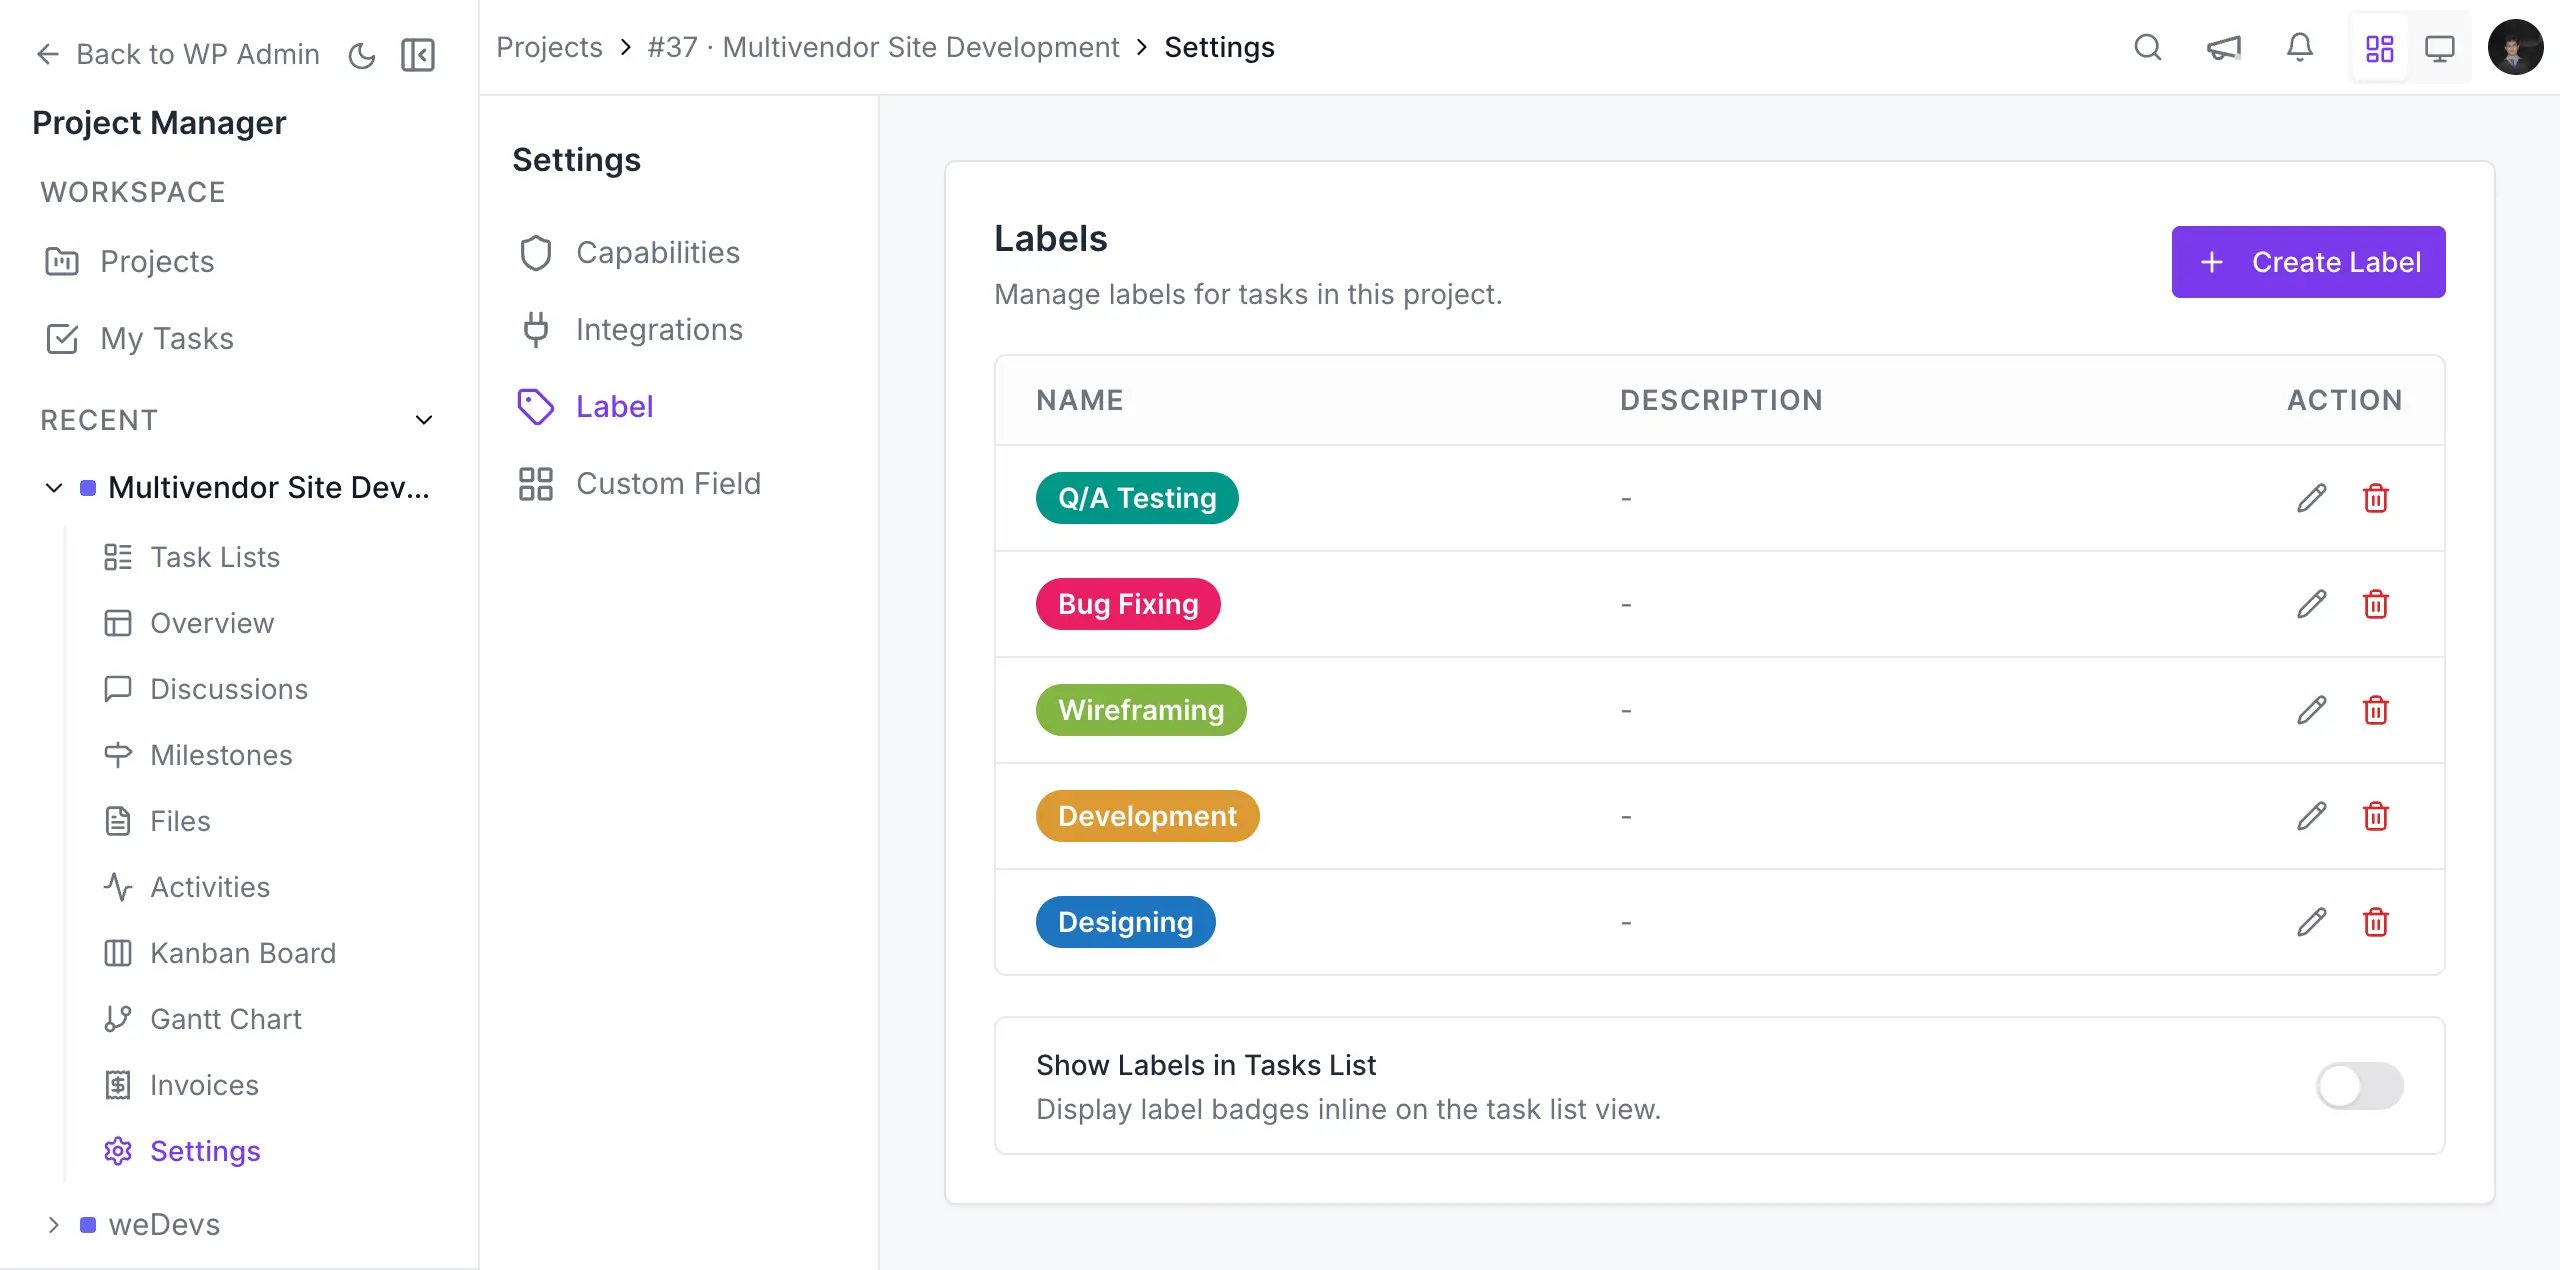
Click the + Create Label button in the top-right corner of the interface.
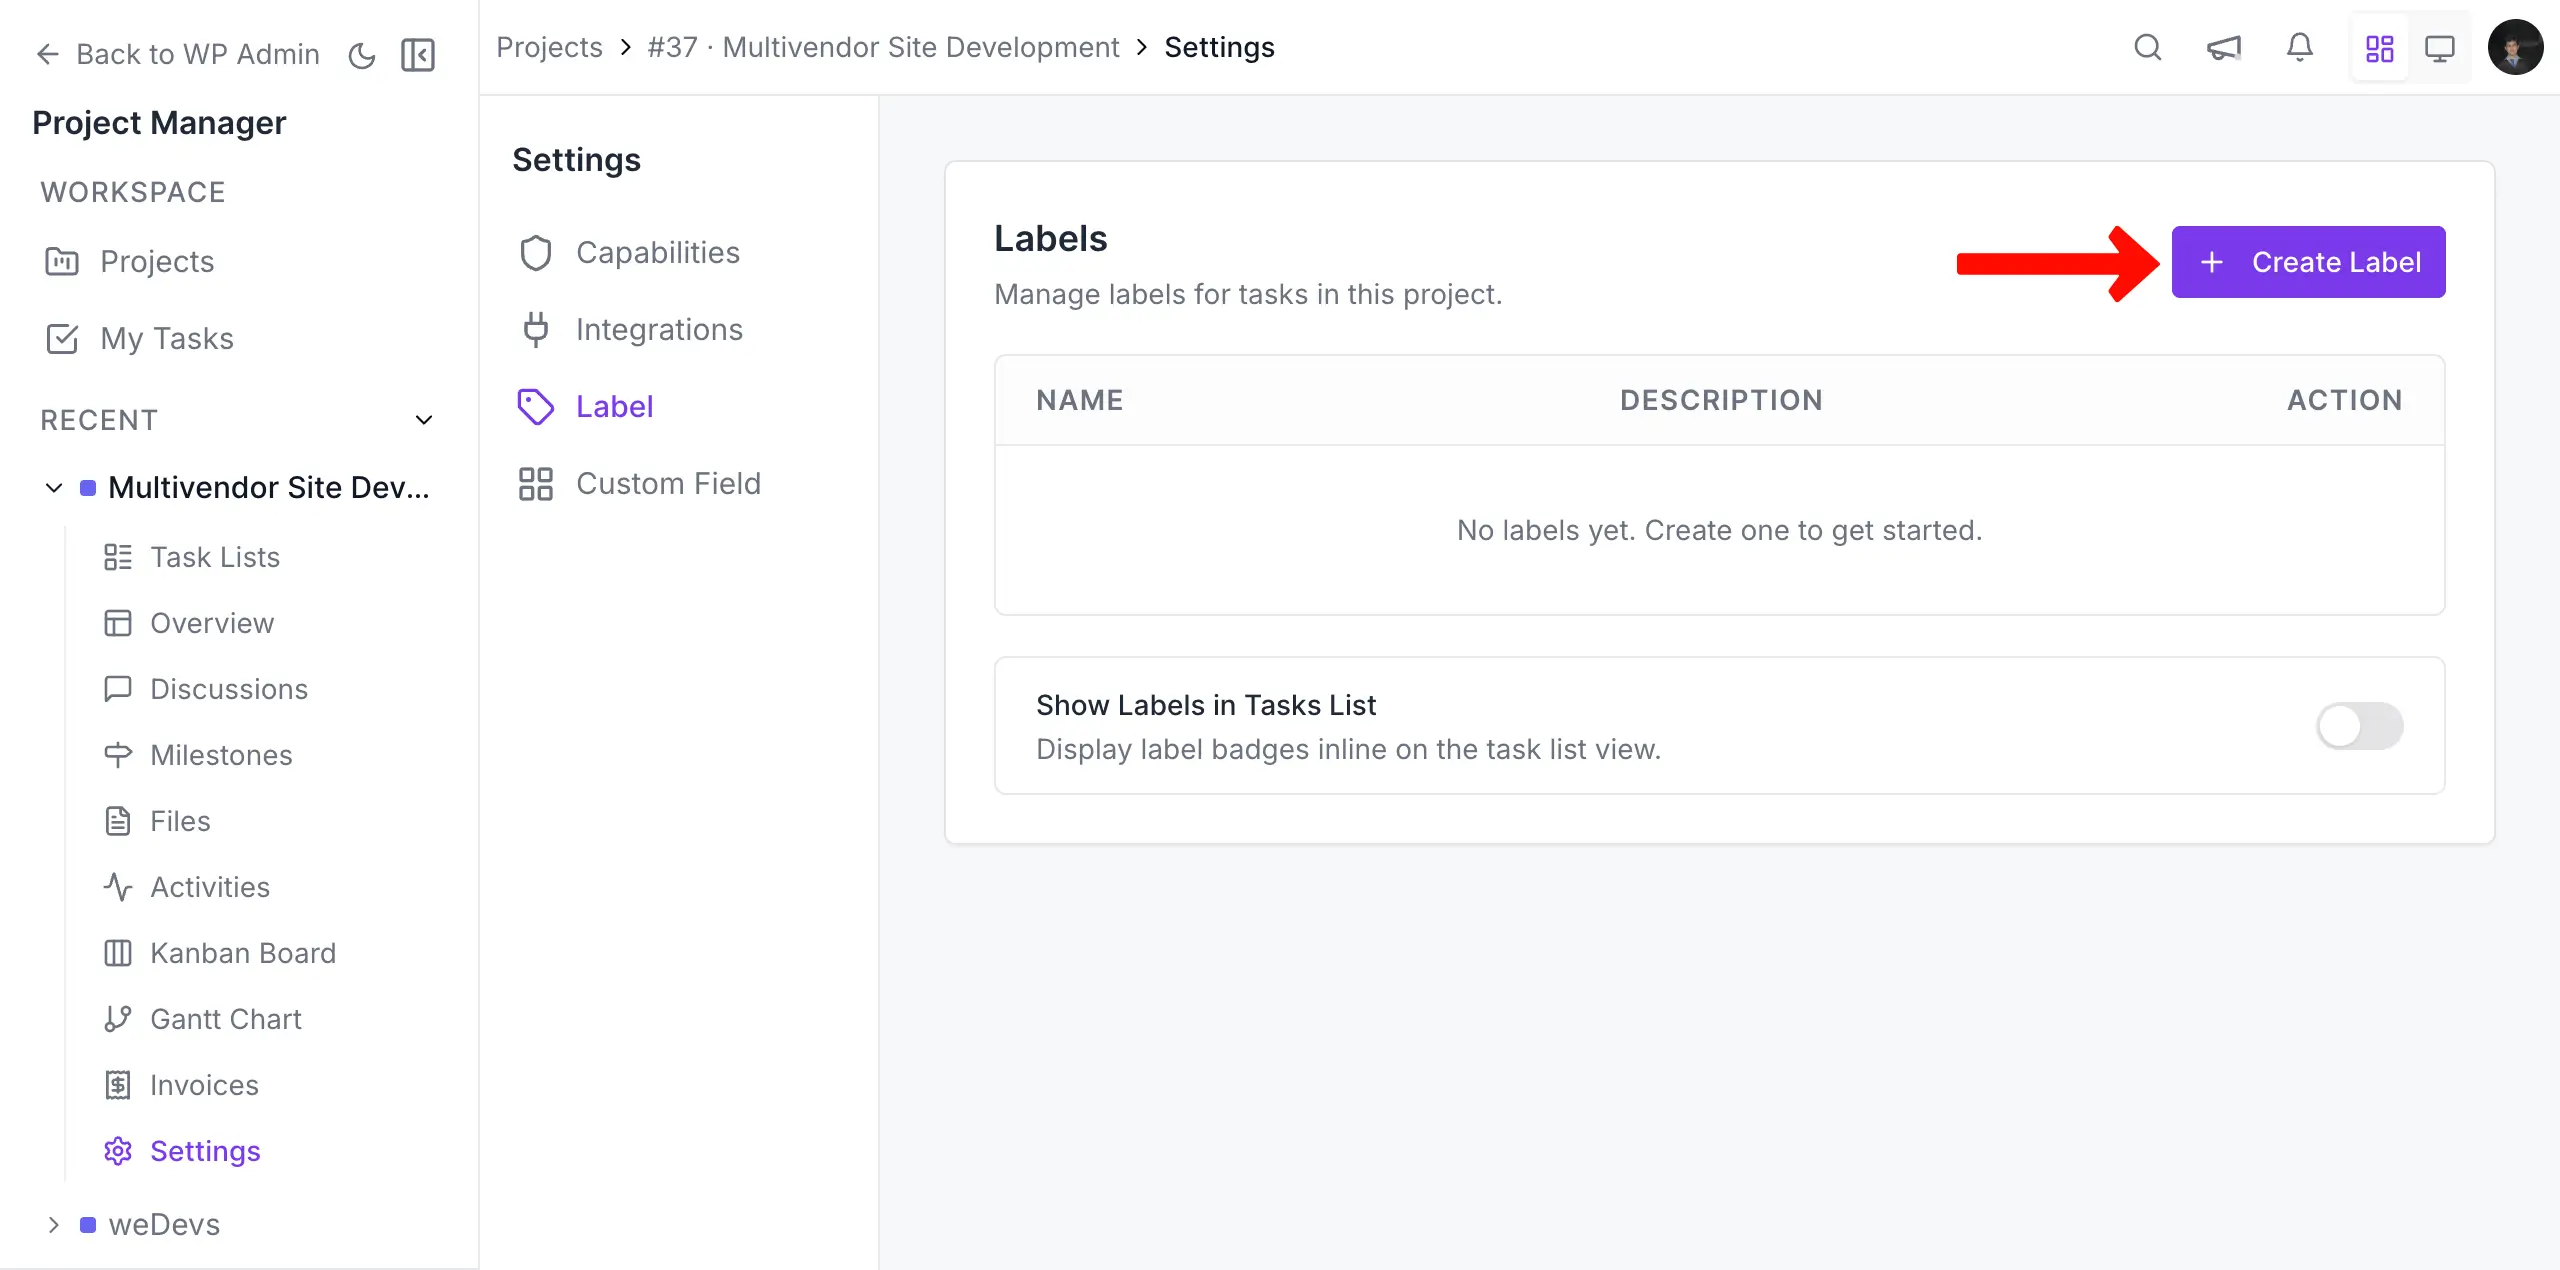
You'll see some fields have opened up where you can write the label names and choose a color.
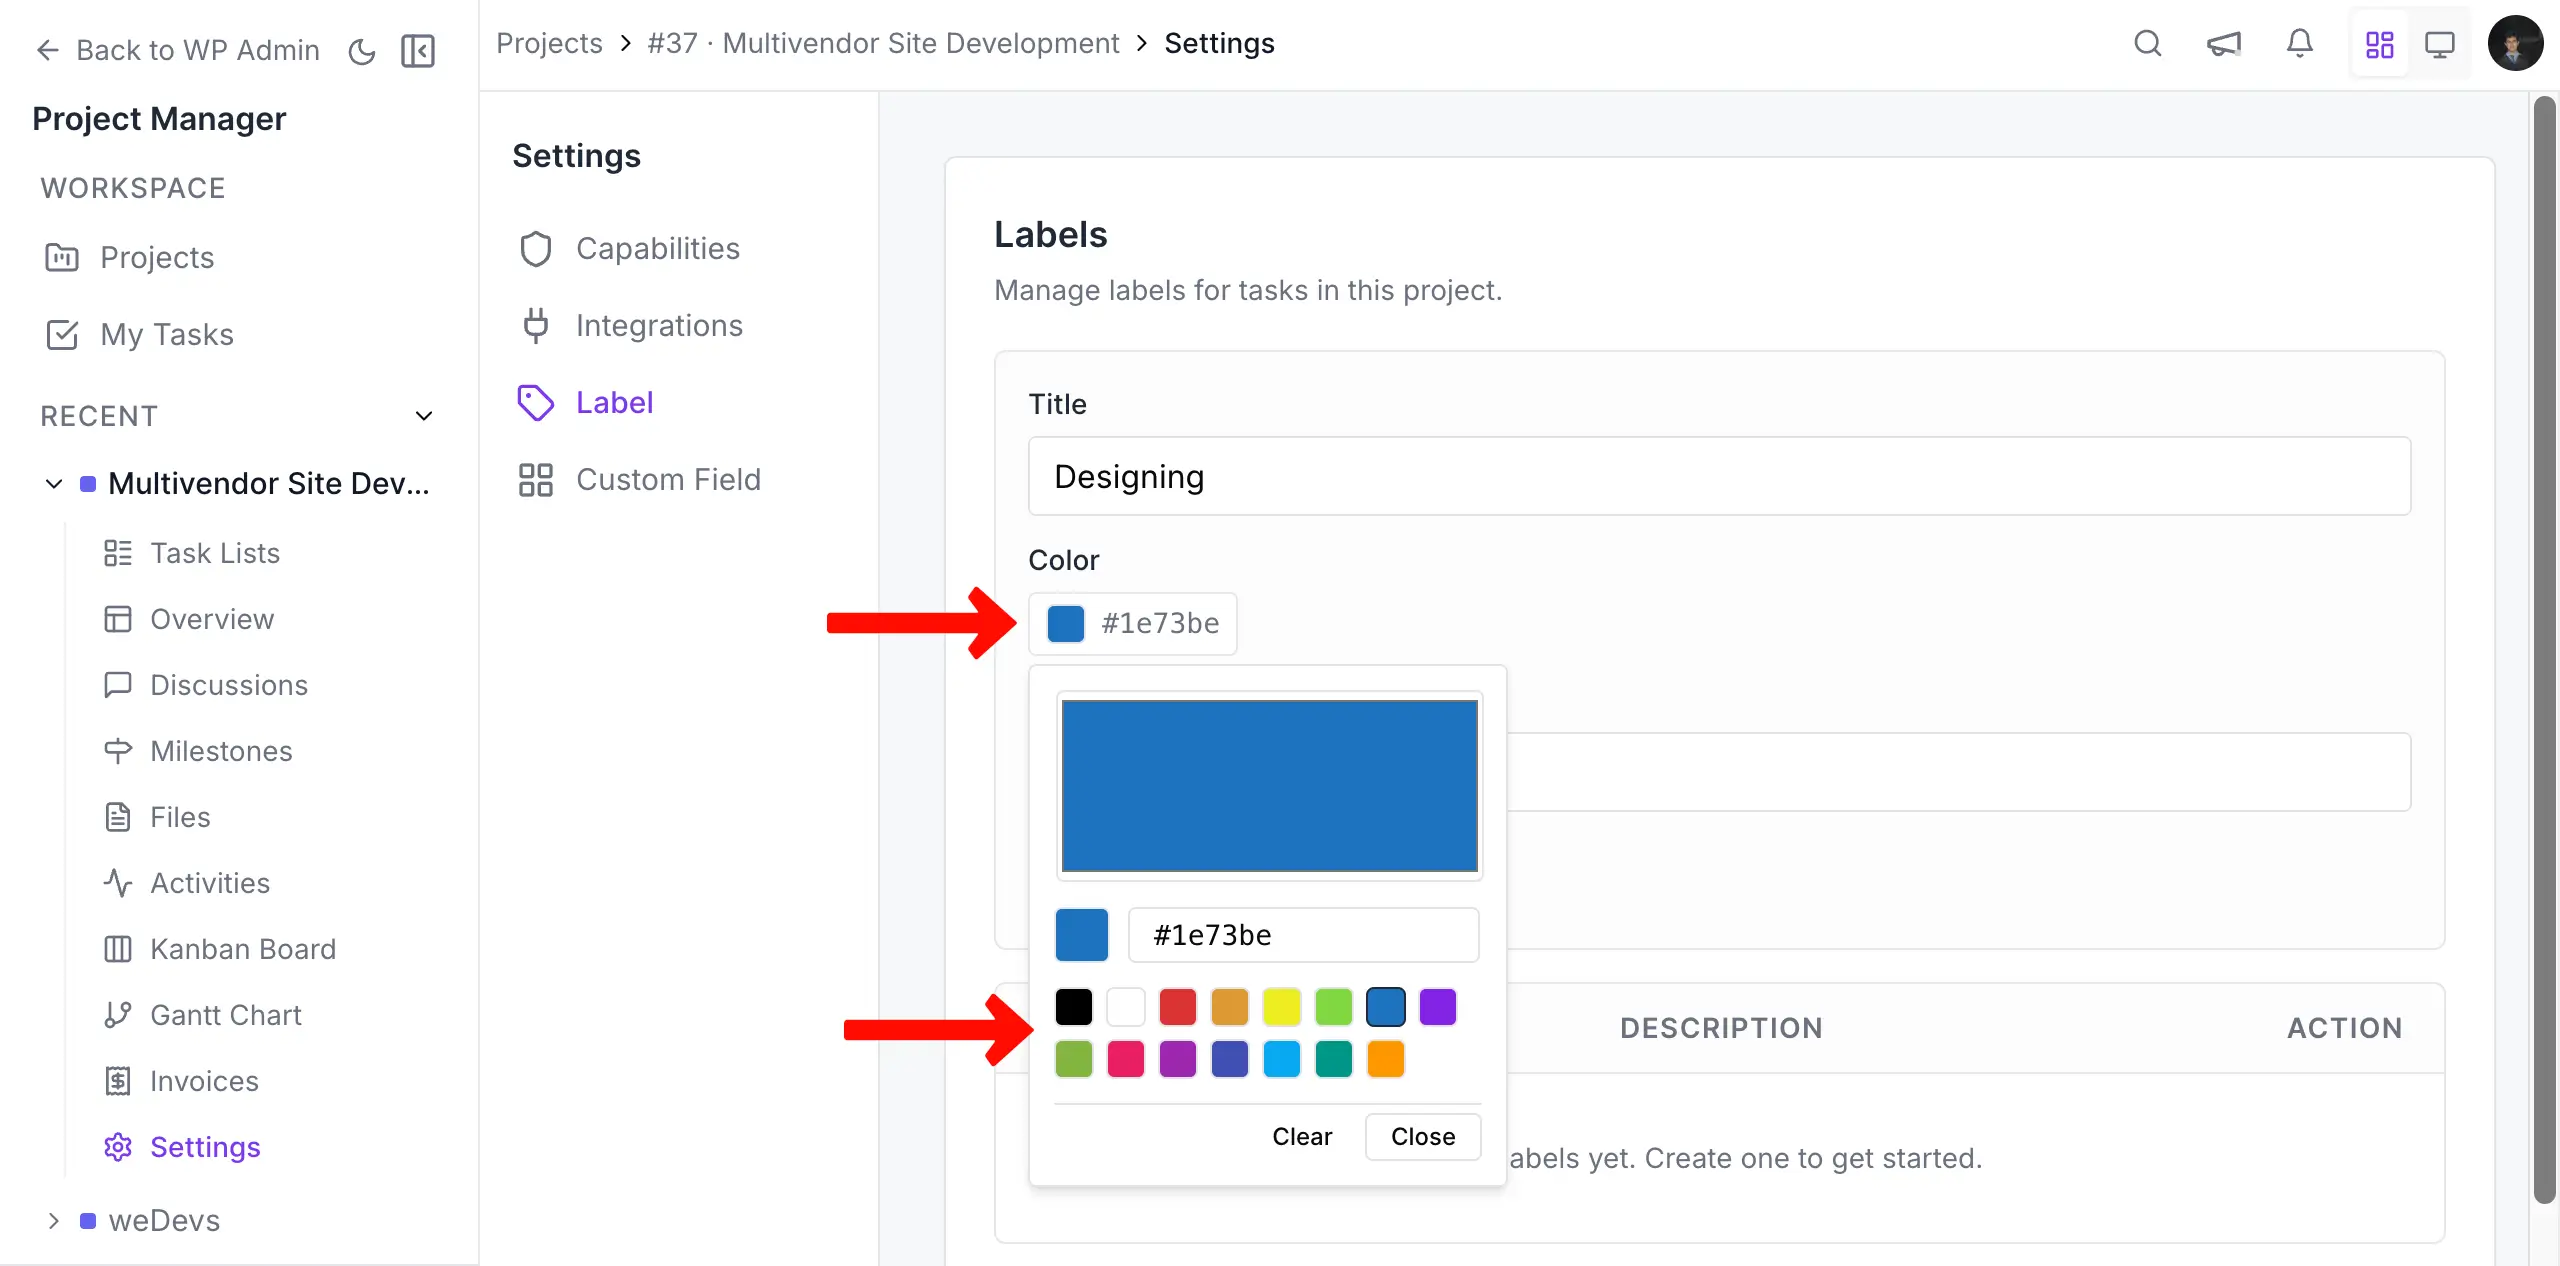
Step 2
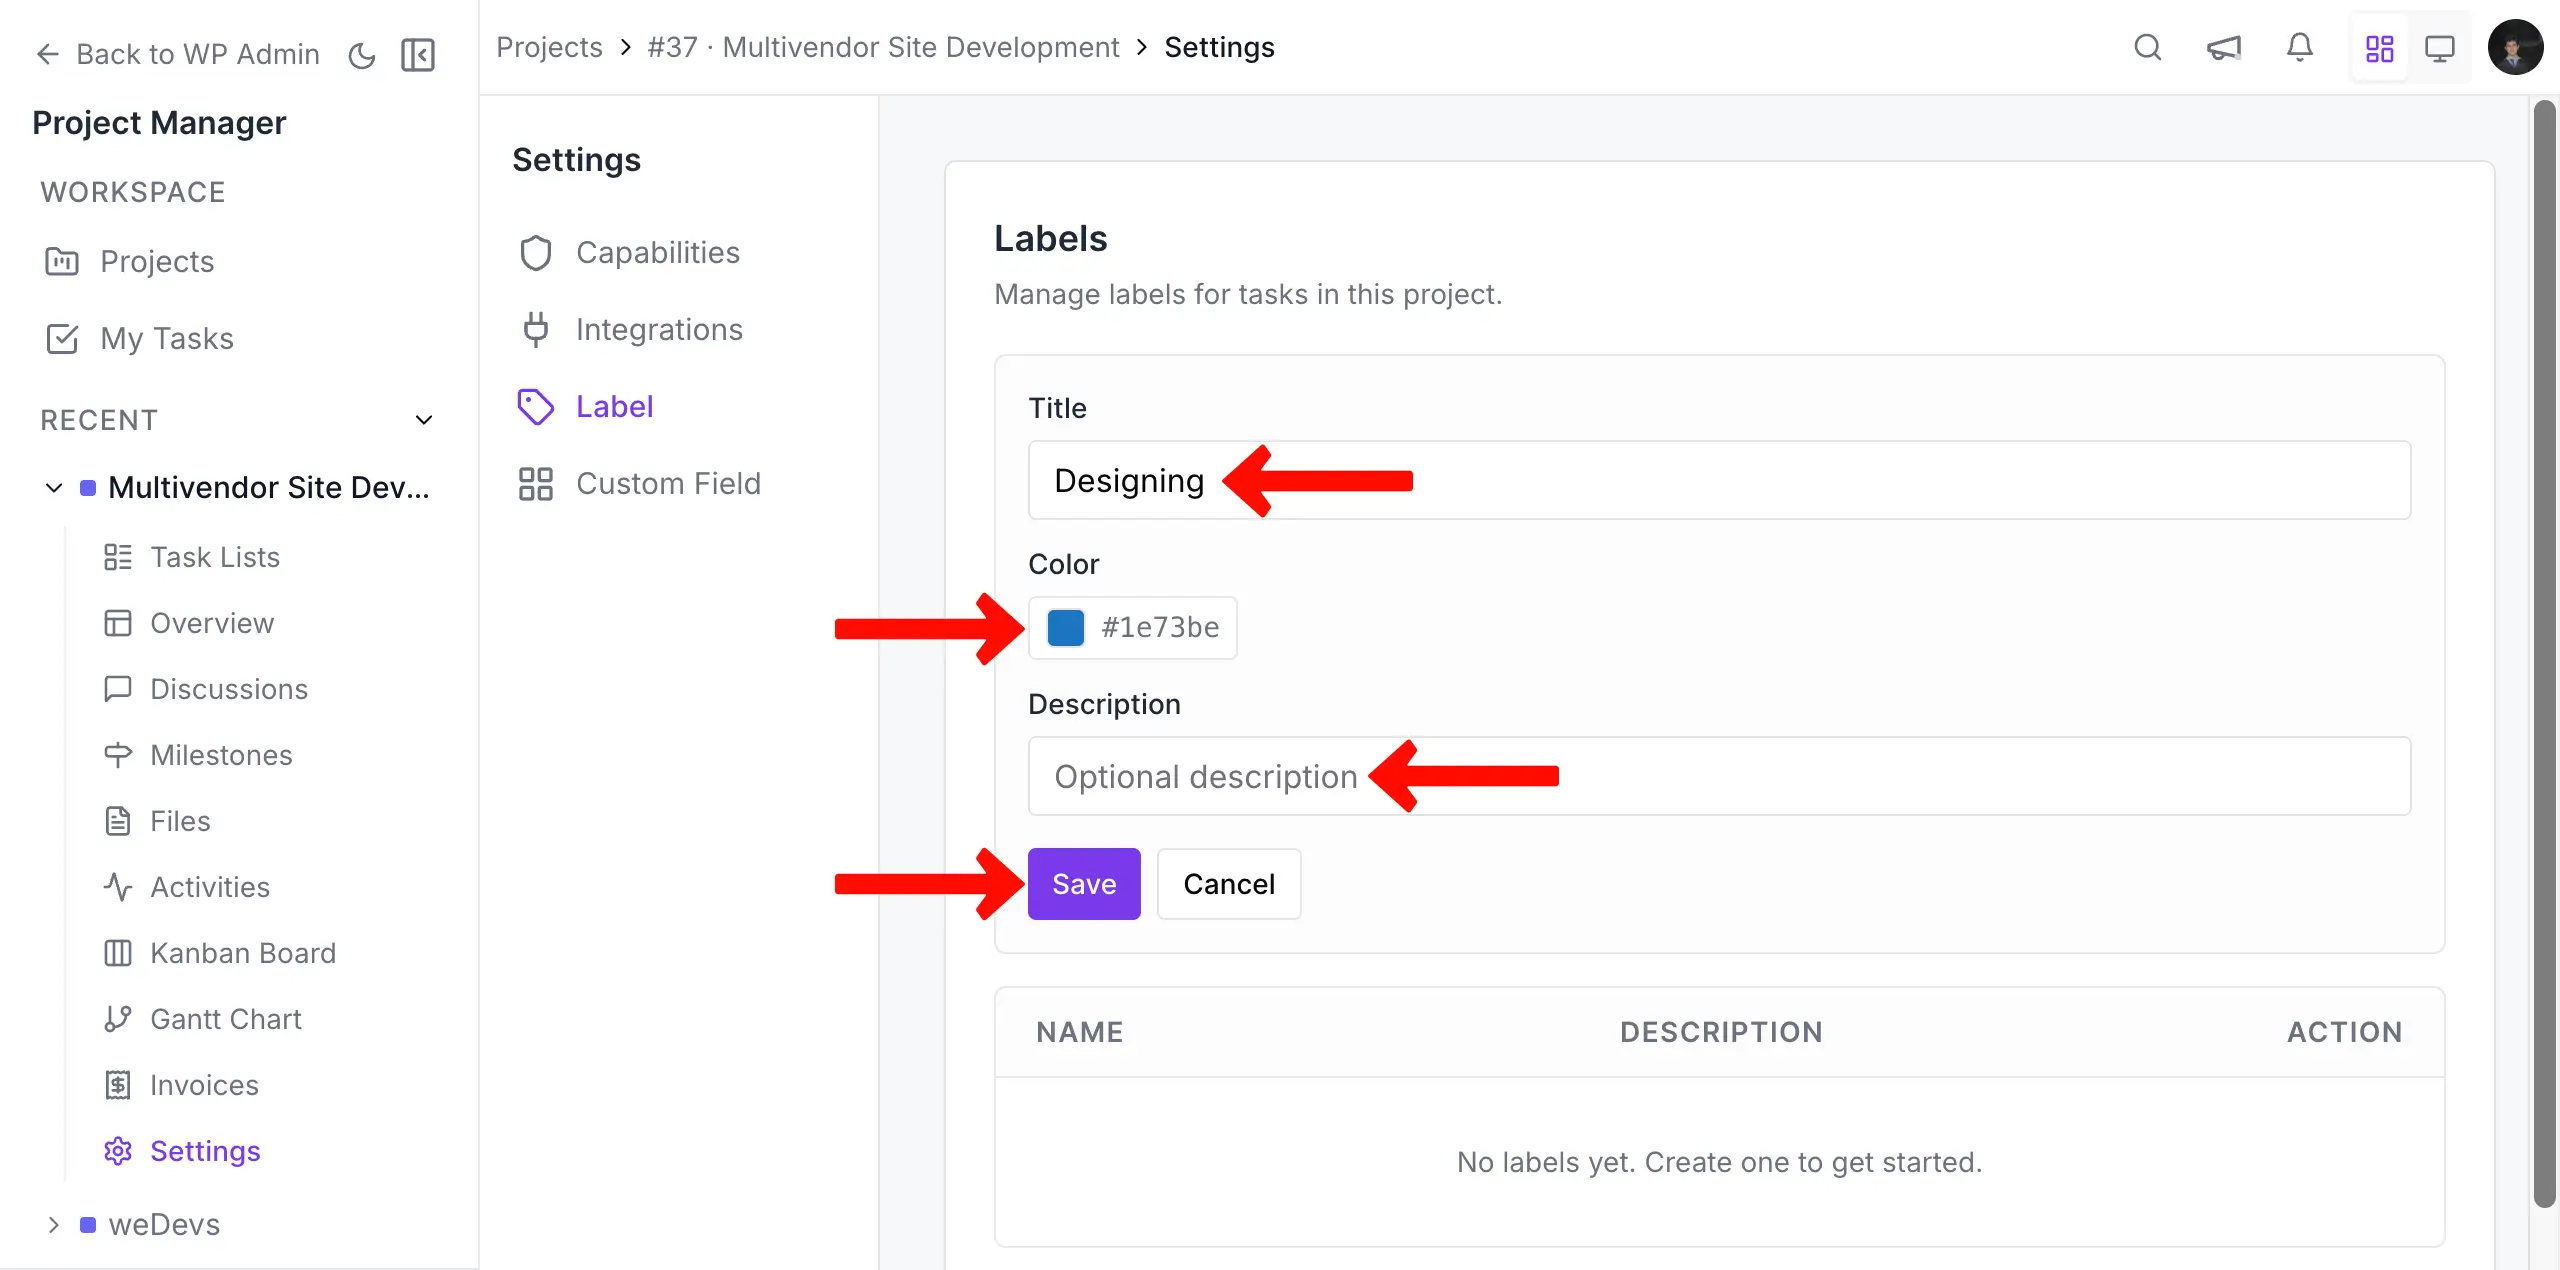
Choose the Label option. You will get 4 options:
- Label Name (Required): Give a suitable label name.
- Color (Required): Select a label color.
- Description (Optional): Give an appropriate description.
- Save: Click to save the color for the label.
By the way, if you want to change the color, just click on the color option. A color box will show up from where you can choose your desired color for the label.
In the same way, you can add colors to more labels to manage your project tasks.
Step 3
Go to the task where you want to add labels. Open the right sidebar by clicking the respective task. Click the Labels option on the sidebar.
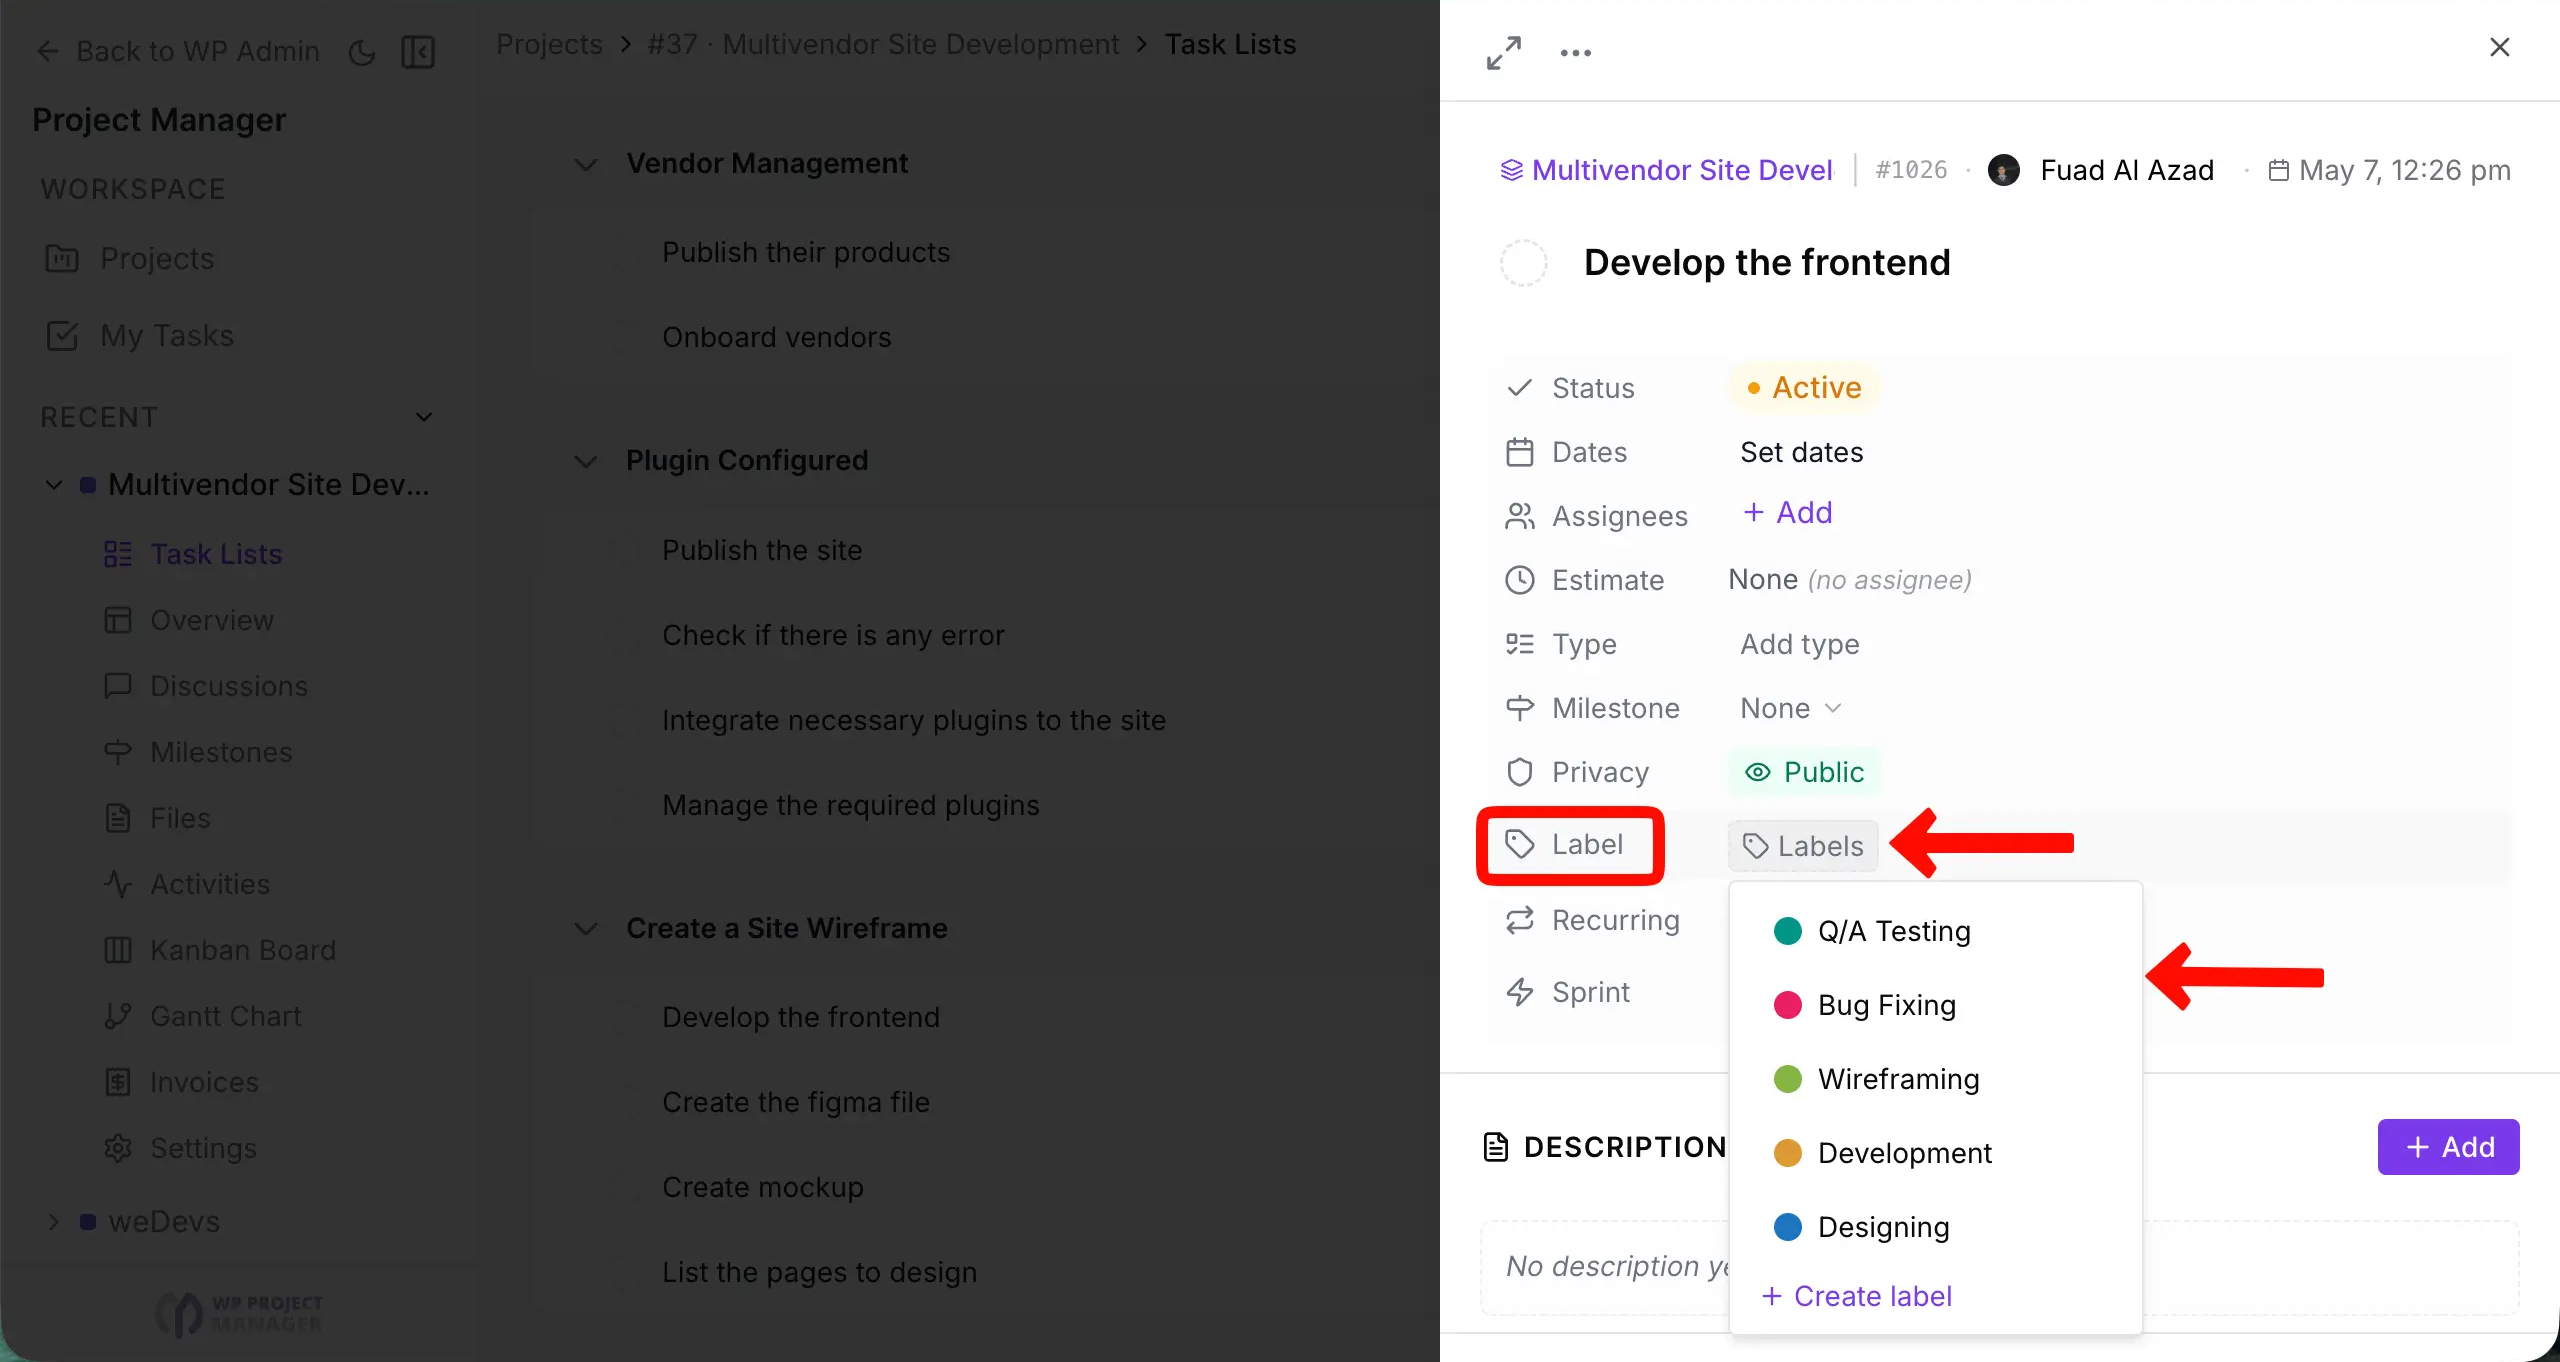
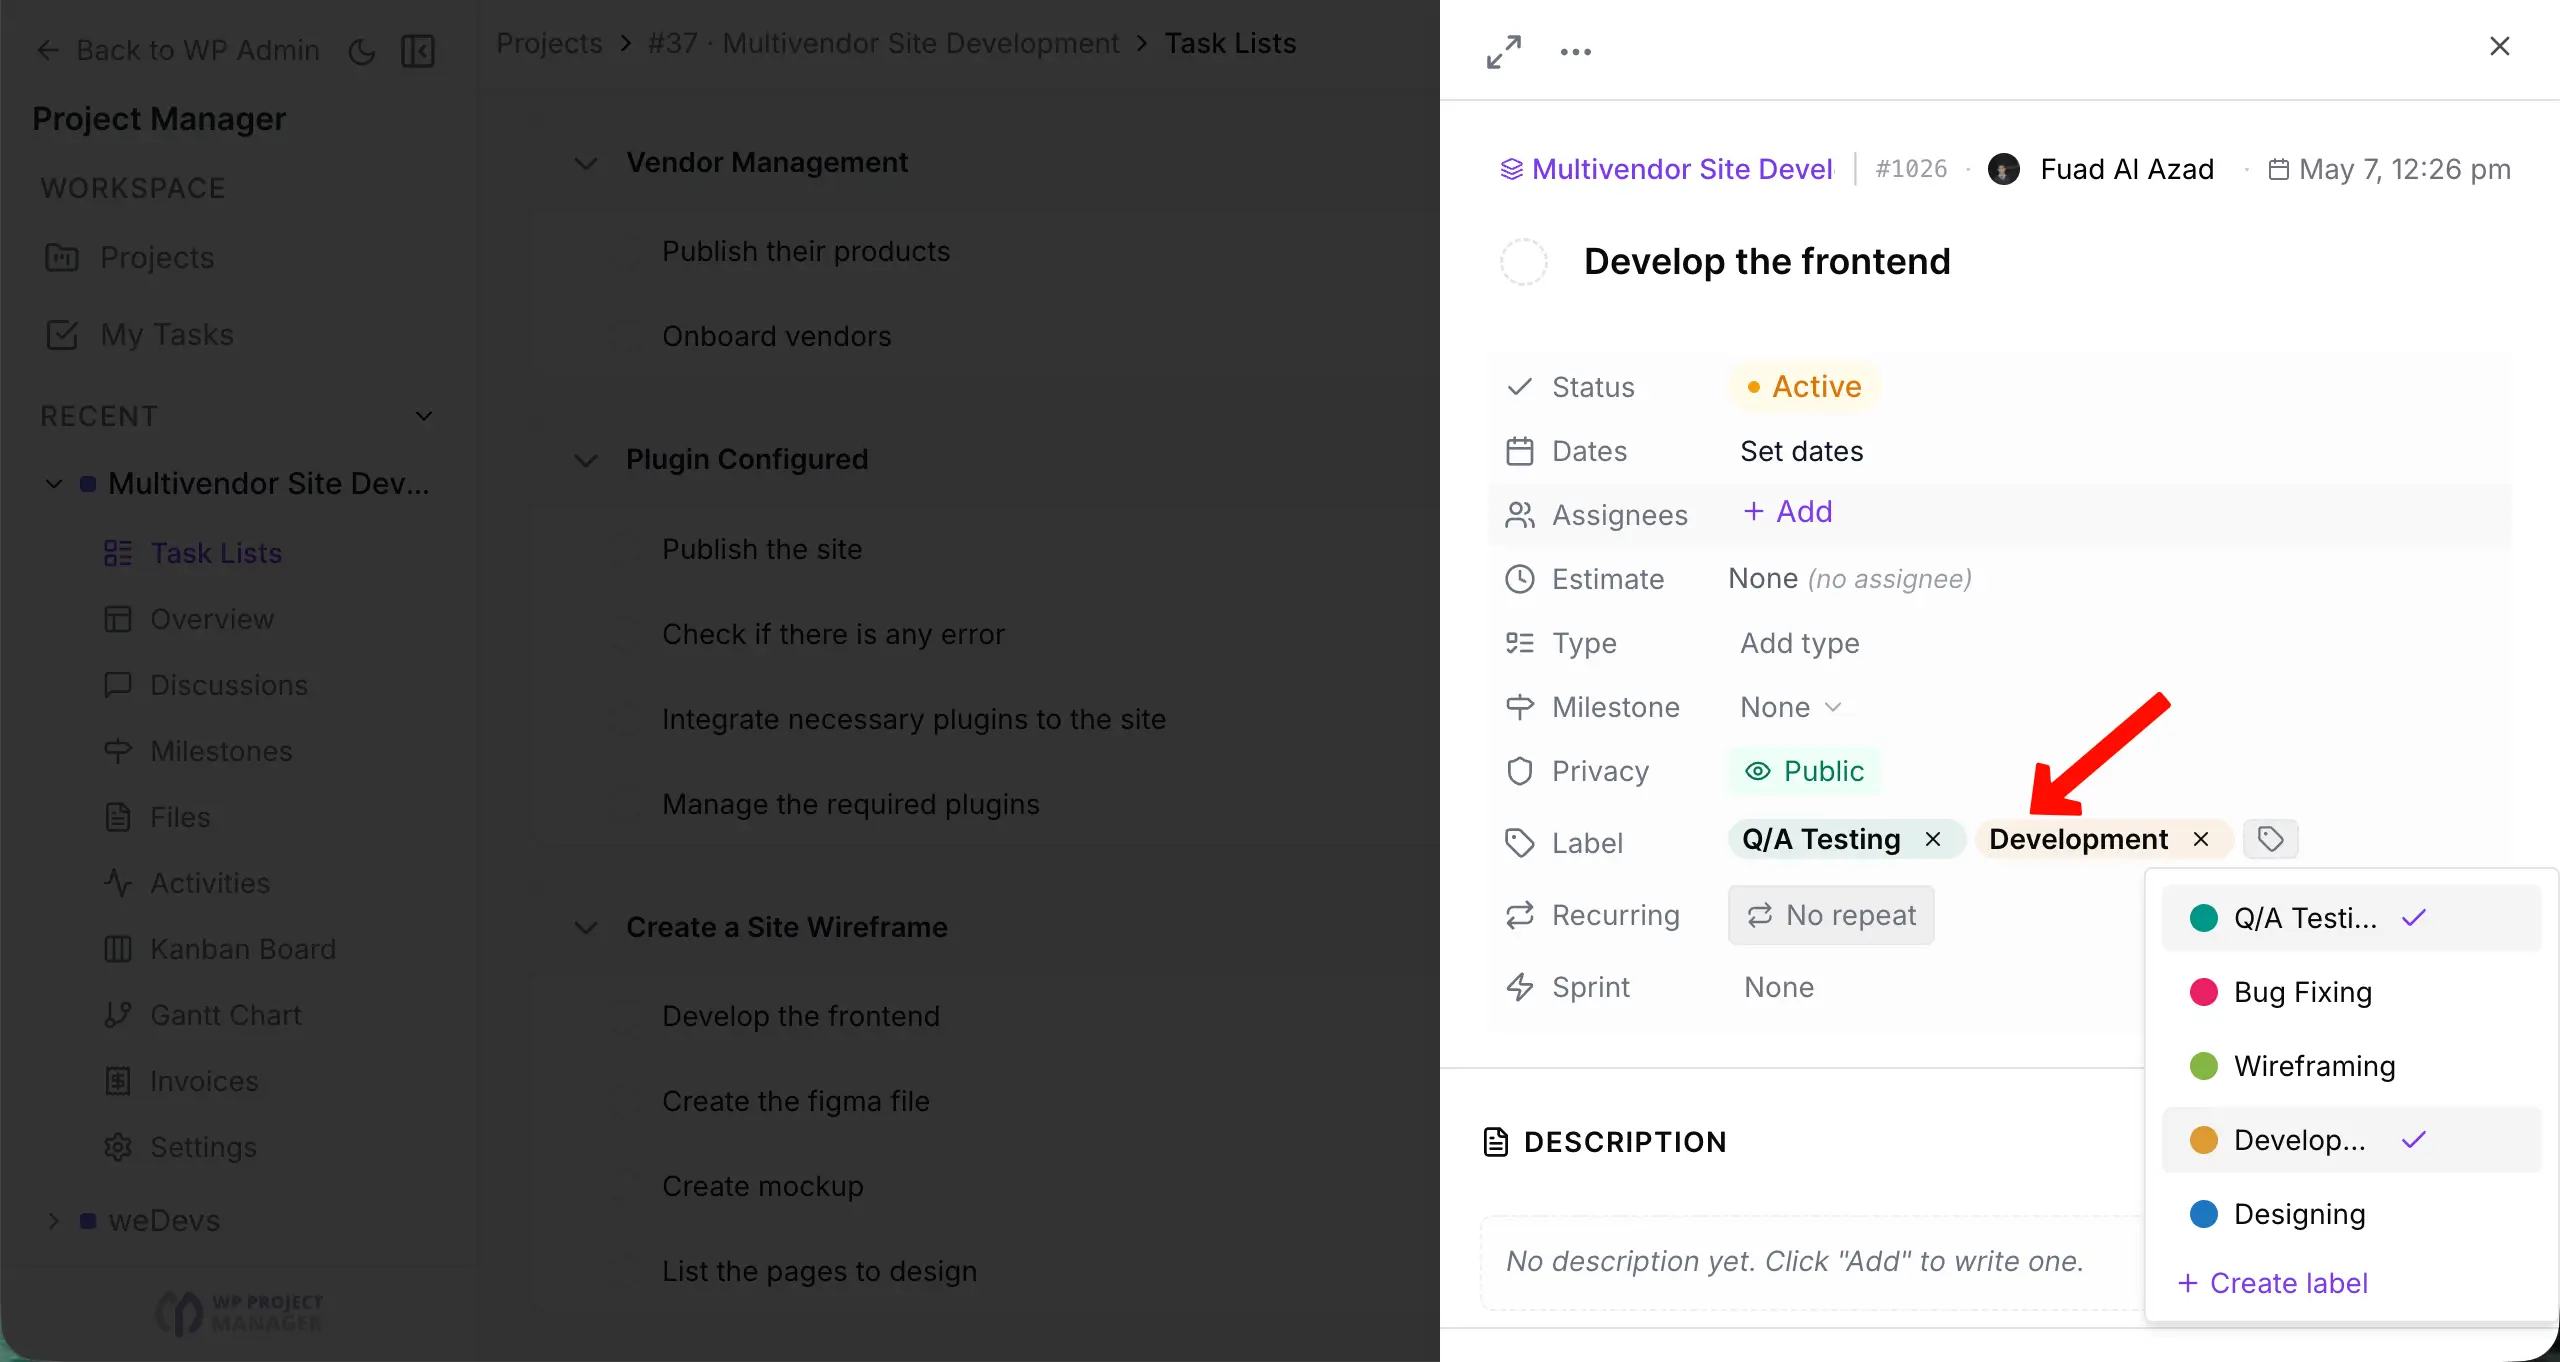
A list of labels will show up once clicked. Choose the ones you want. You can see that we have added a label from the list.

In the same way, you can add multiple labels to the task as you want.
With WordPress Project Manager Pro, it's now extremely easy to manage your task list and smartly track them. If you're searching for an easy task management solution for your WordPress site, WP Project Manager Pro could be the best suite.