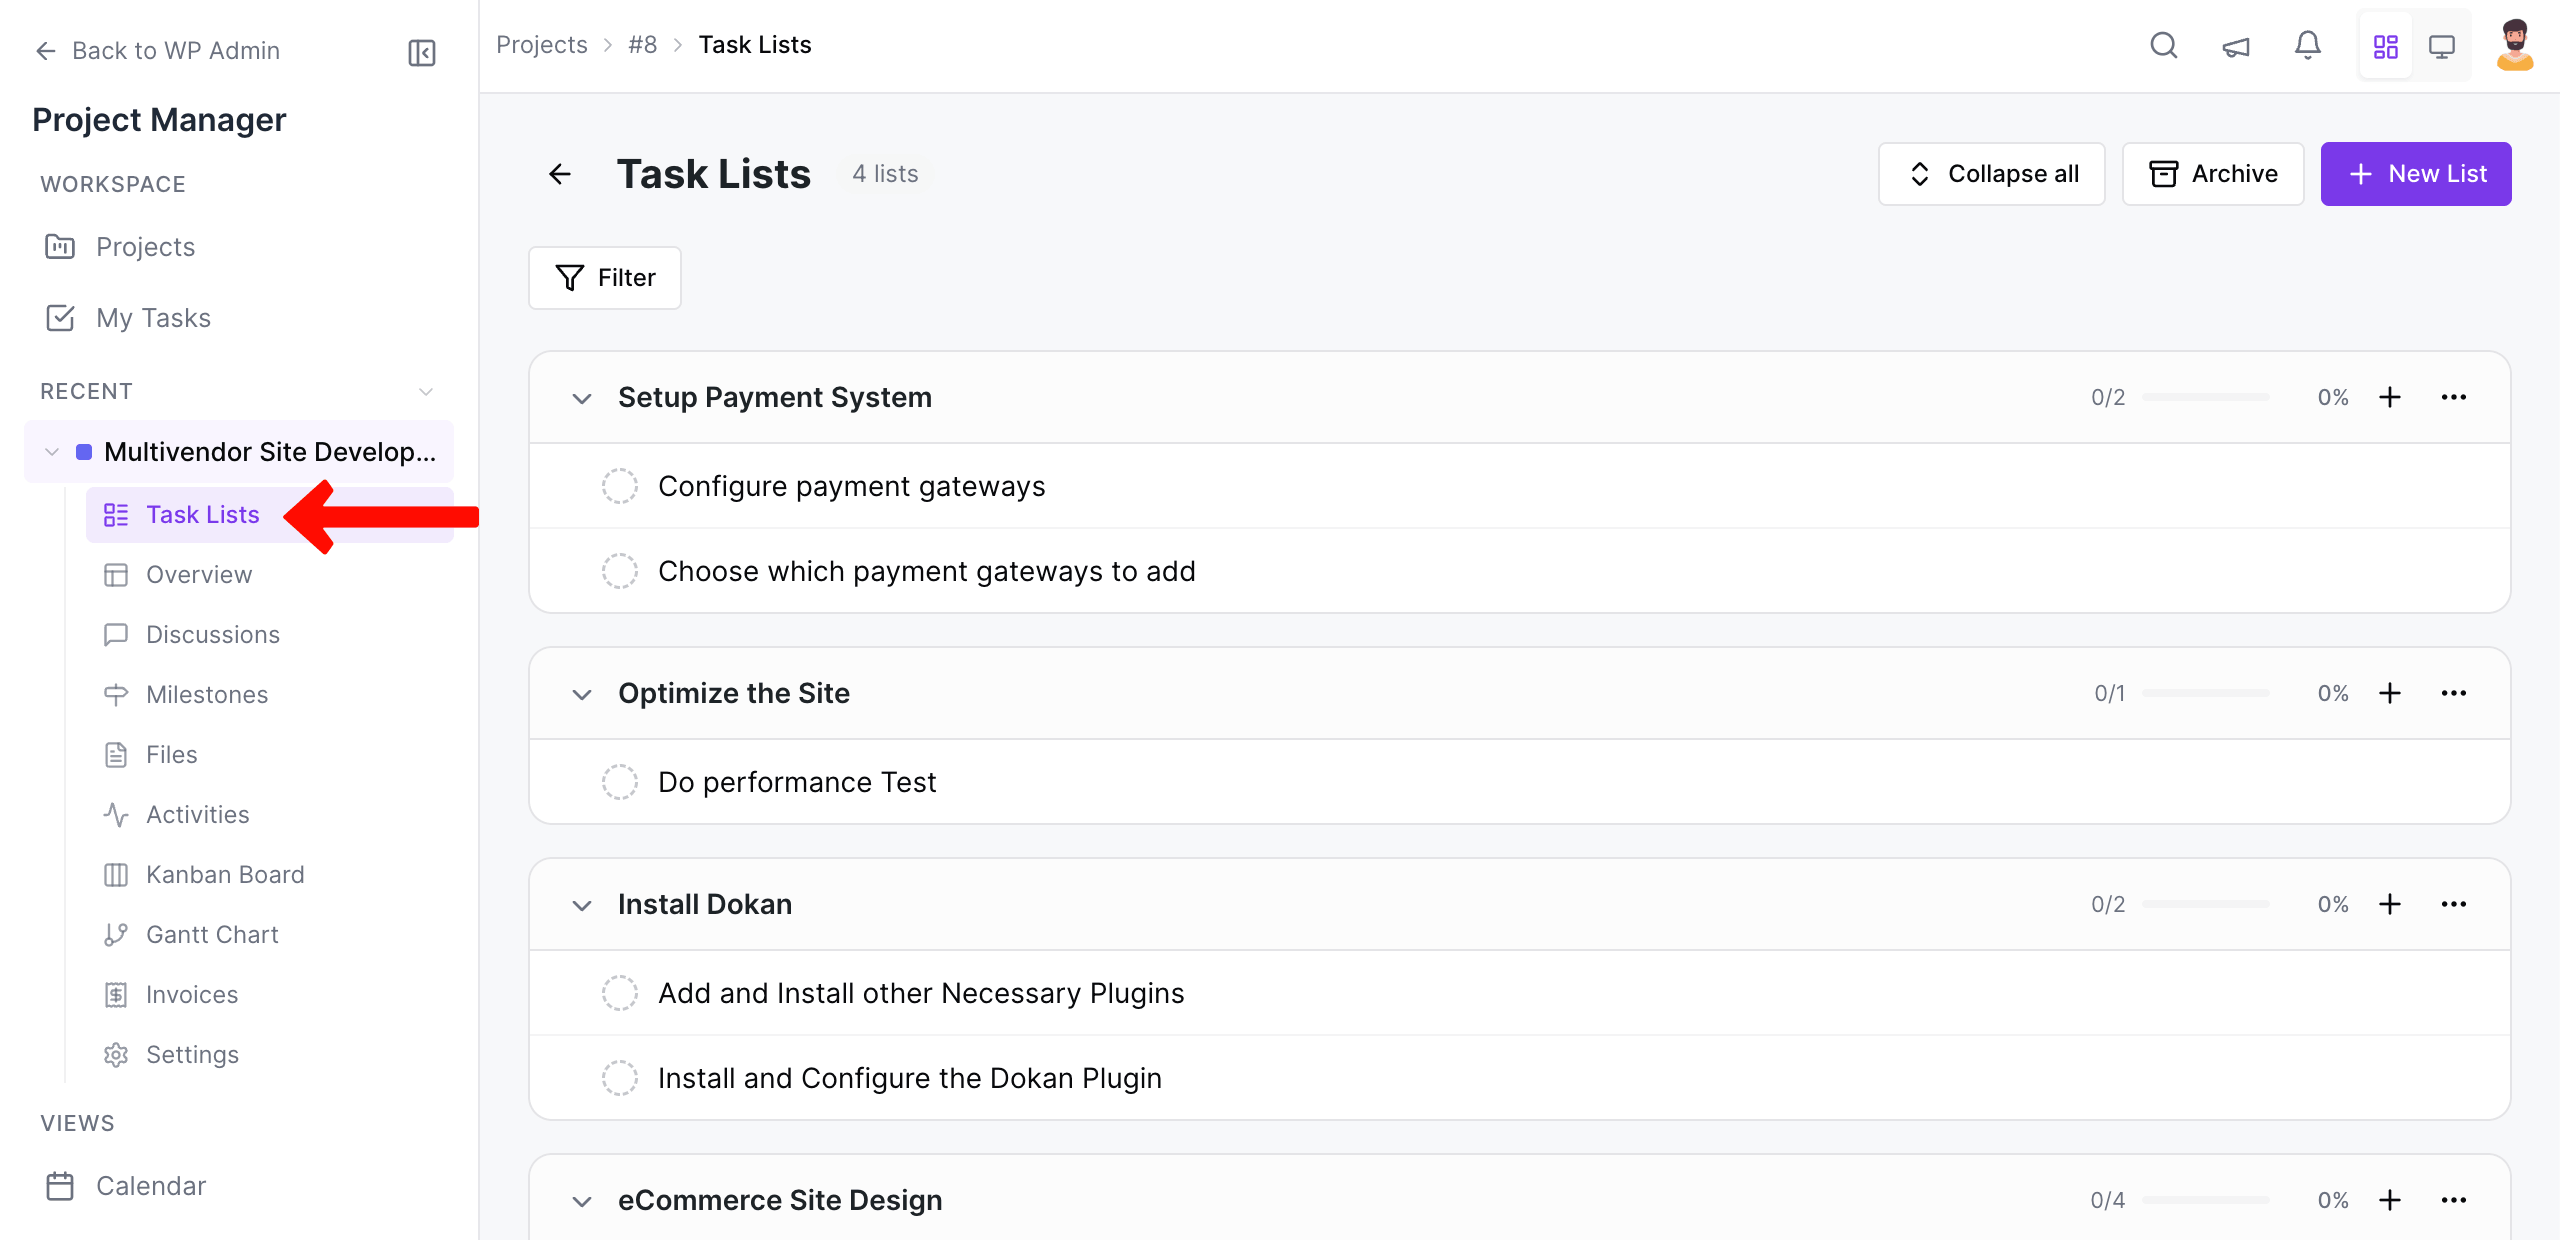
How to View Task Lists and Add News Tasks in WP Project Manager
What is a task list?
A task list is the backbone of your project management. Within a project, you can create several task lists to host your project tasks. Task lists can also be tagged with milestones so that you can check progress. You can do that easily with WP Project Manager.
Creating a New Task List
Go to Project Manager → Projects → Create a project or click on an existing project → Task lists tab.
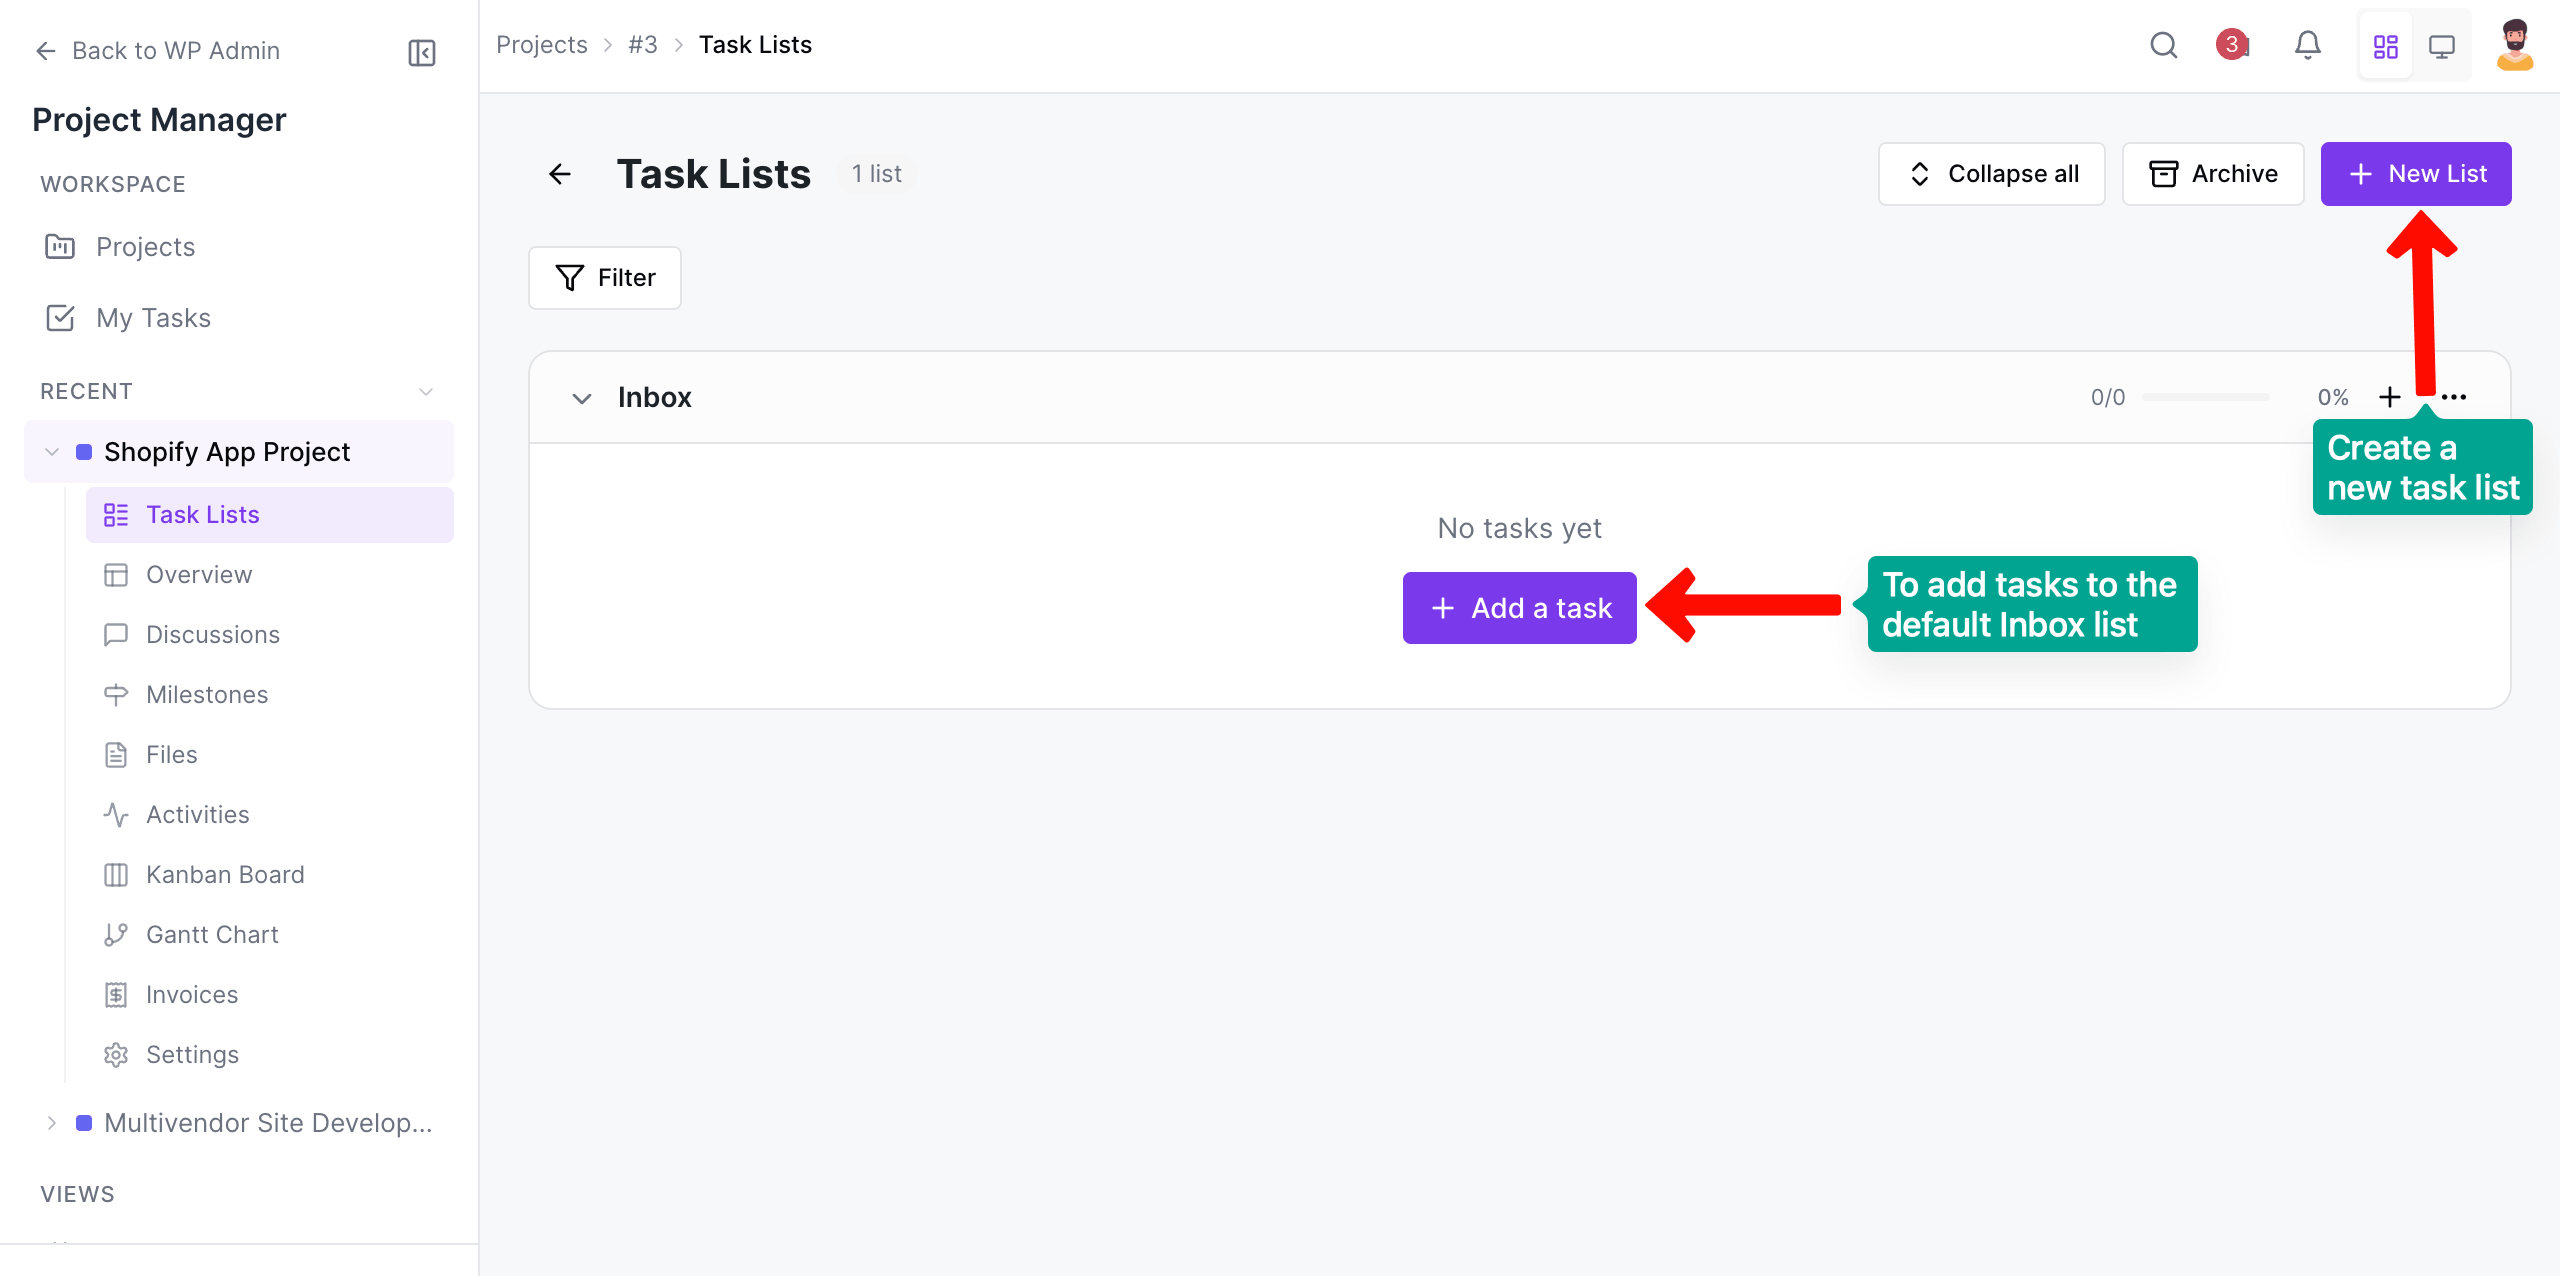
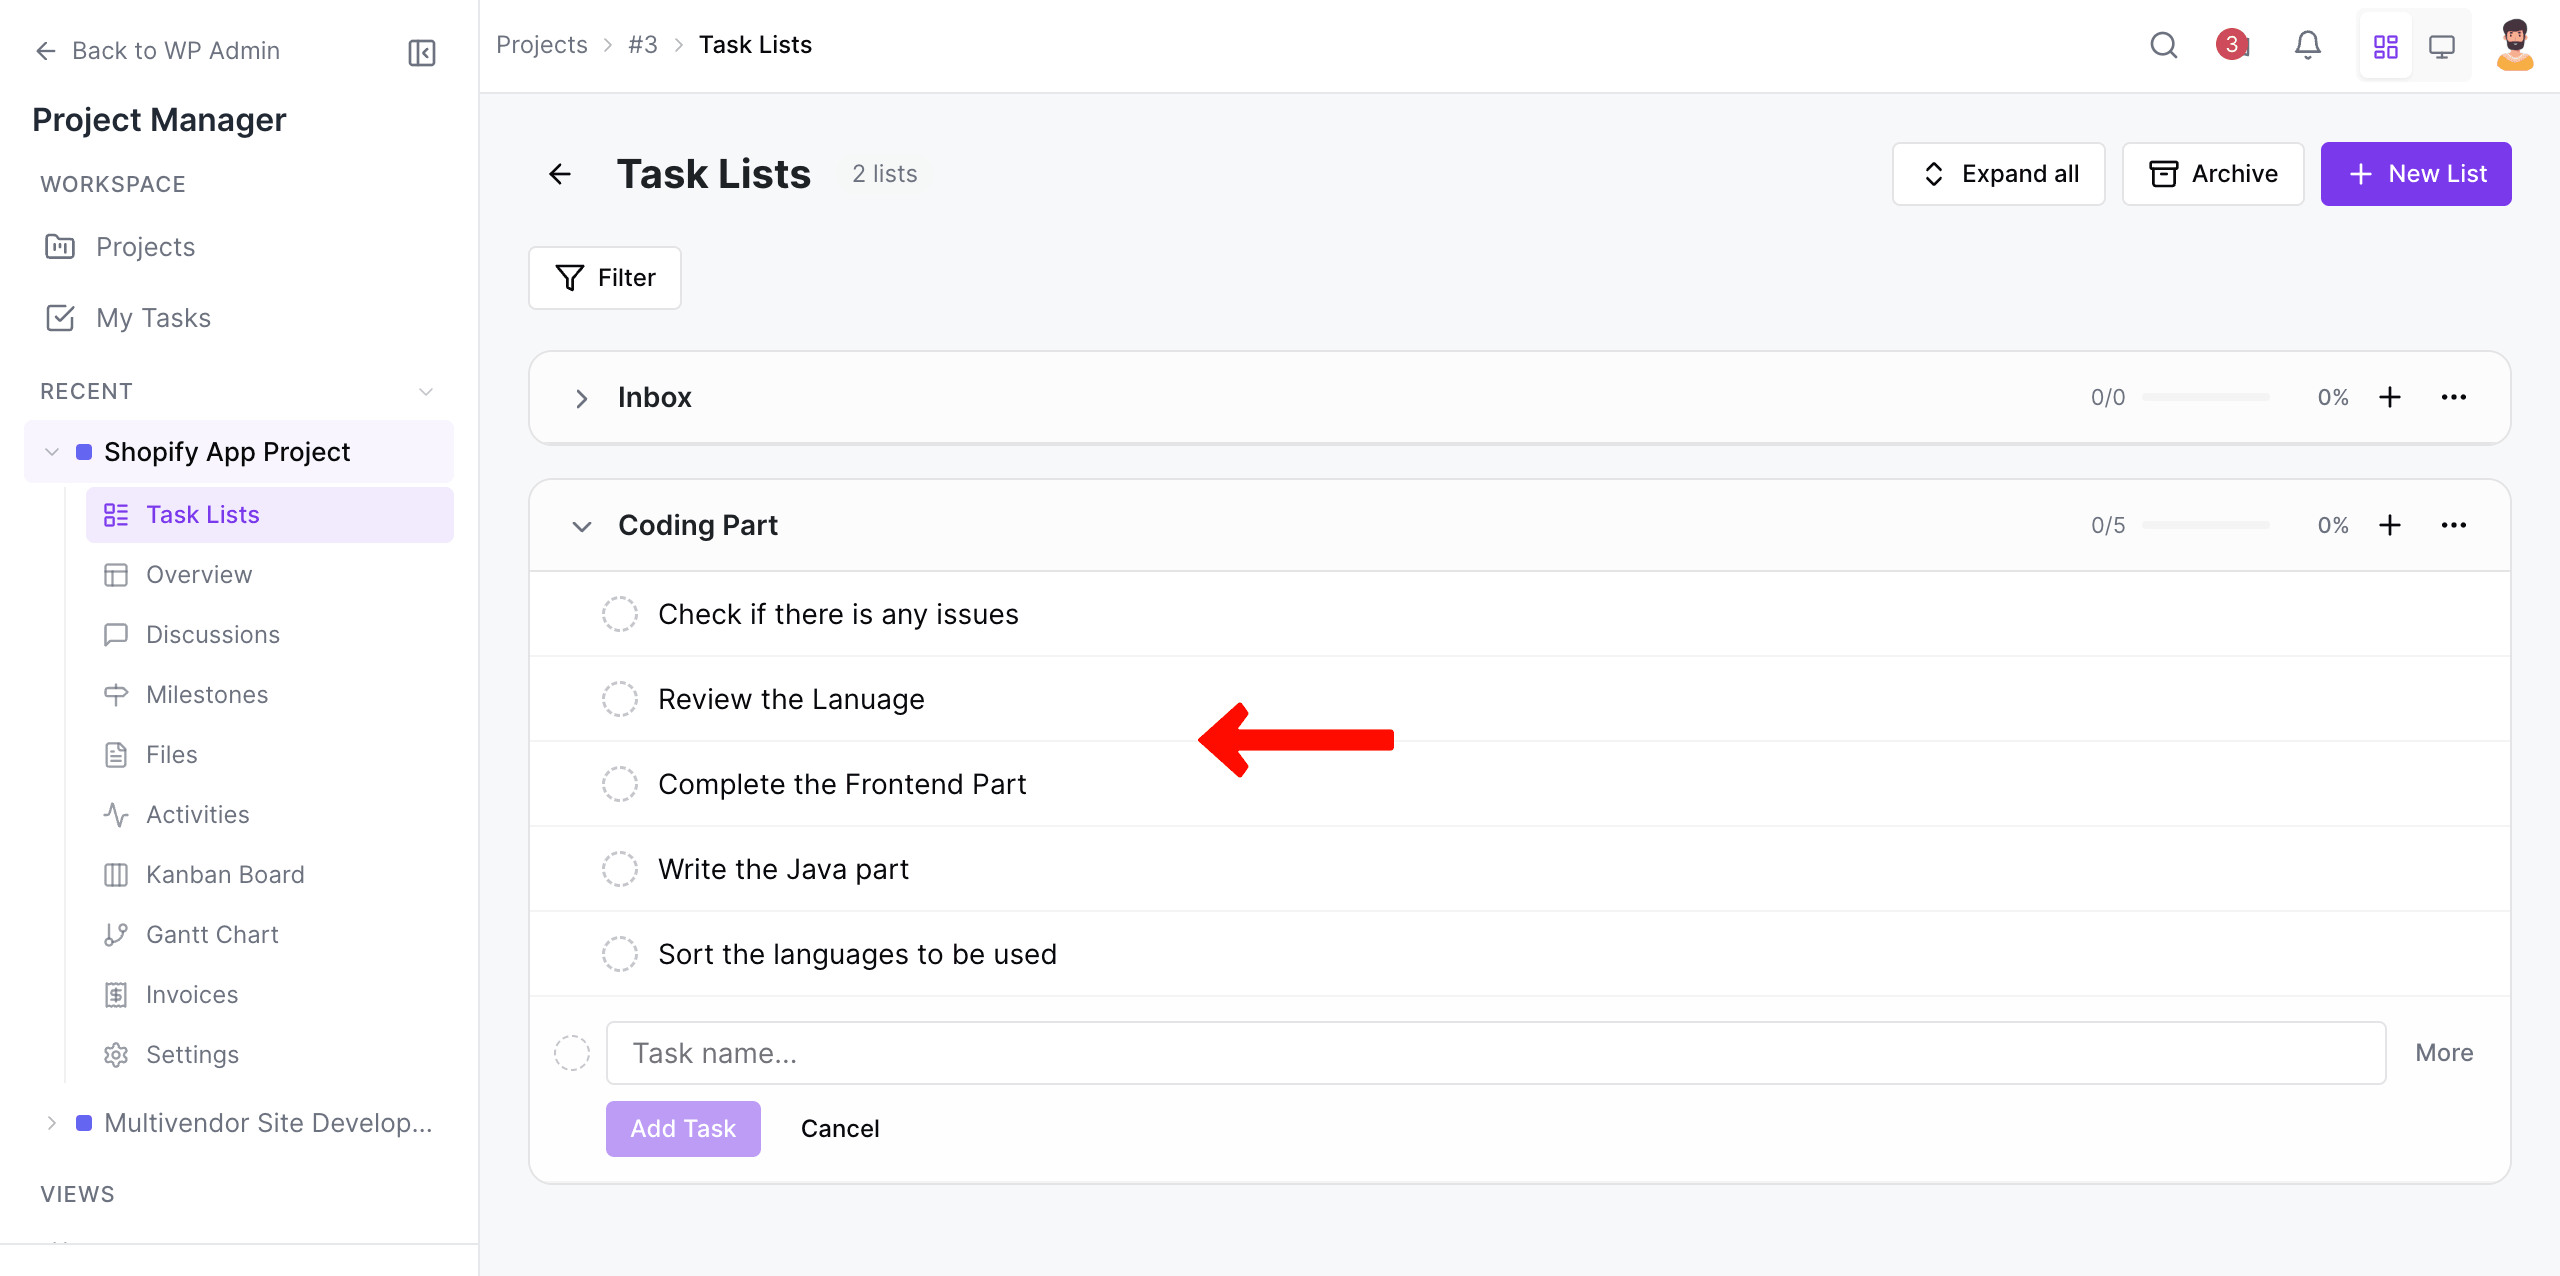
The Inbox is a default list that is included in all projects. If you want to add new tasks to the list, you can click the + Add a task under the list.
But if you want to create a new list, click the + New List button in the top right corner.
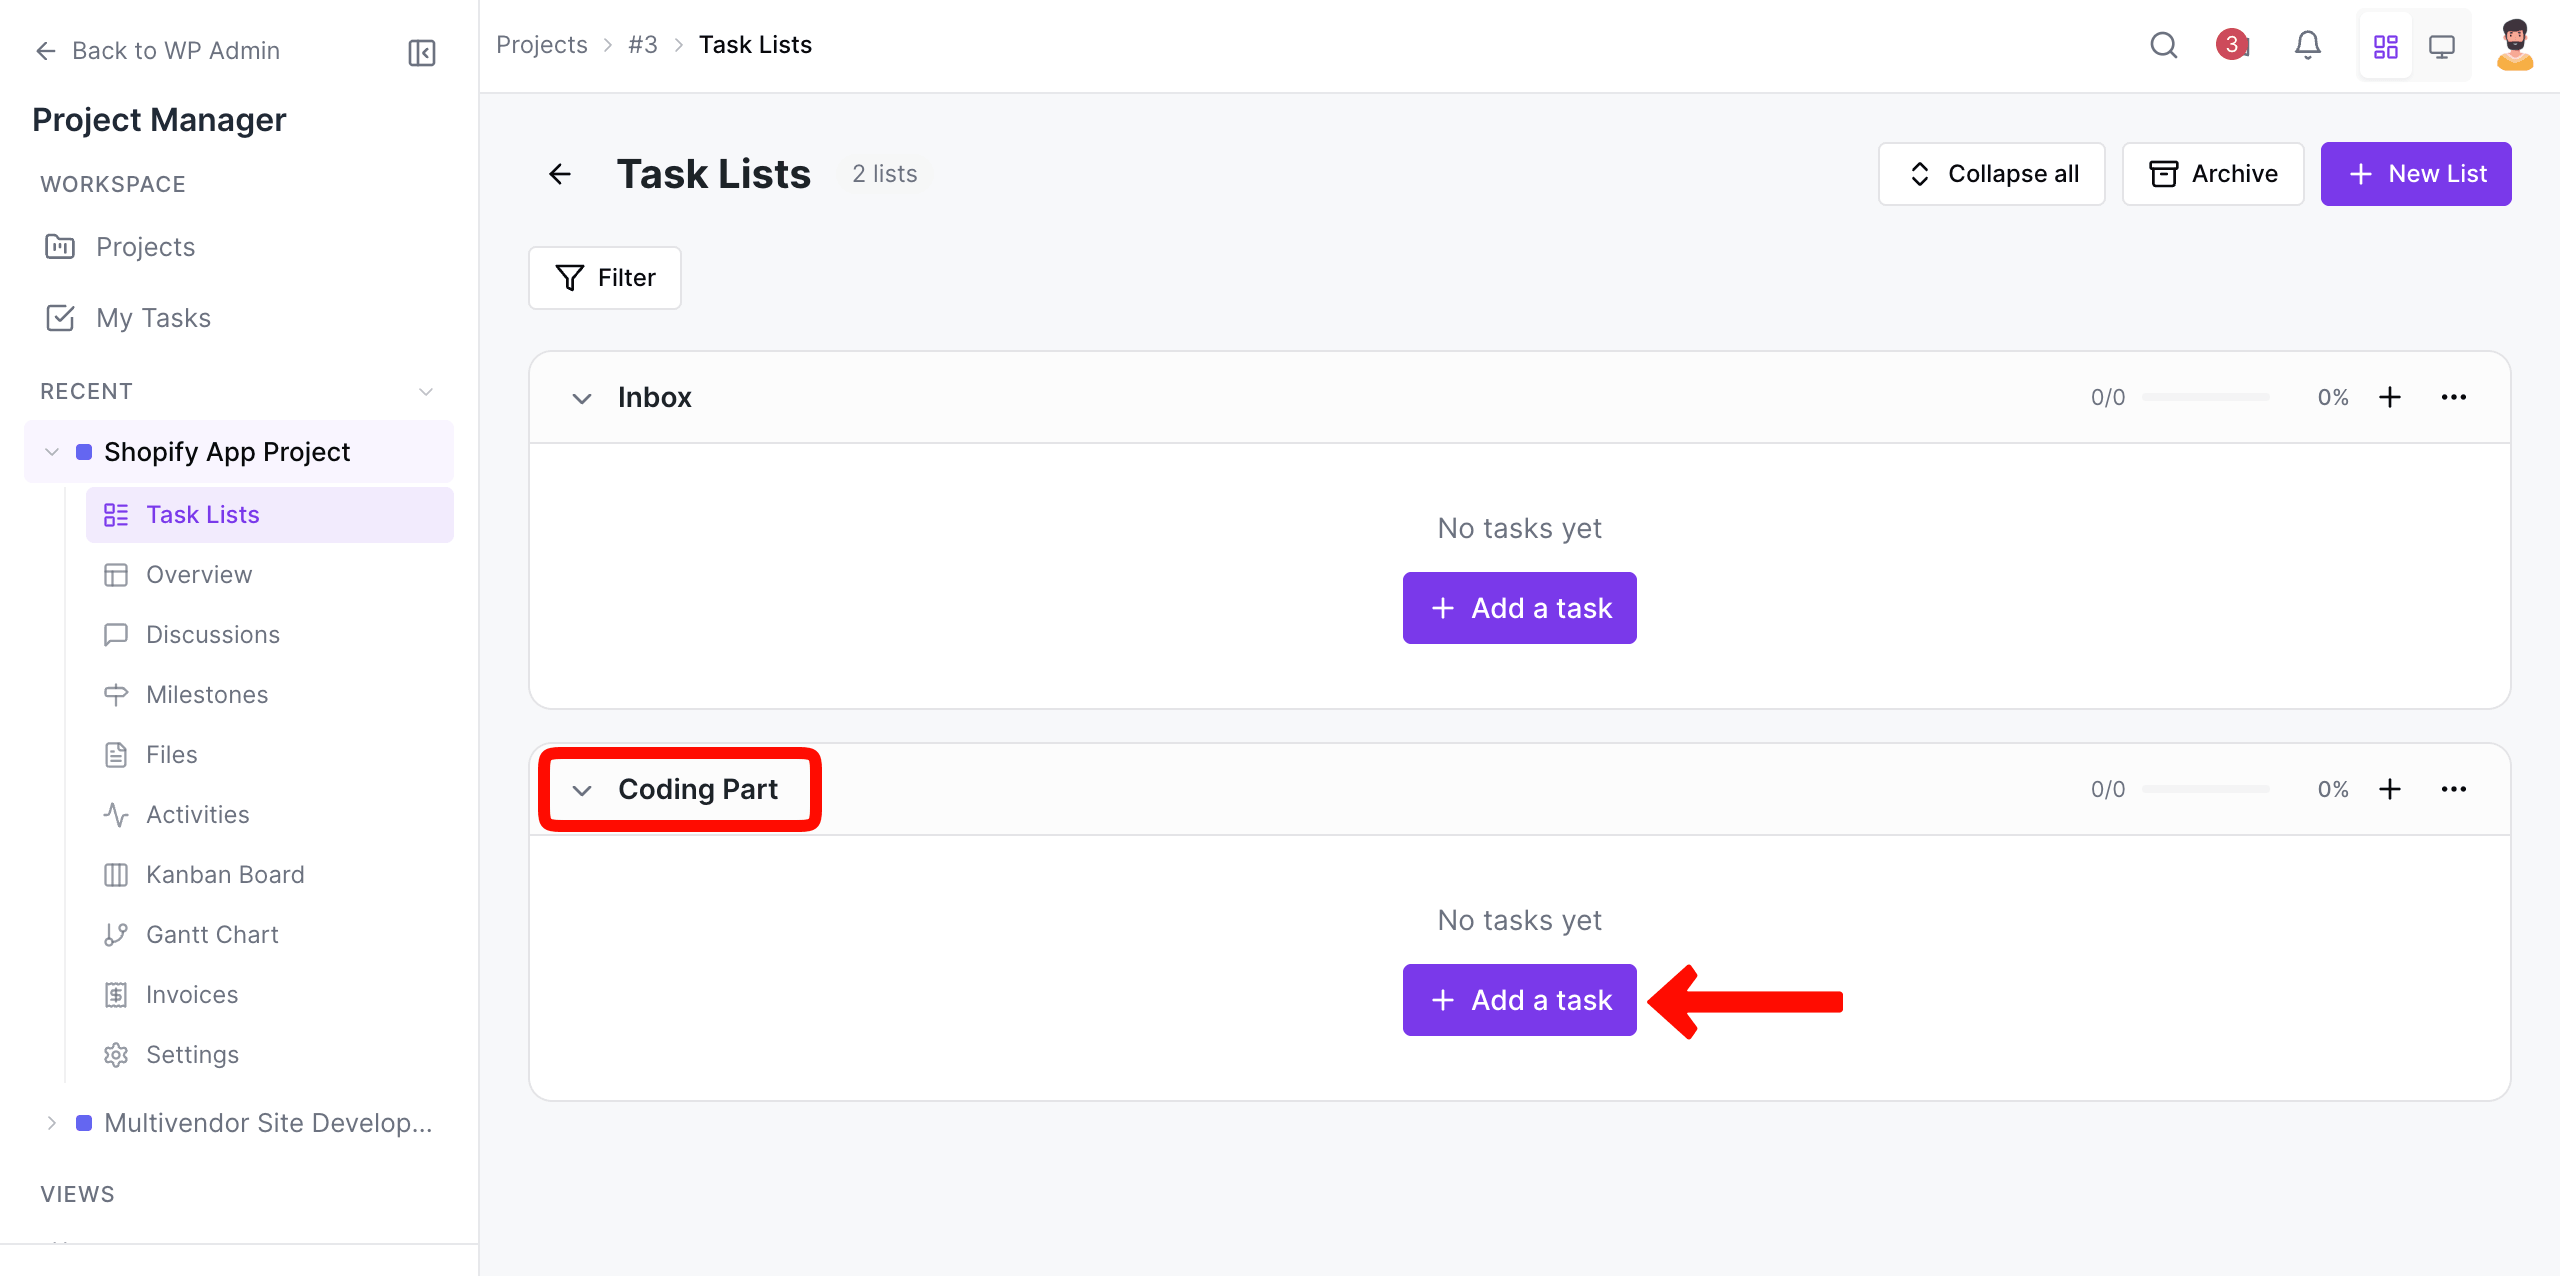
Let's create a new list. Click the + New List button in the top-right corner. Some fields will show up. Give a name to the list. You may add a description, but it's optional. Finally, click the Add List button.

For example, the name of our task list is Coding Part. To add new tasks one by one, click the + Add a task button under the project.
A field will open up. Write the name of your task in the field. Click the Add Task button at the end.

In this way, you can add as many tasks as you want to the list.
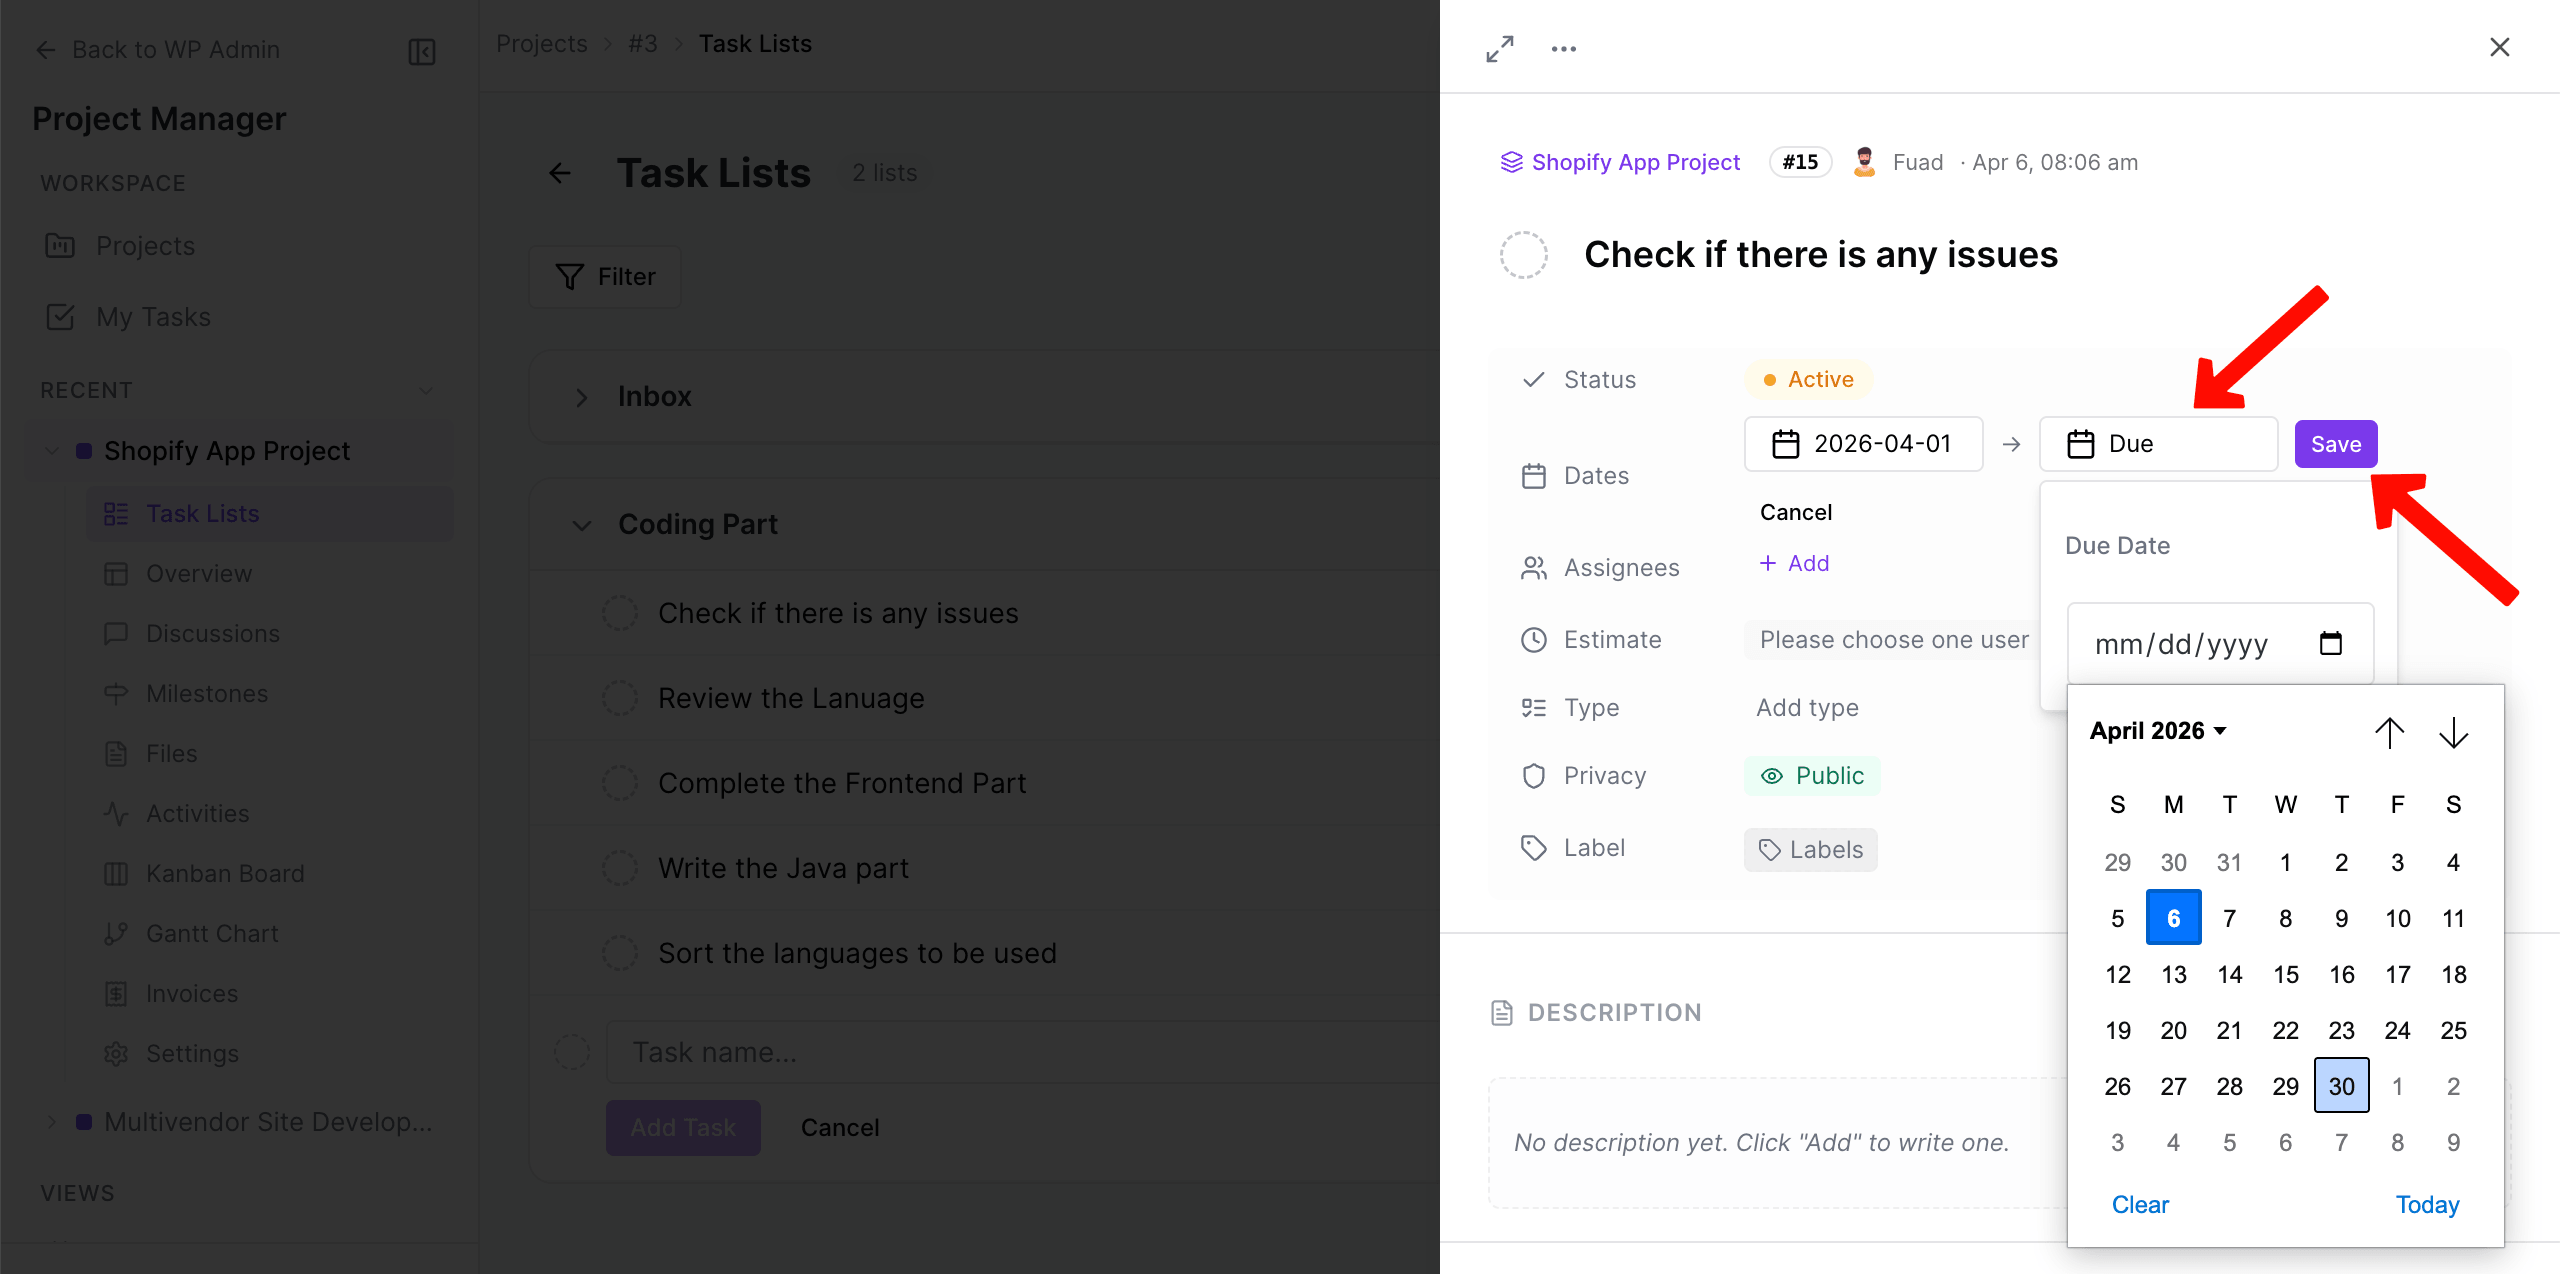
Set a Deadline for the Task
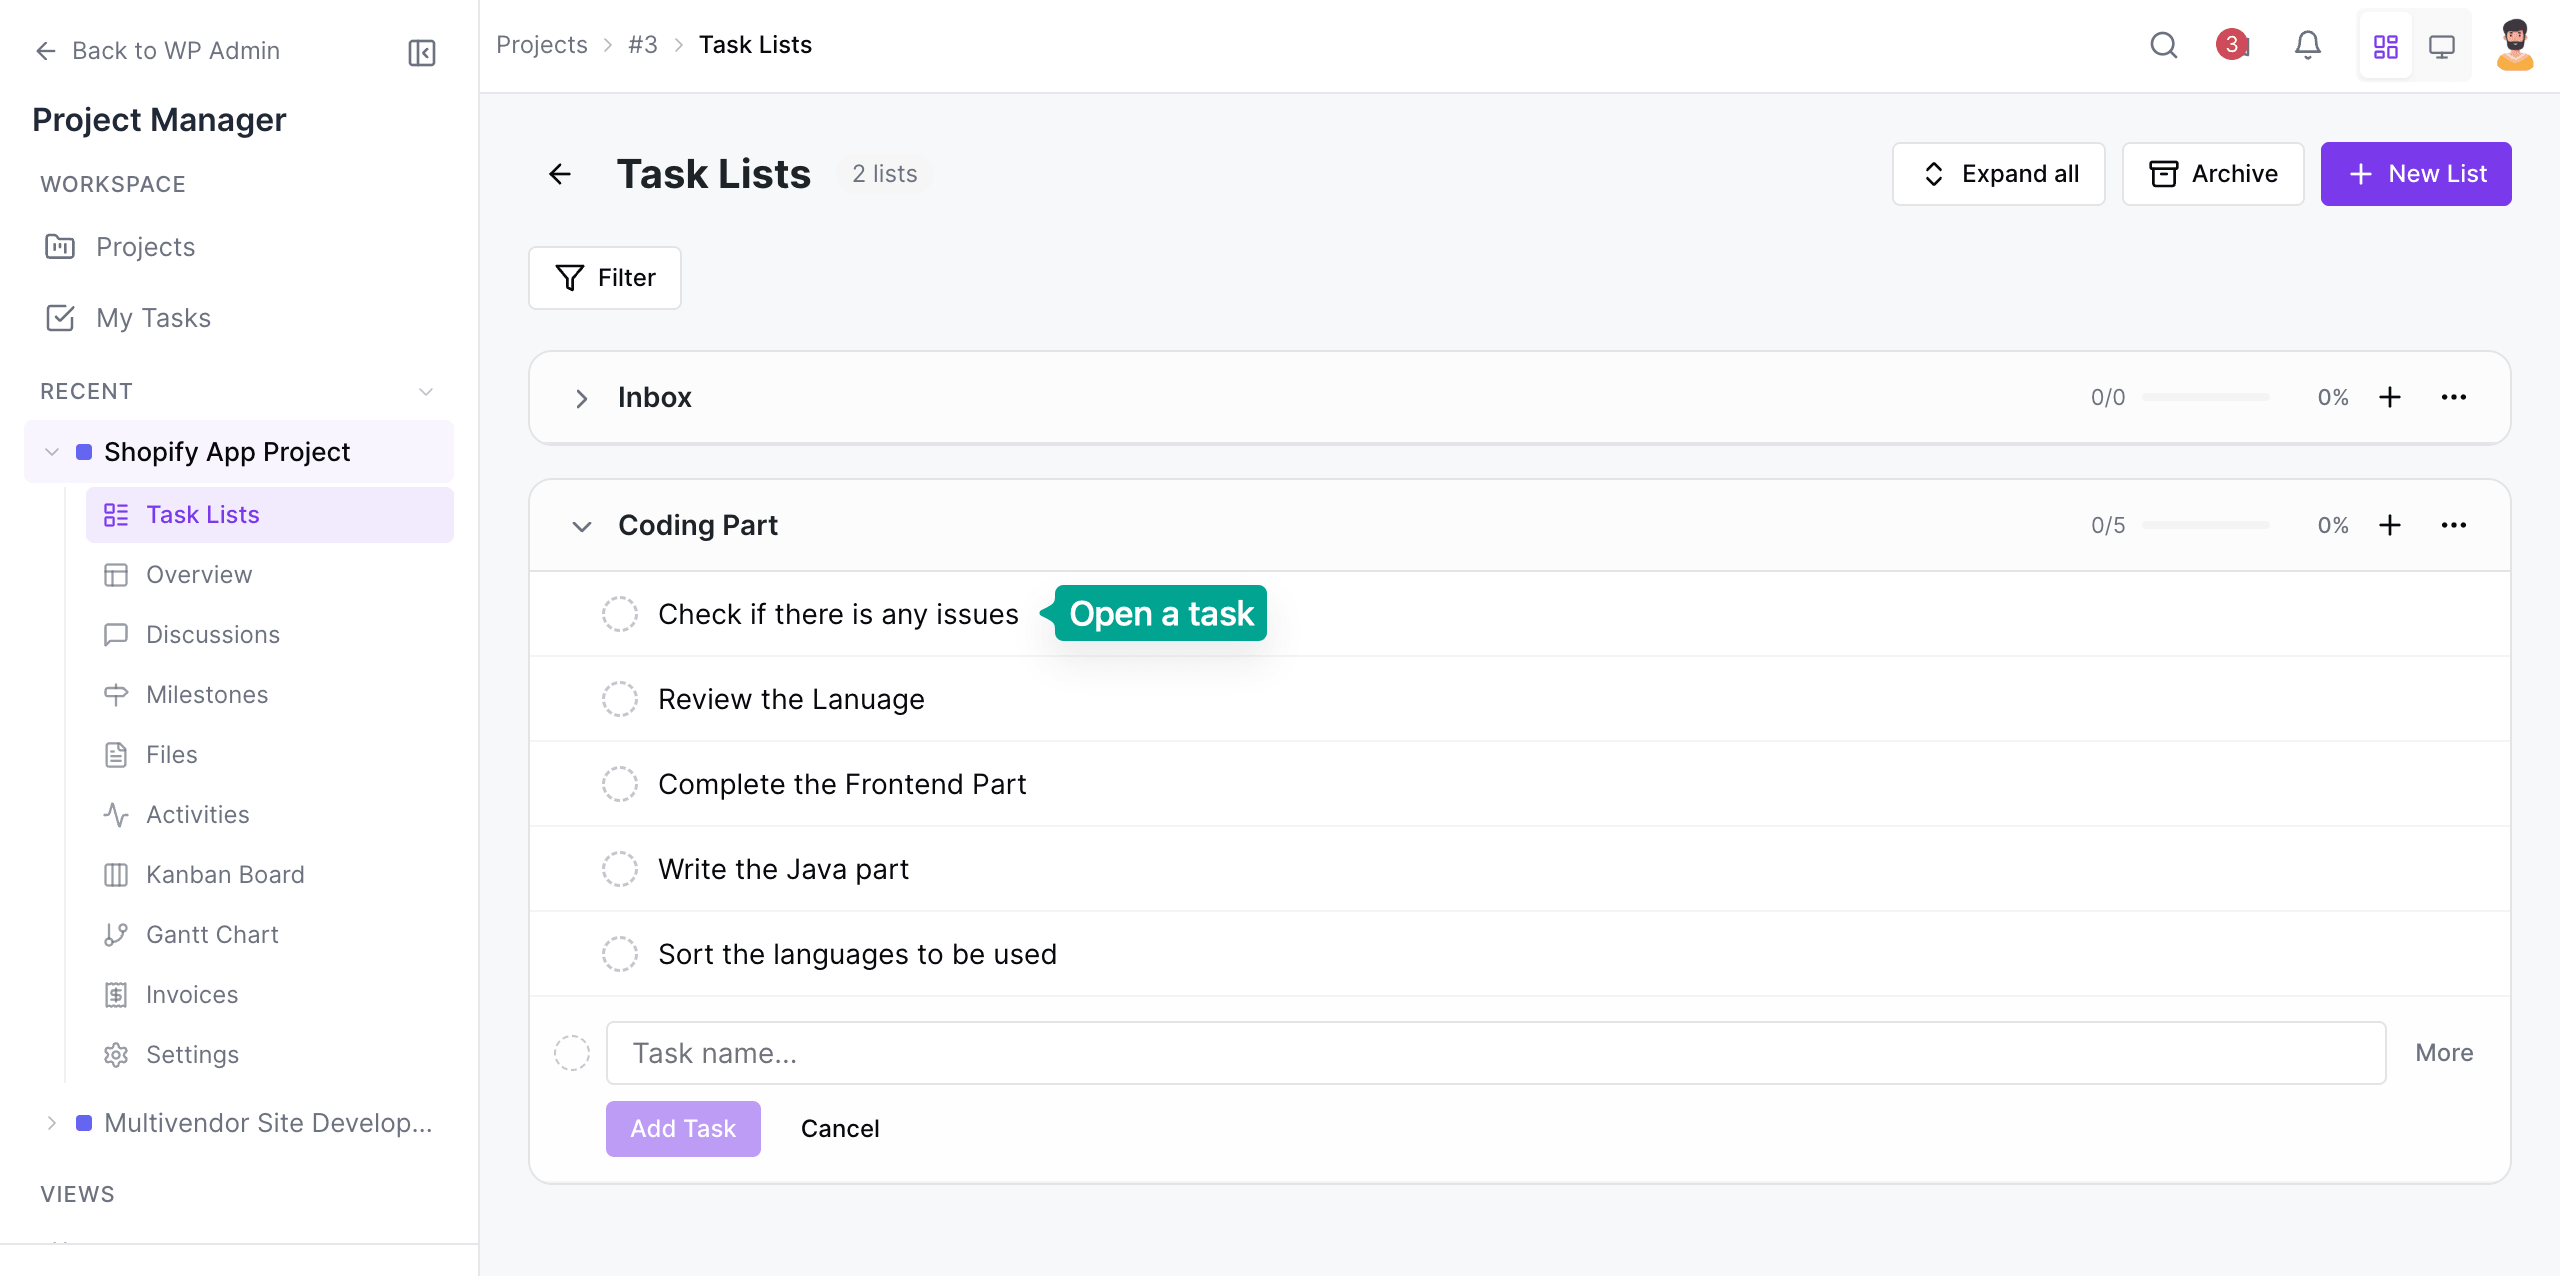
Click on any task to set a deadline.
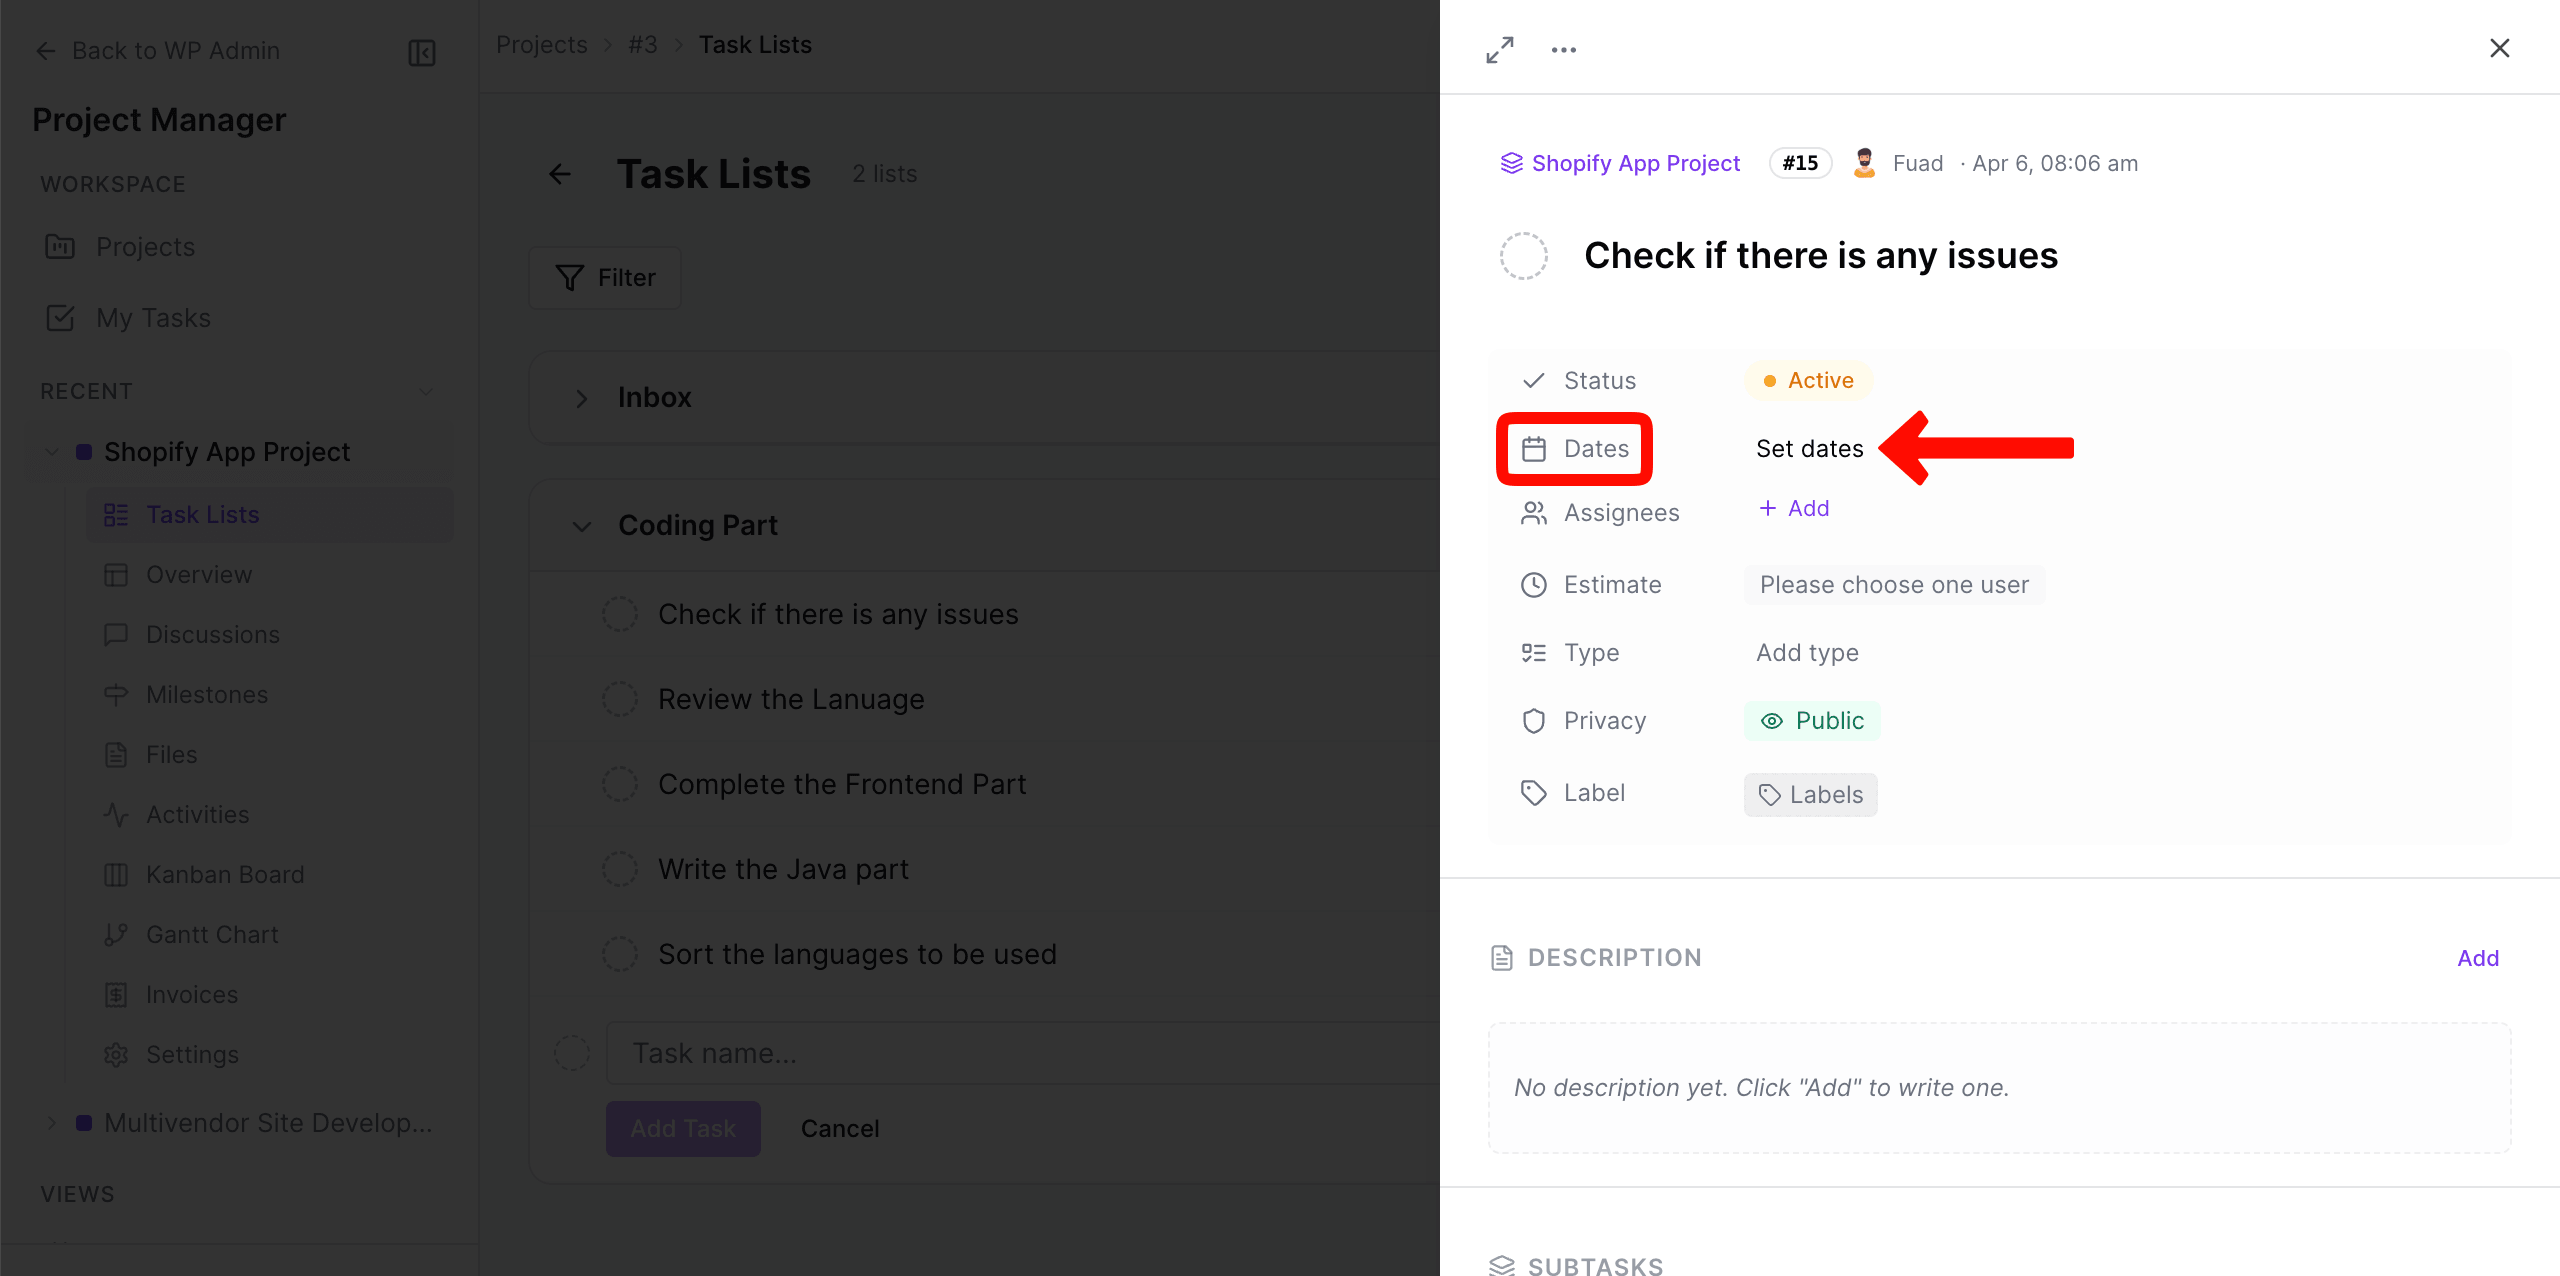
A sidebar will open up on the right side. Next to Dates, click on the Set dates option.
Click on Start and Due options one by one to set the start and deadline.
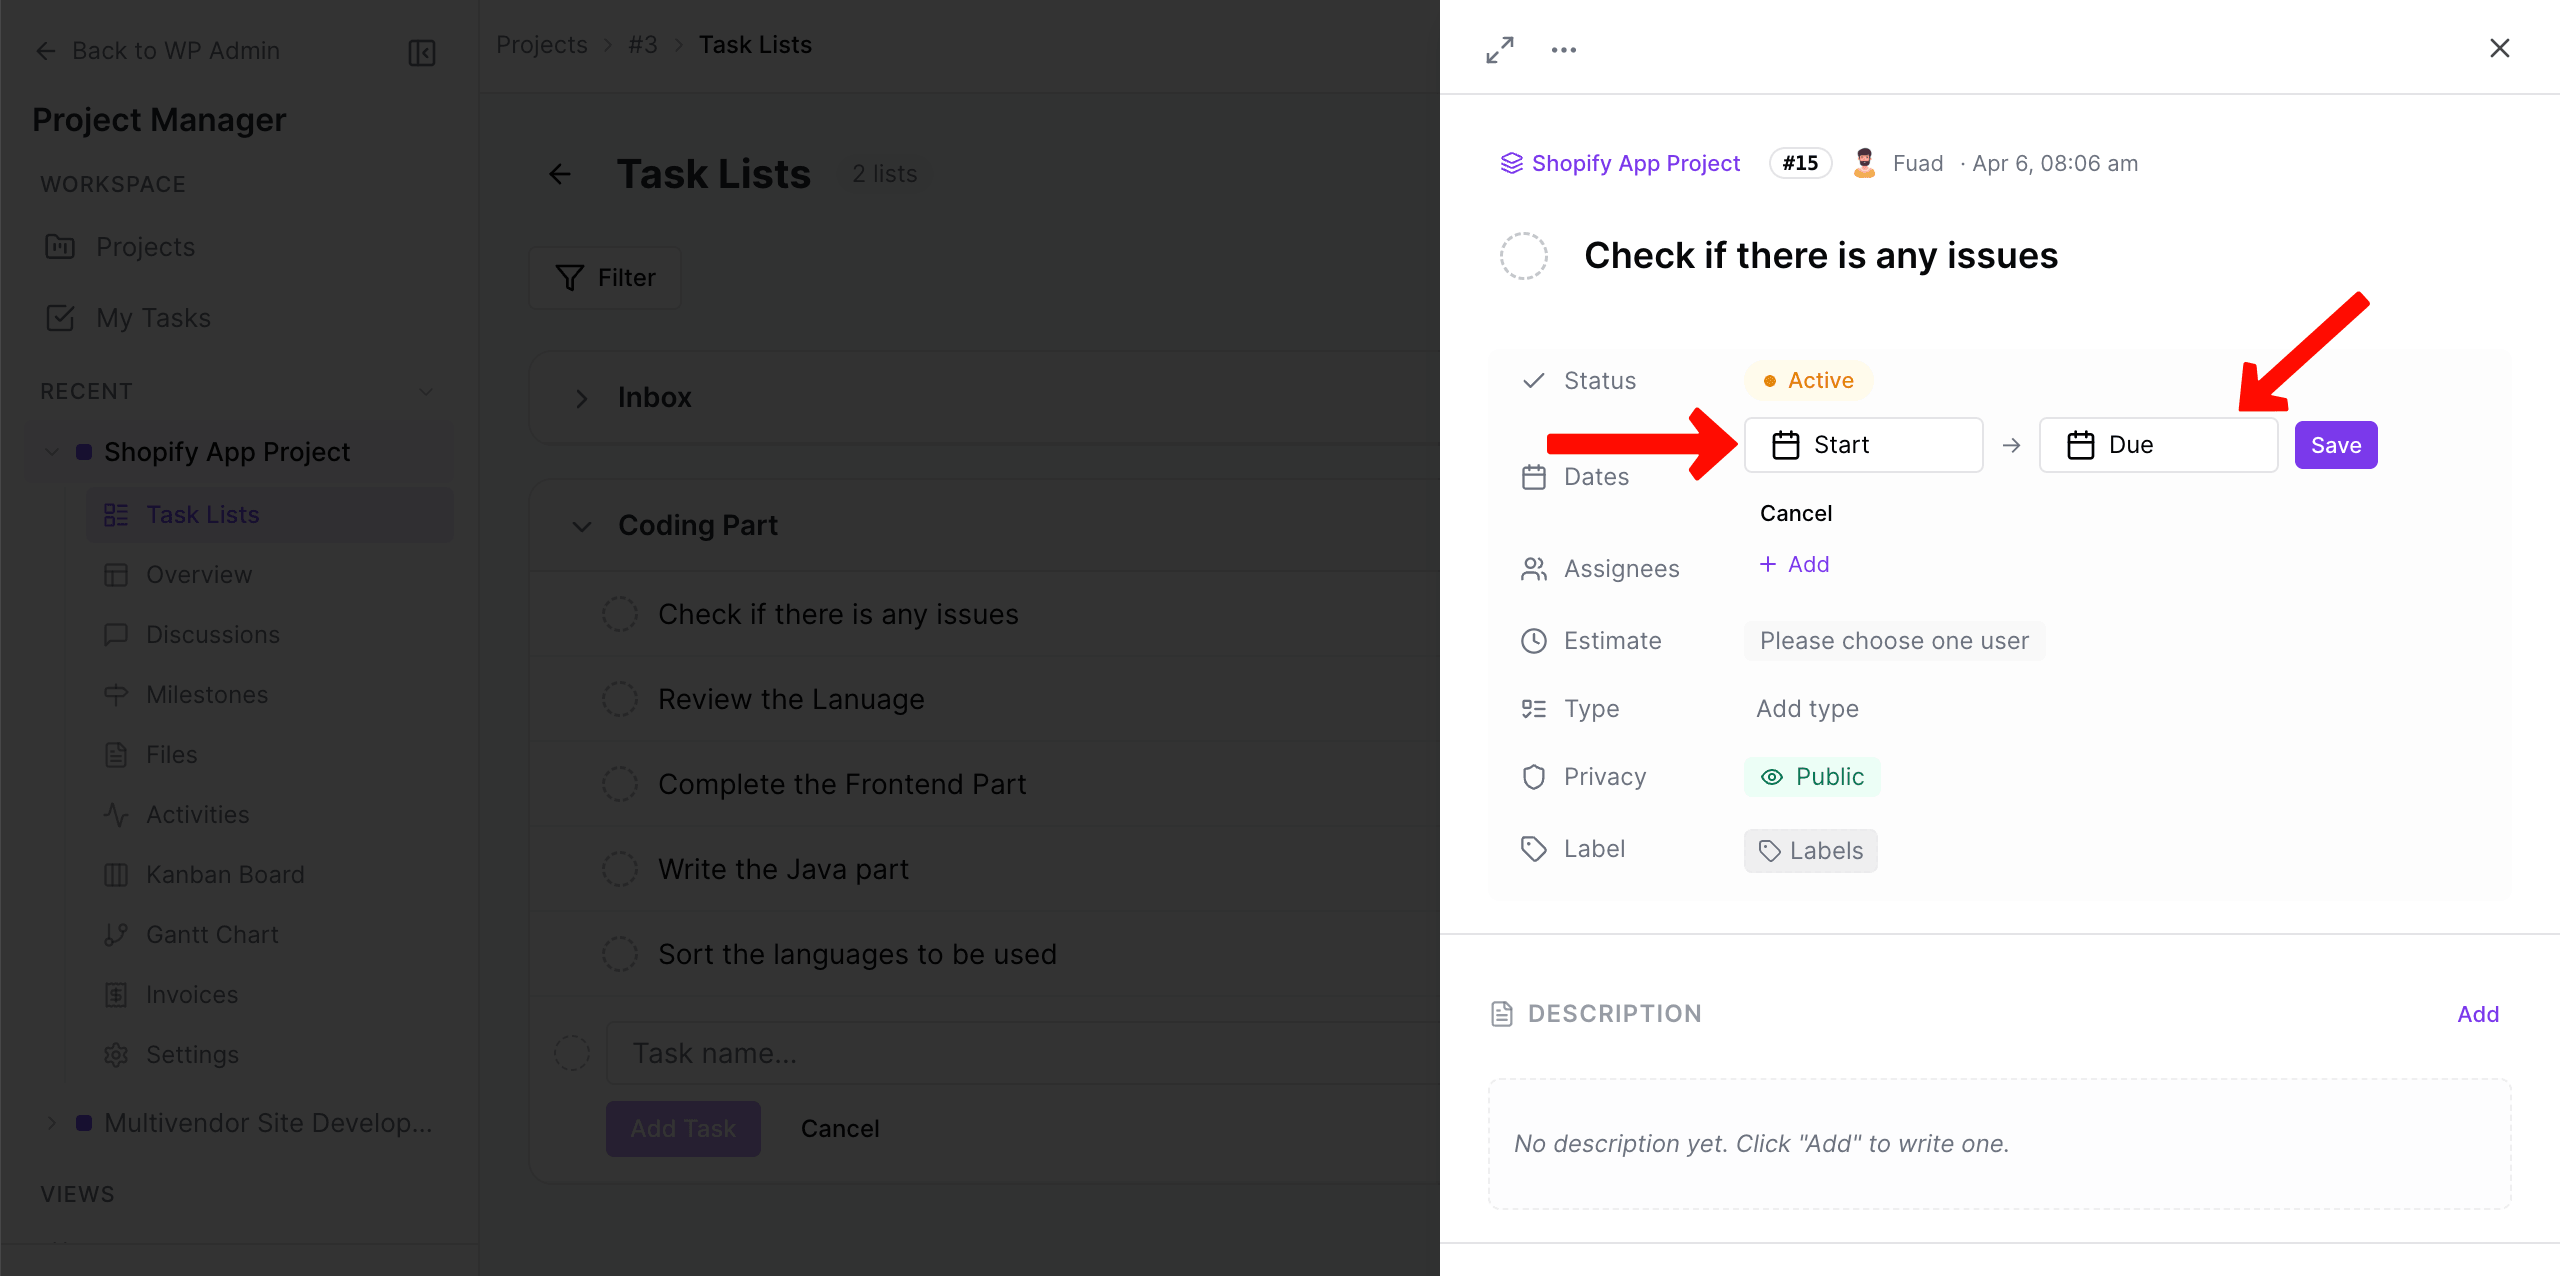
Once done, click the Save button to preserve deadline changes.
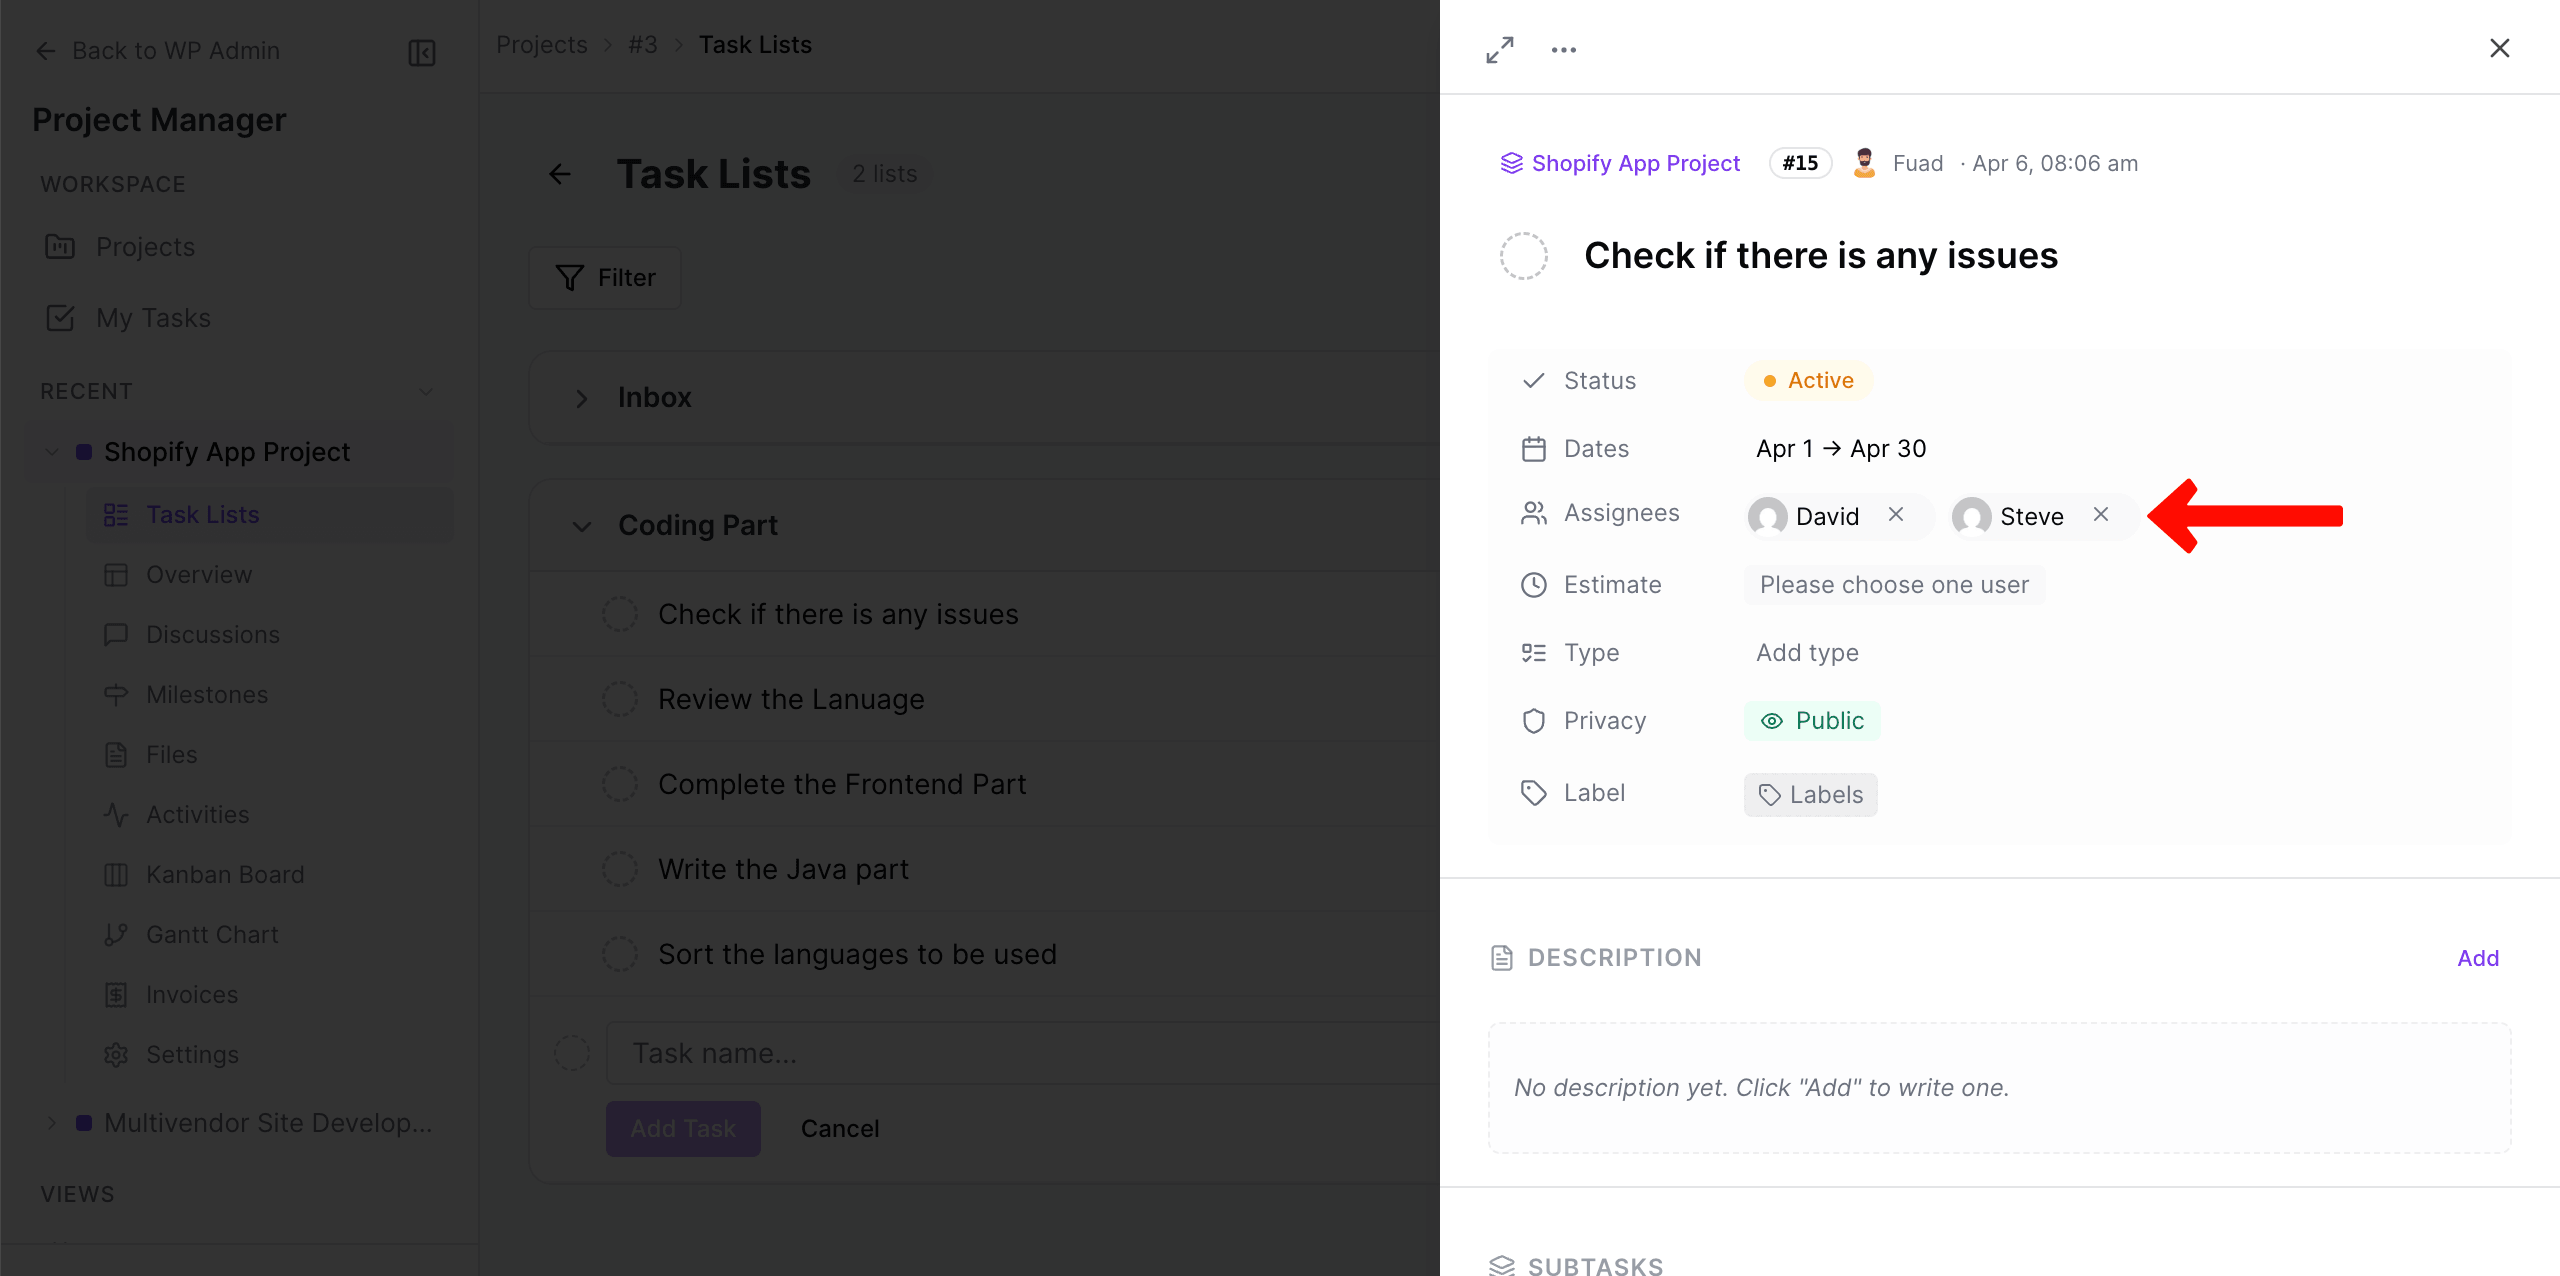
Assign the Task to Team Members
Come to the Assignees option and click the + Add button.
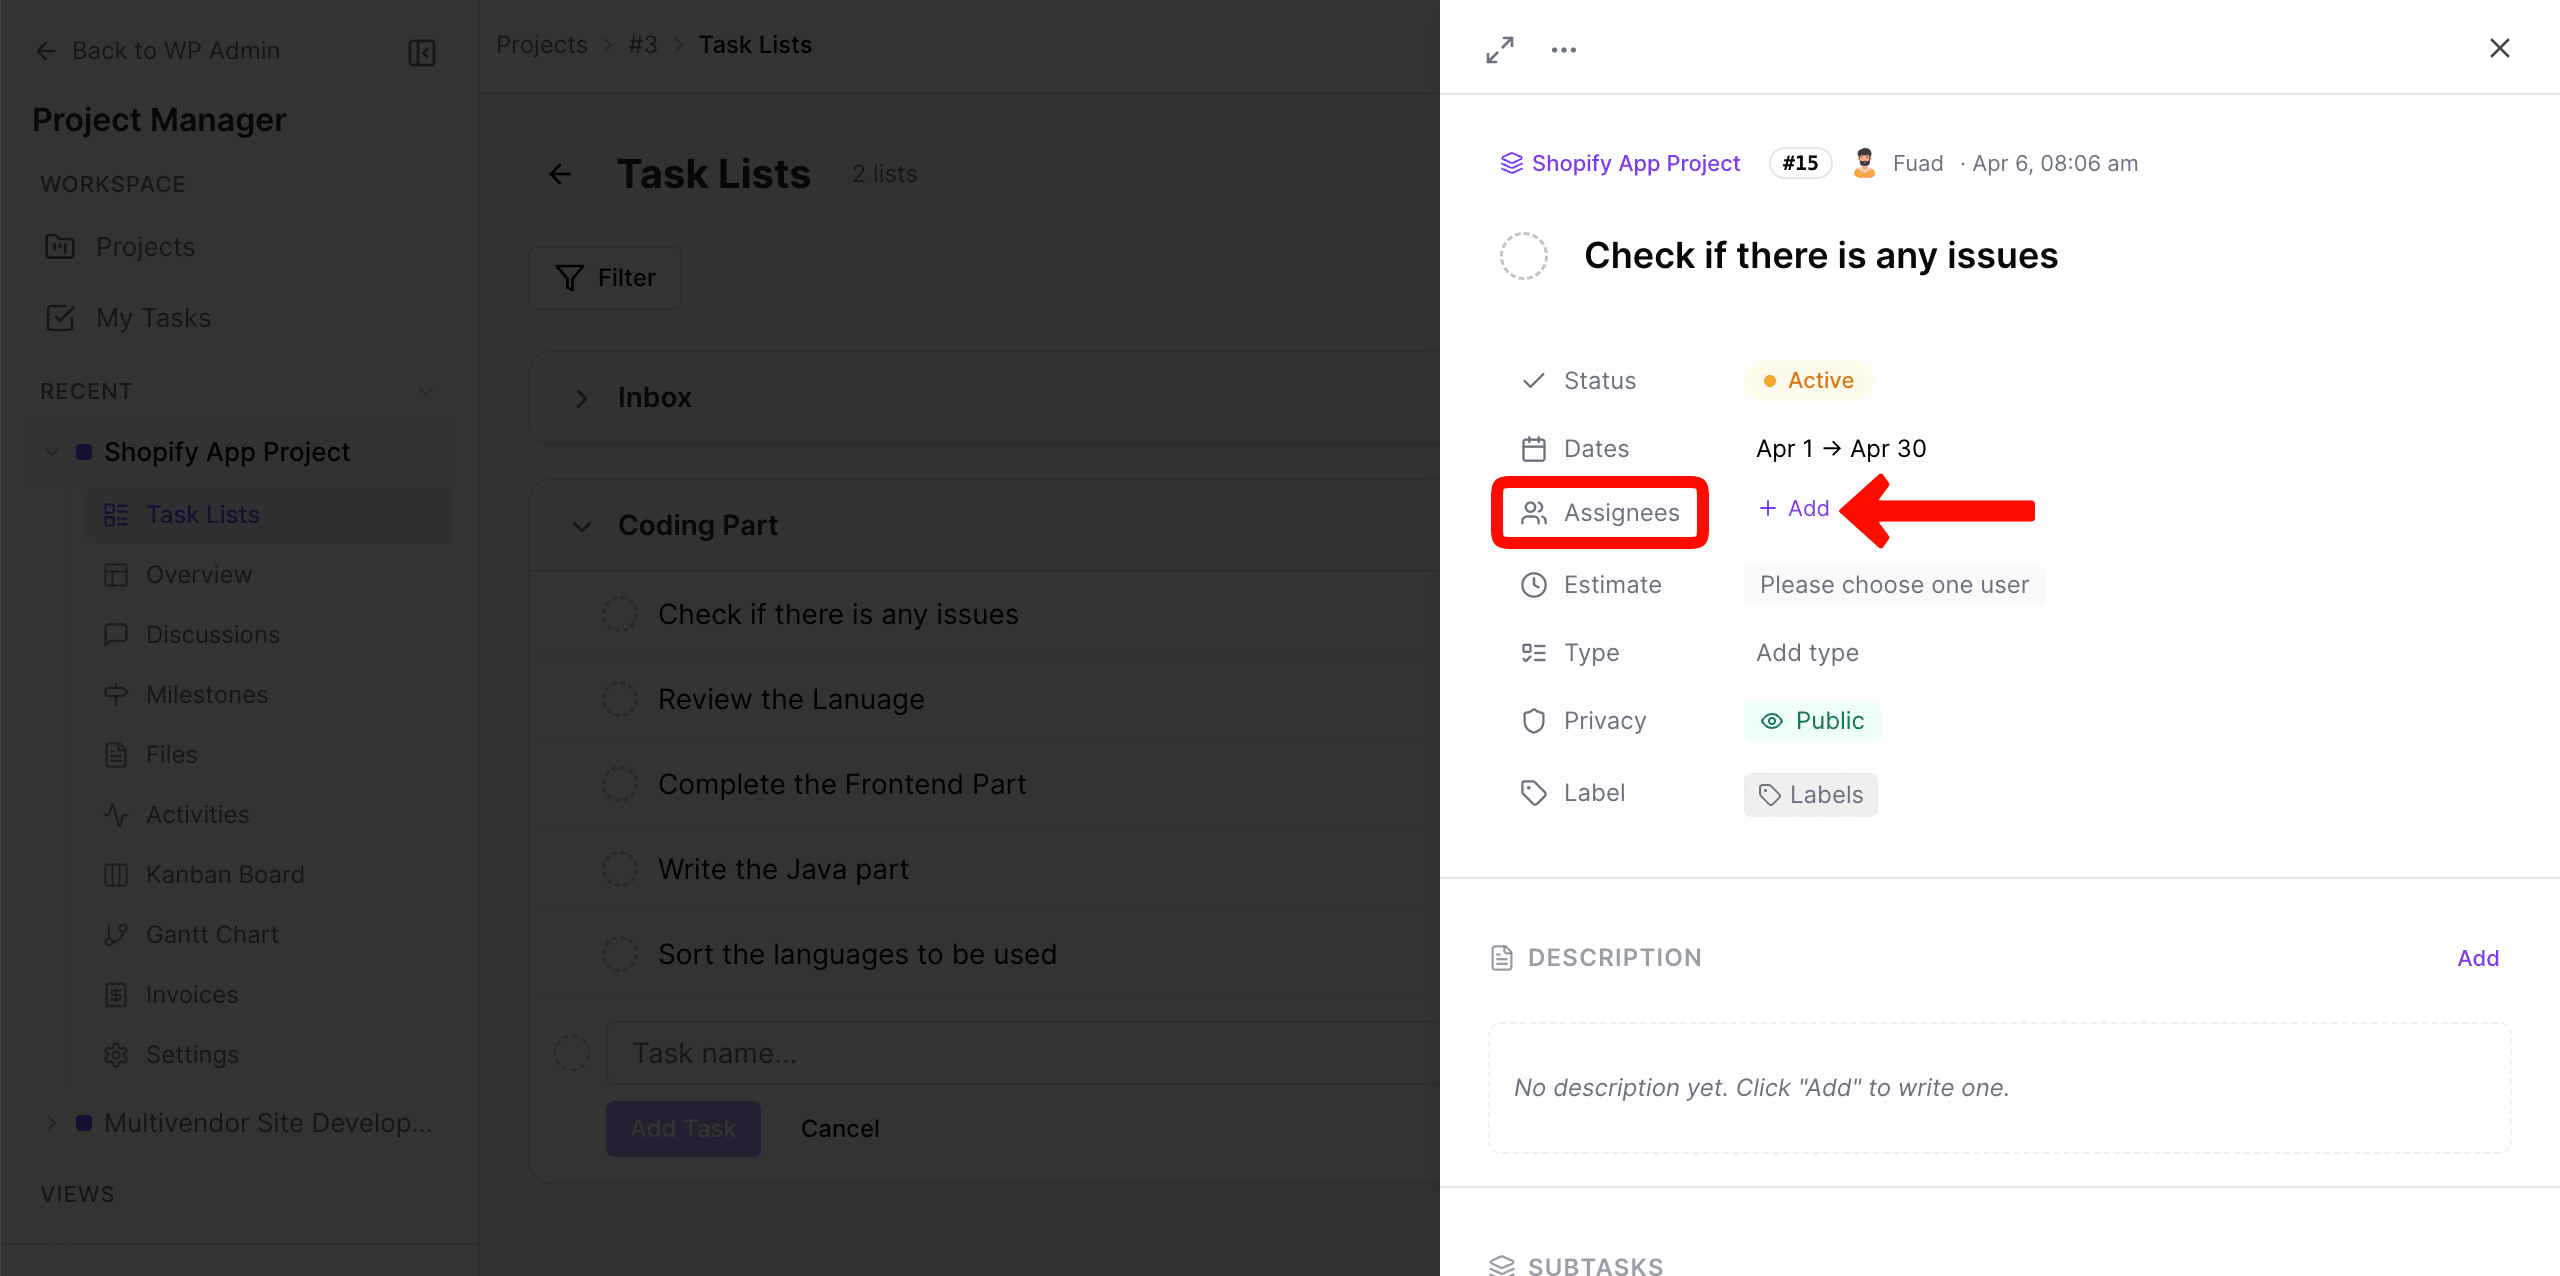
From here, you can find out your team member and assign them to the task.
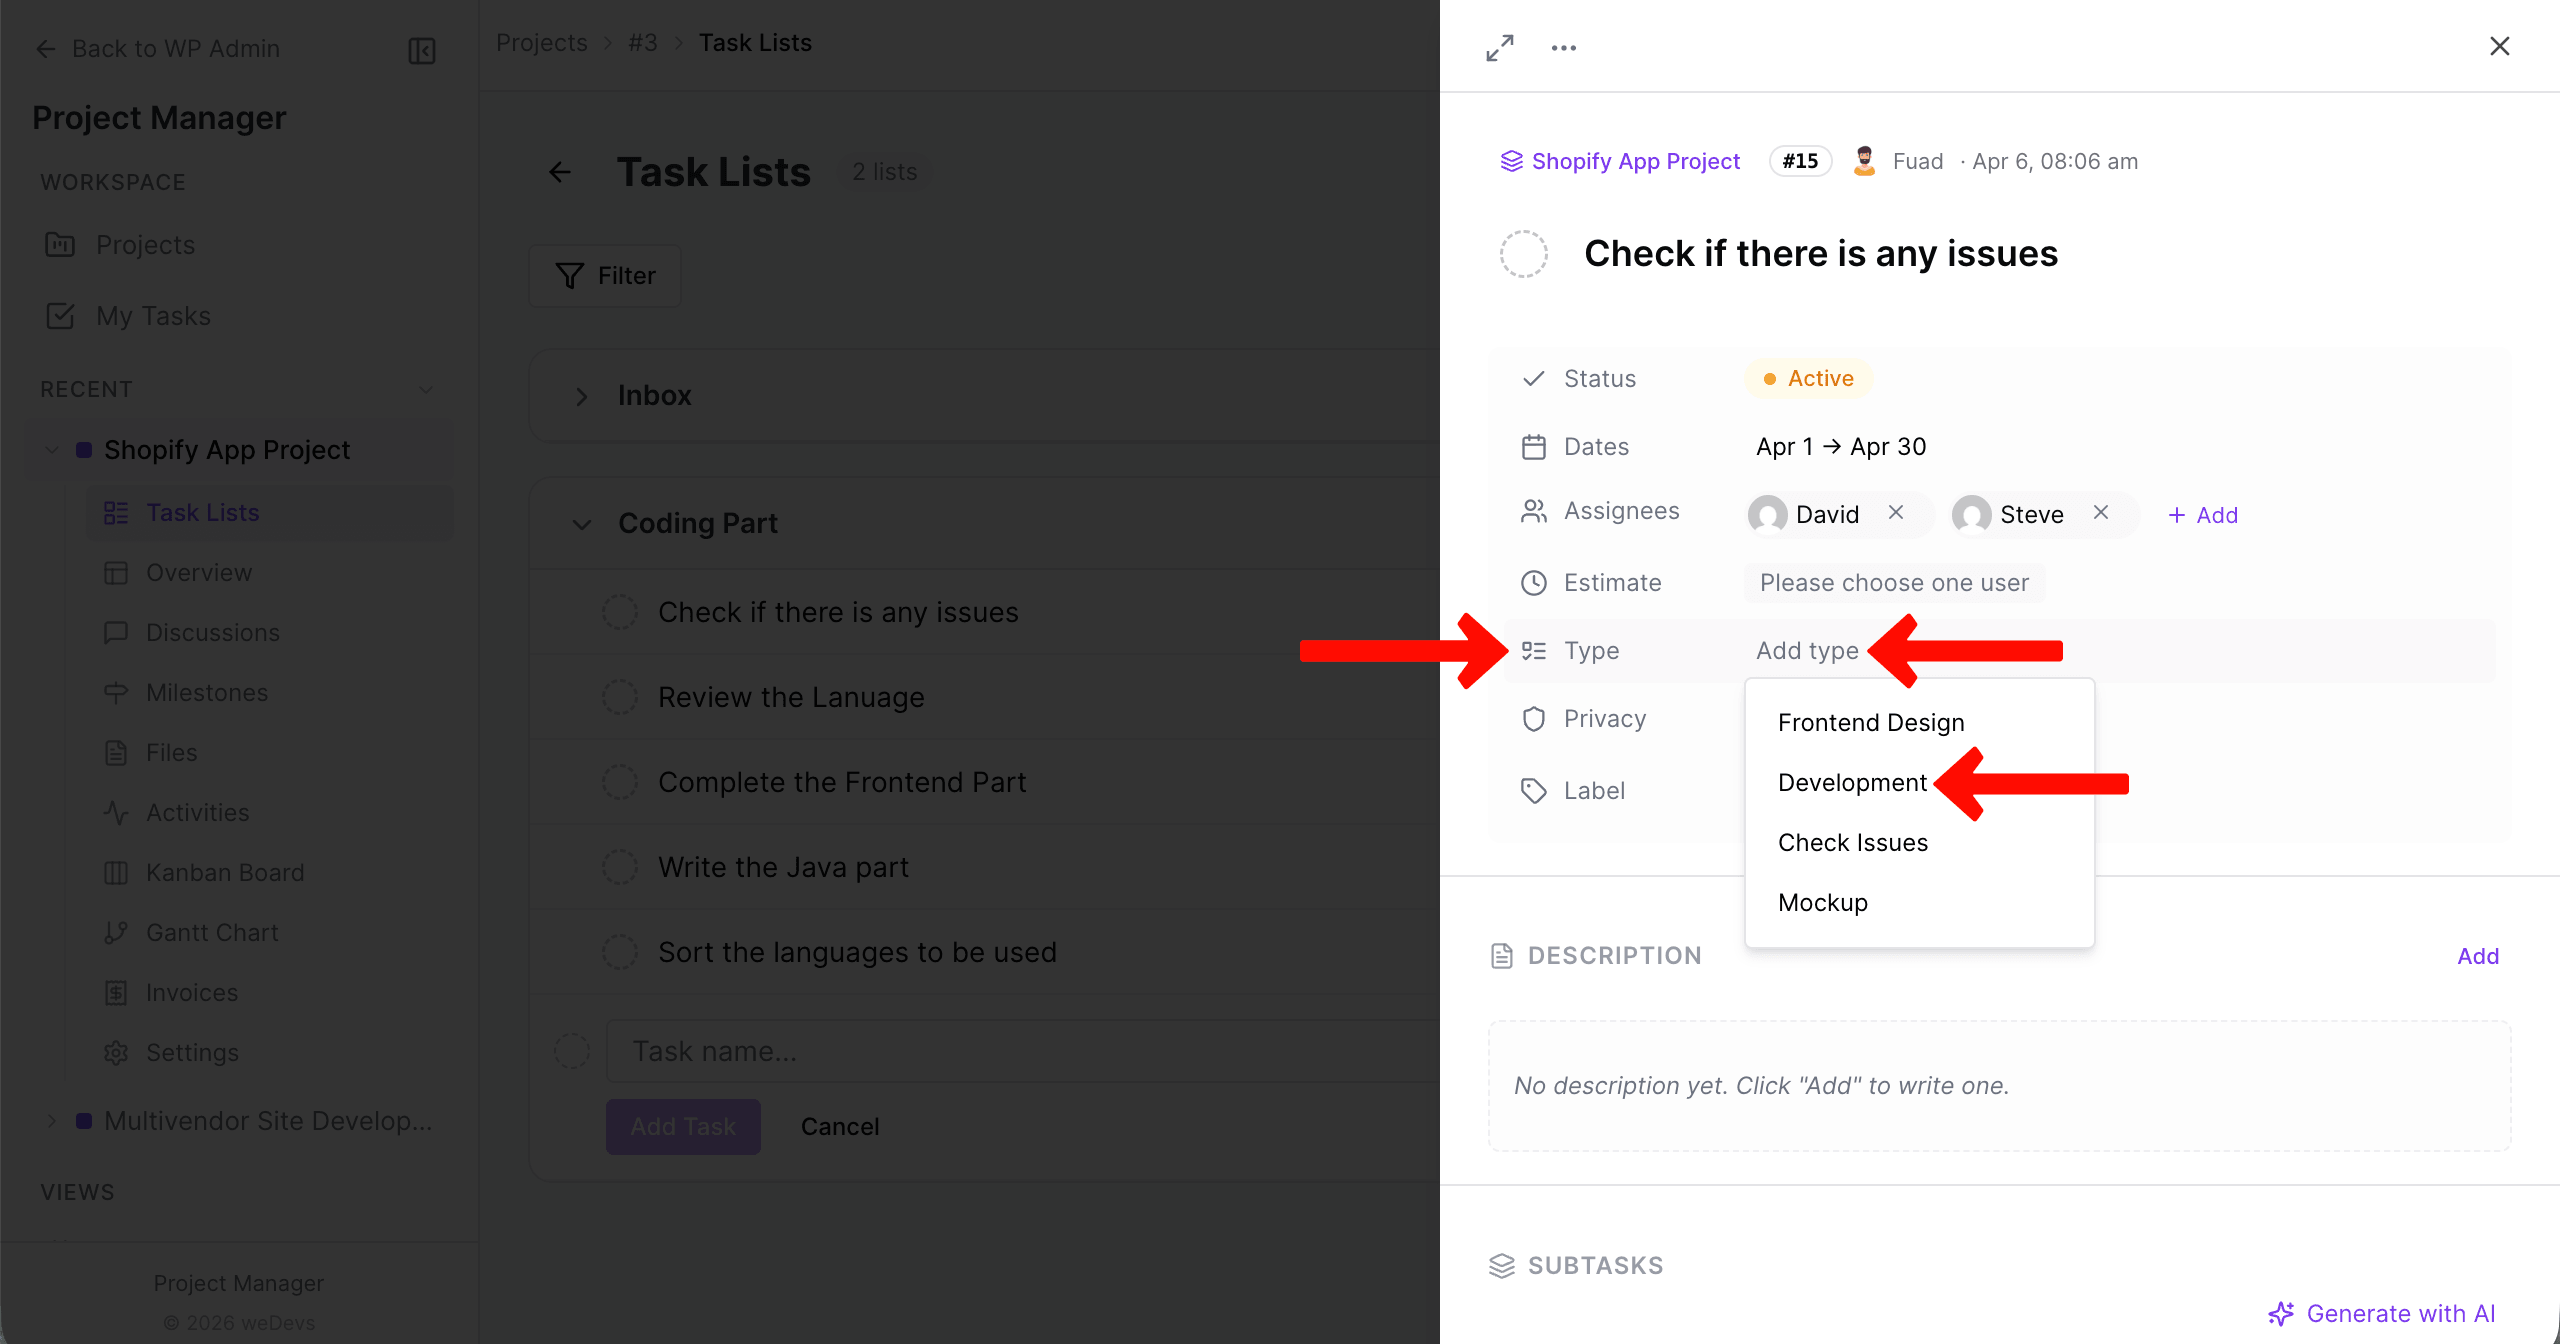
Add Task Type
From the Type option, you can set a task type for the task.
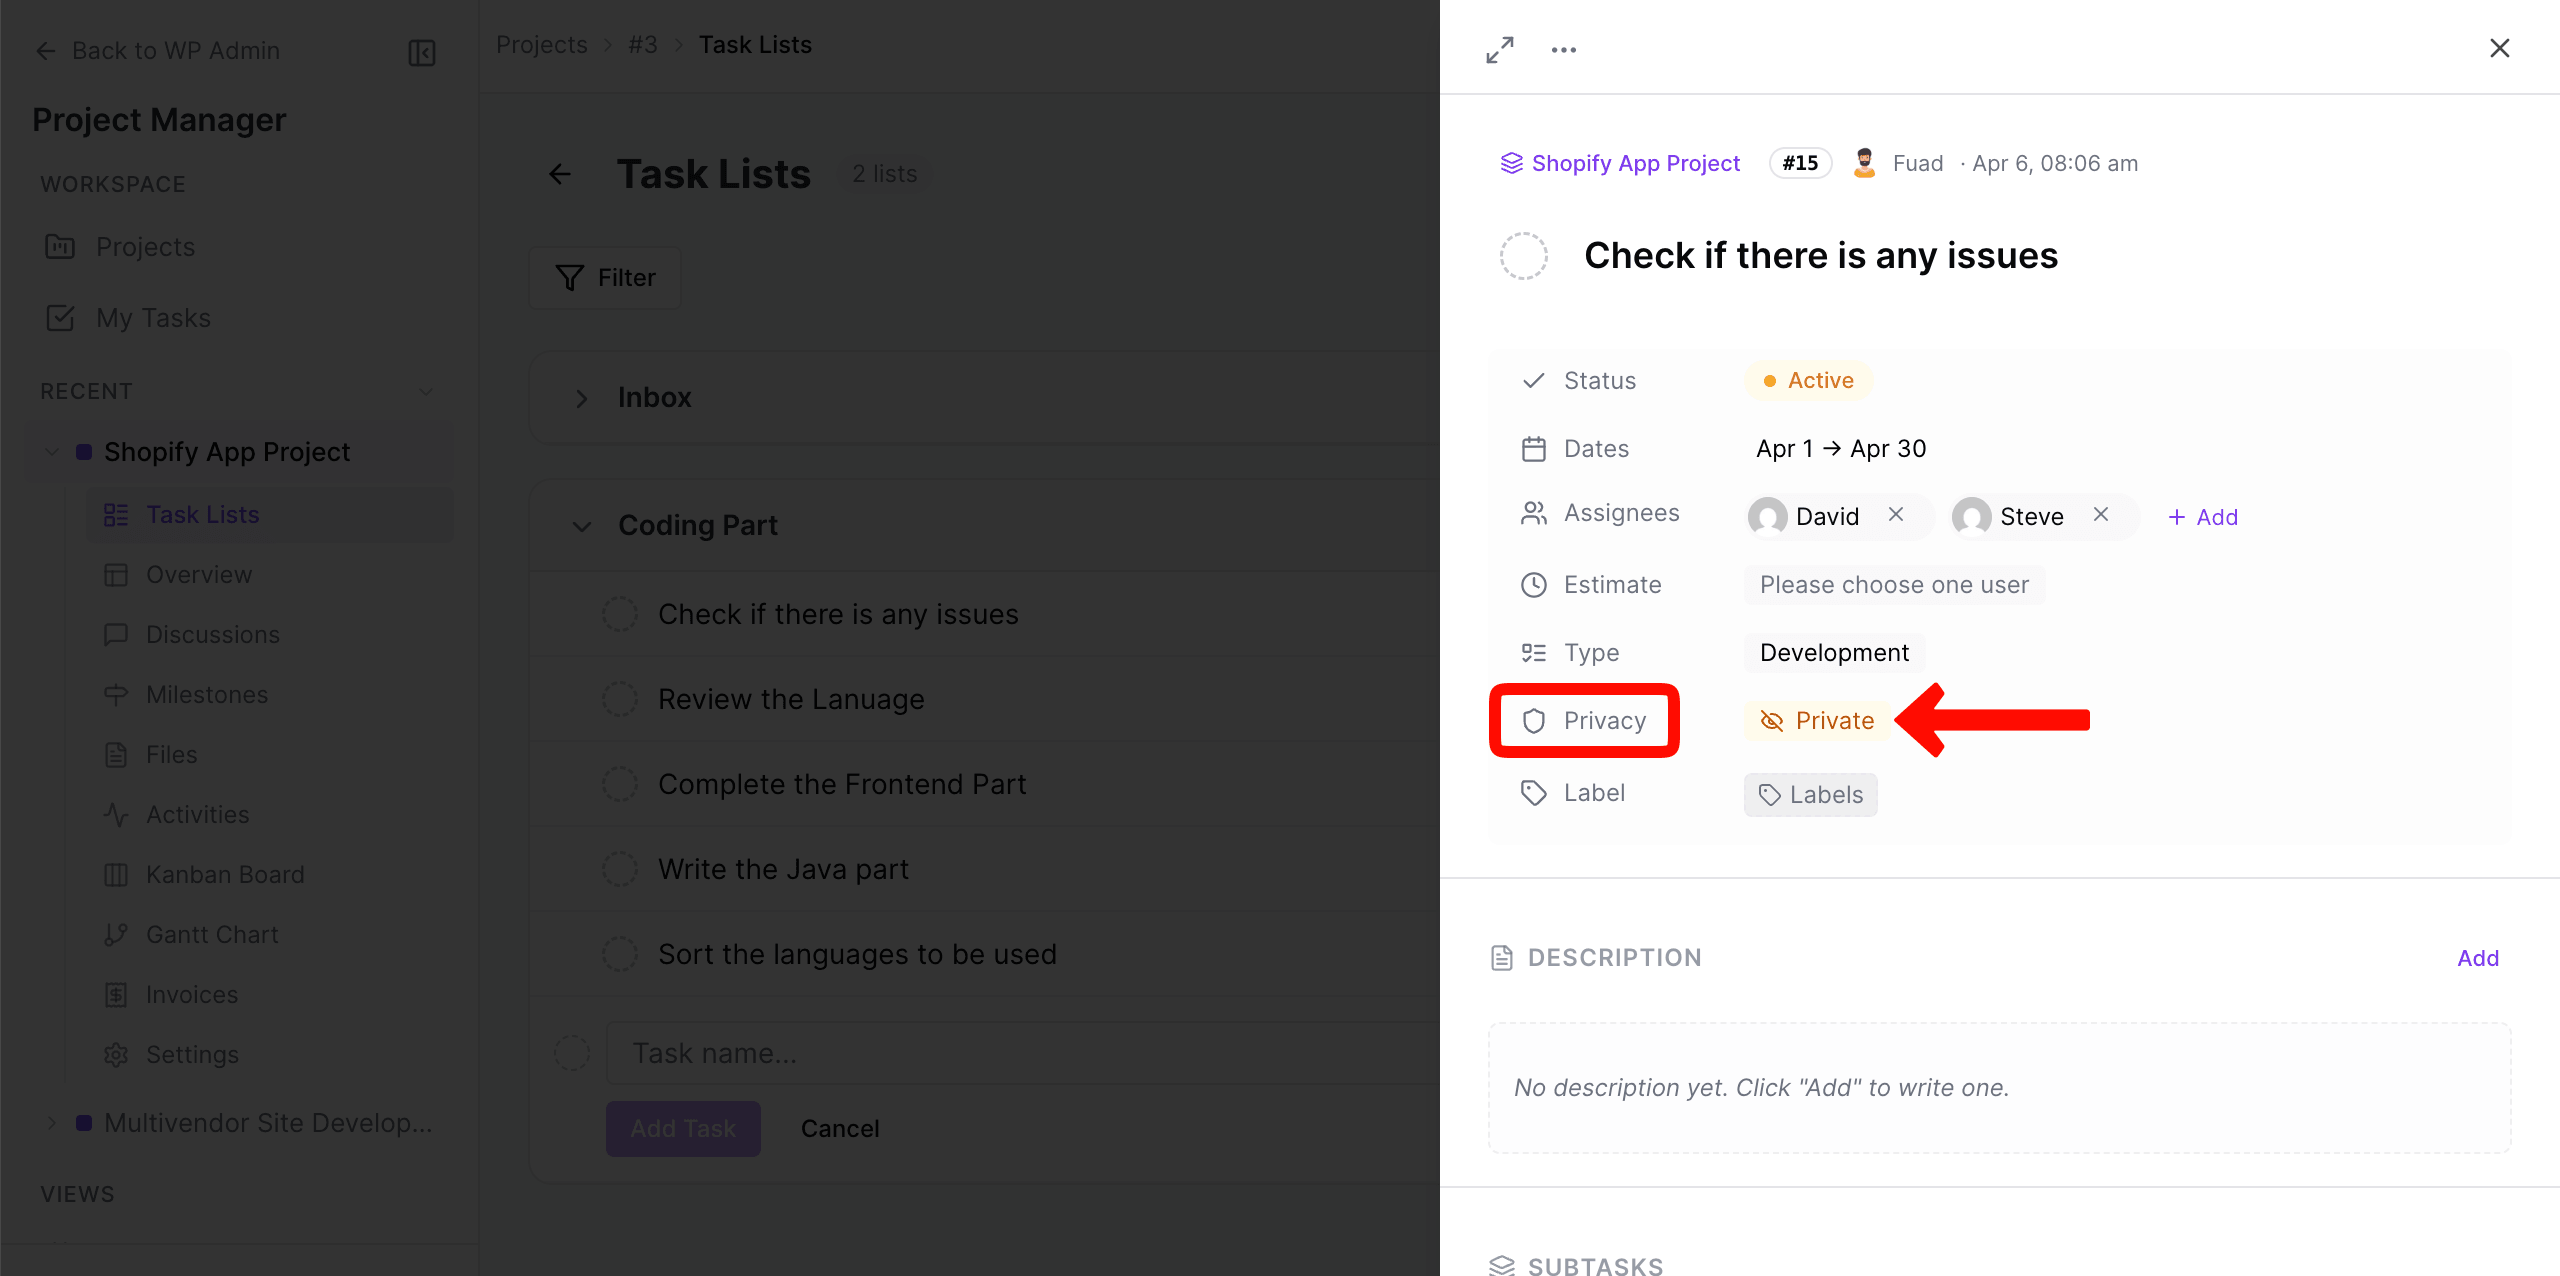
Set Privacy to the Task
By clicking on the marked option, you can change and set the task private or public.
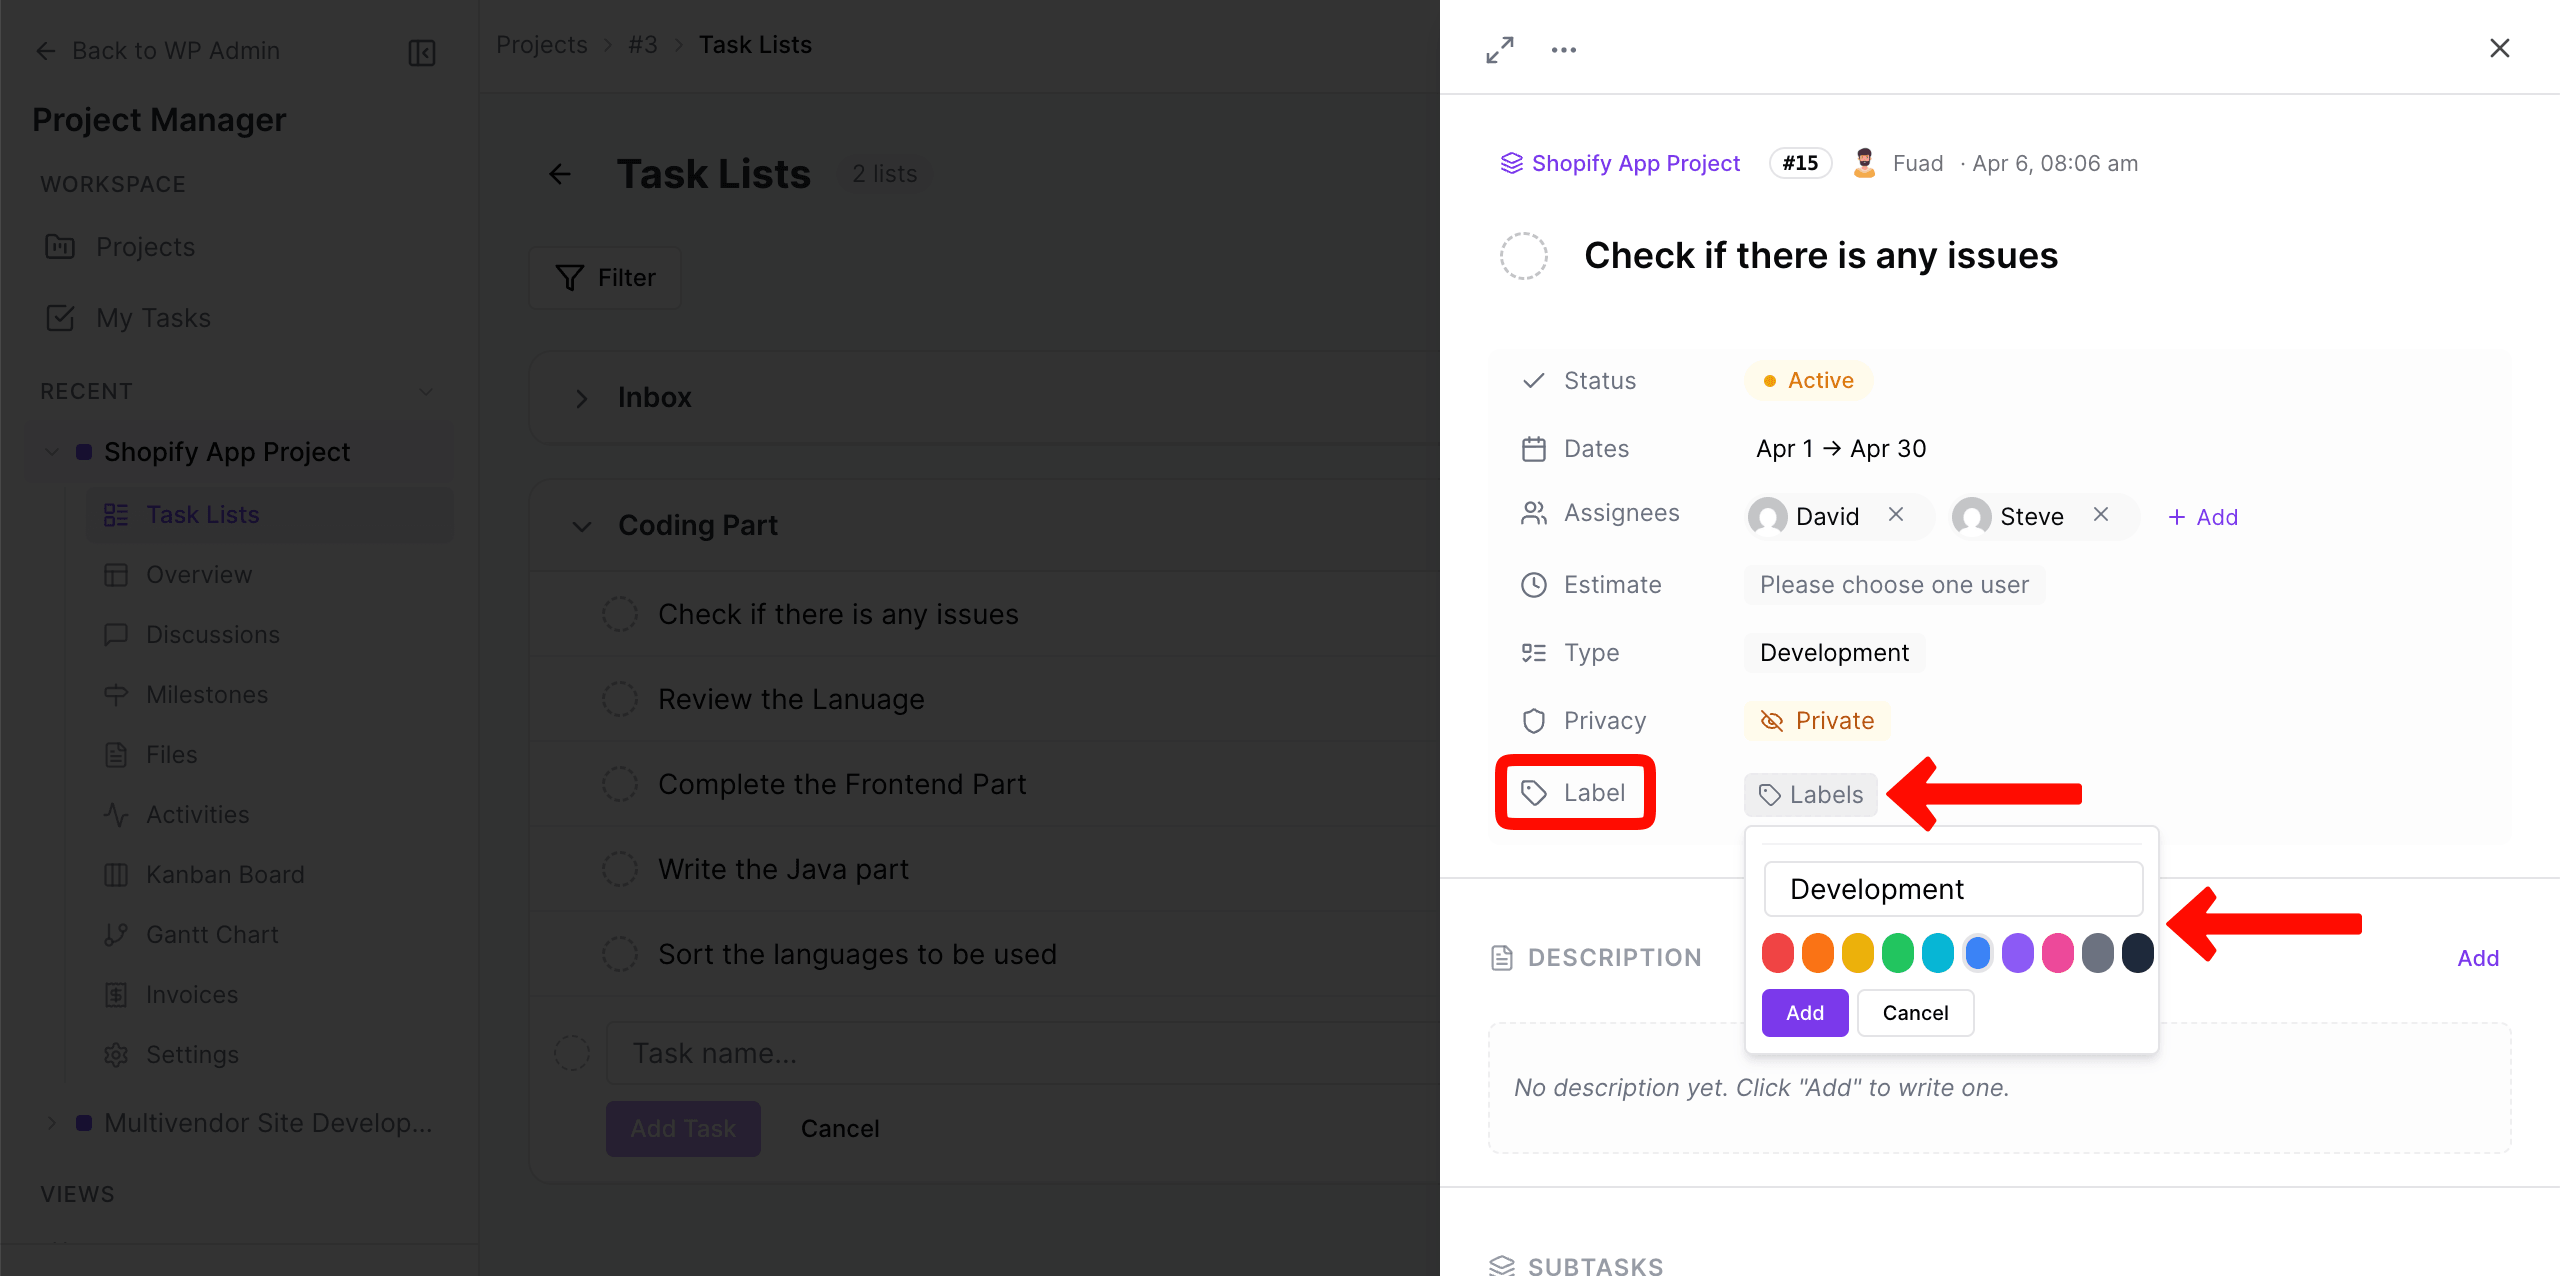
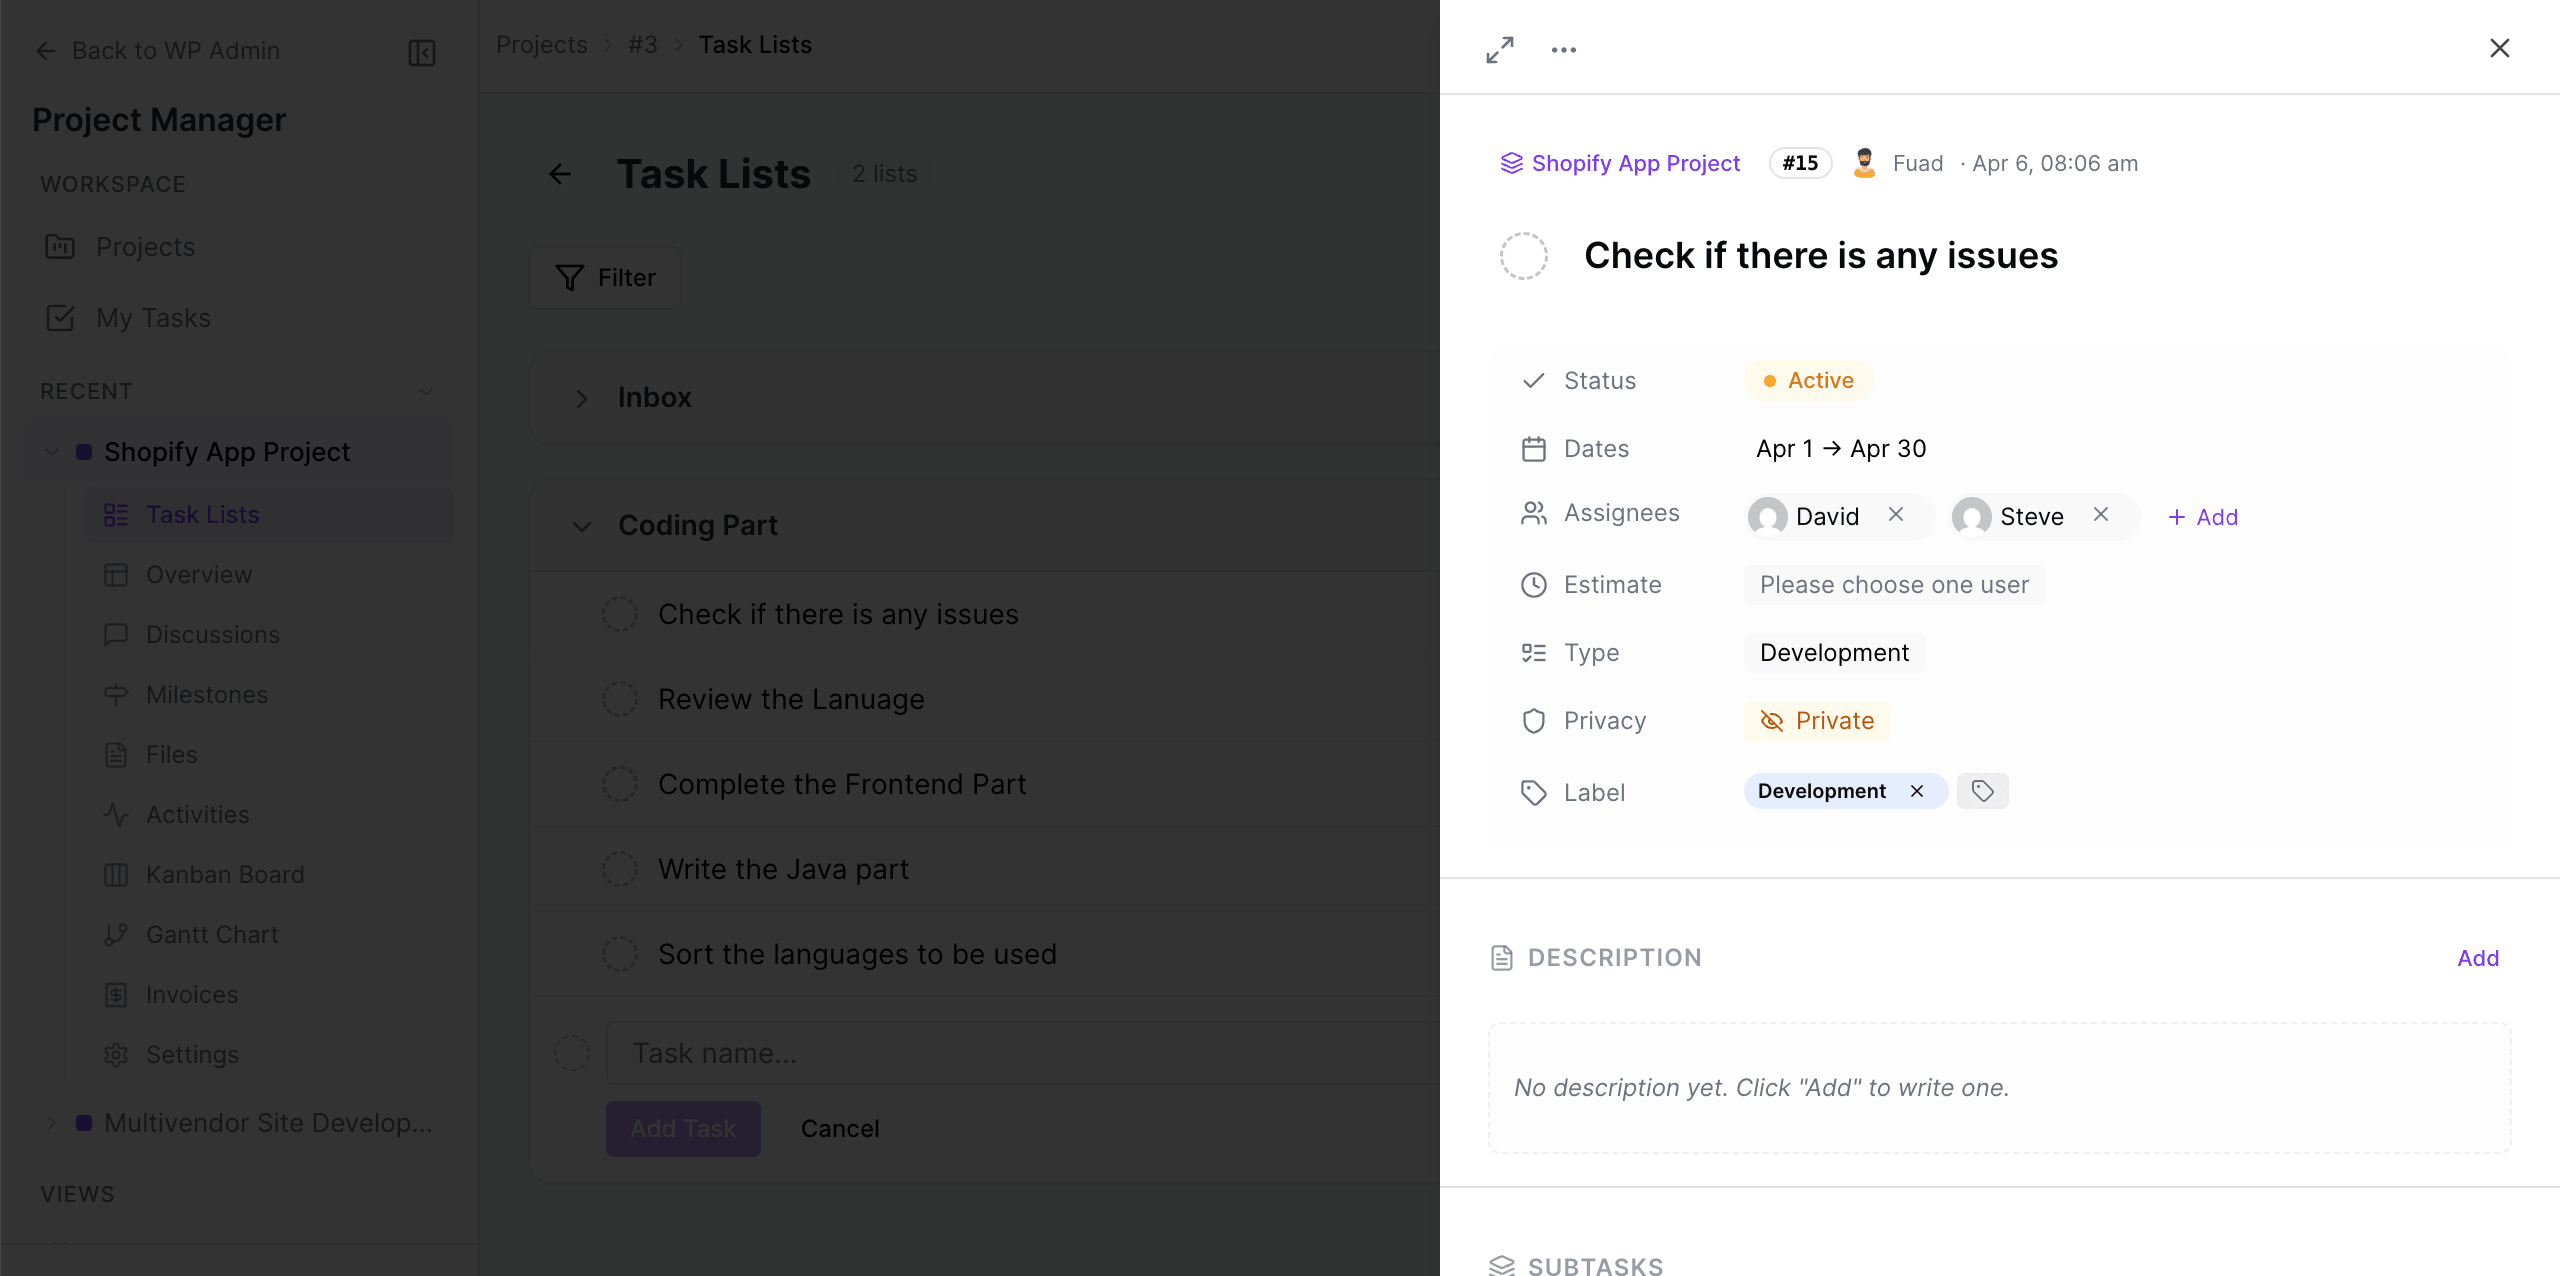
Add a Label to the Task
From the Label option, you can set tables for the task. You can also customize its appearance.
Thus, you can configure and complete the settings of any task.
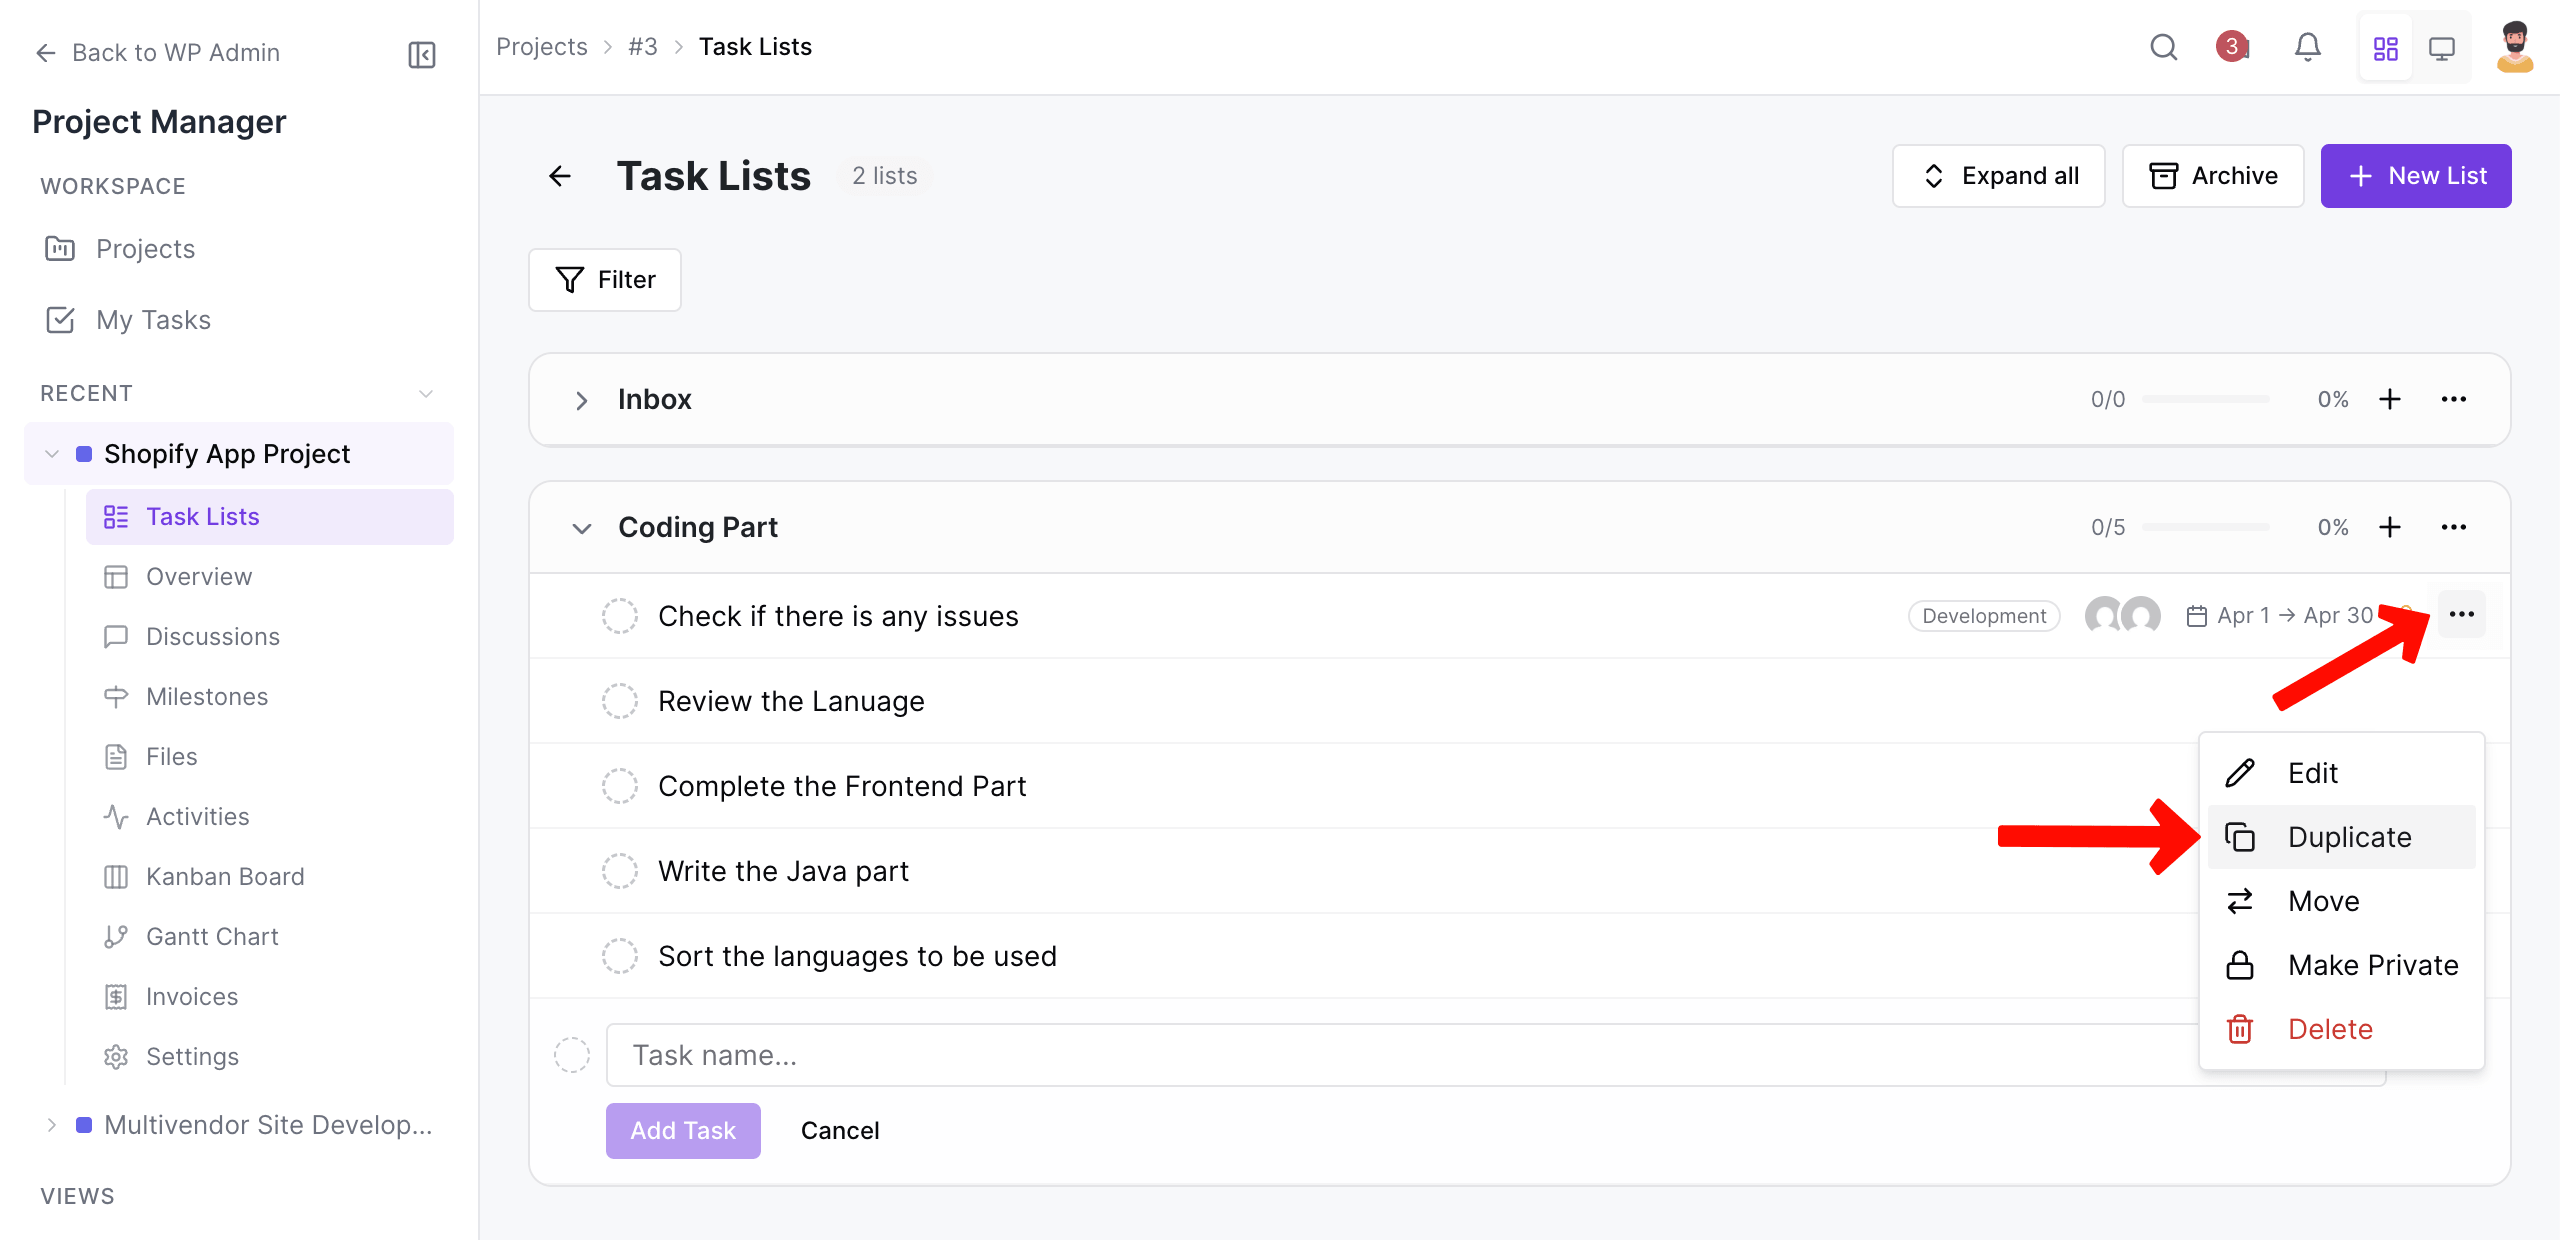
Duplicate a Task
You may duplicate an entire task. Come to the list. Hover the cursor on the task you want. Click the three-dot icon. Hit the Duplicate option.
If wanted, you can even move or delete the task.