How to Create an Image Gallery in WordPress (Step by Step)
Are you looking to showcase your photos or artwork on your WordPress site? Creating an image gallery is a fantastic idea to display multiple images in an organized and attractive way.
An image gallery is a collection of images displayed together on a webpage. Here you can add photos in rows and columns. It'll save space and improve user experience.
A well-designed gallery can capture visitors' attention and keep them on your site longer. Users can easily browse through images in a gallery format, often with features like lightboxes for a better viewing experience.
In this guide, we'll walk you through the process of creating an image gallery in WordPress efficiently.
We'll show you 2 methods to create an image gallery in WordPress:
- Creating an Image Gallery in WordPress Without a Plugin
- Creating an Image Gallery in WordPress Using a Plugin
Method 1: Creating an Image Gallery in WordPress Without a Plugin
WordPress includes built-in features for creating a basic image gallery. This is the easiest way to add an image gallery to your website. It may lack advanced customizations but no hassle of installing a new plugin.
Log in to your WordPress admin dashboard using personal credentials. Then follow the below steps:
Step 1: Create or Edit a Post/Page
From your admin dashboard, navigate to “Posts” or “Pages” in the left-hand menu.
Then, select “Add New” to create a new post or page, or “Edit” an existing one where you want to add the gallery.
Step 2: Add a Gallery Block
In the editor, click on the “+” button to add a new block. Search for “Gallery” and select the “Gallery” block.
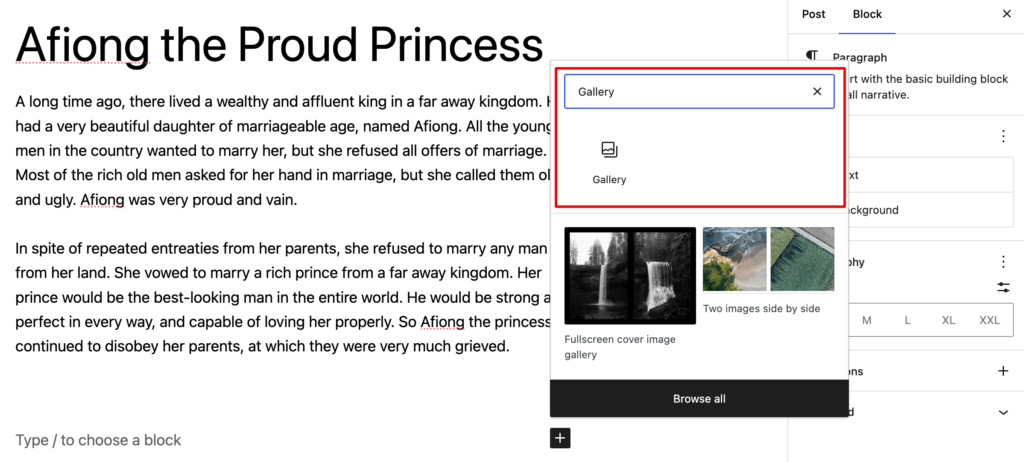
This block will allow you to add and arrange multiple images.
Step 3: Upload or Select Images
Now, click on the “Upload” button to add new images from your computer. Alternatively, select “Media Library” to choose from previously uploaded images.
You can select multiple images by holding down the Ctrl (Windows) or Cmd (Mac) key while clicking.
Finally, click “Create a new gallery” after selecting all your images.
It takes you to the “Edit gallery” page. Here, you'll find all your selected images. You can rearrange them just by drag and drop.
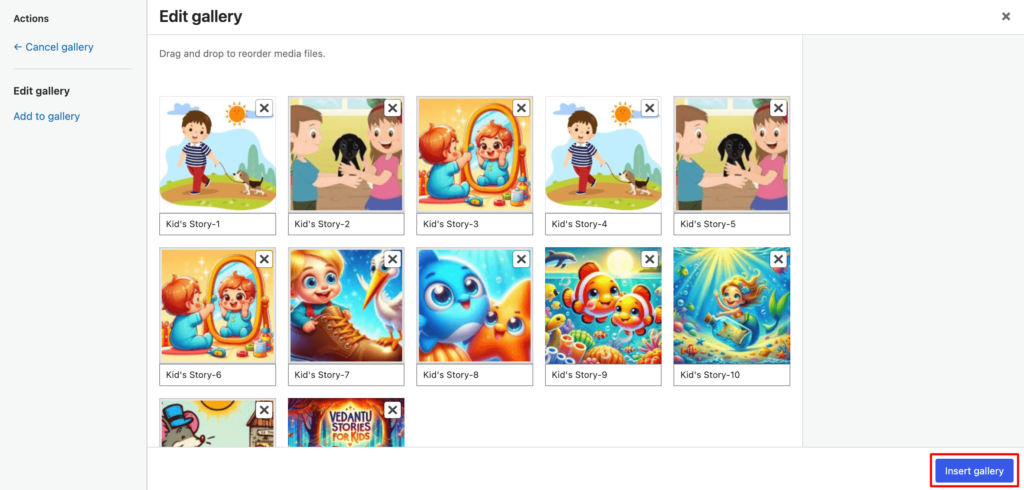
Also, you get the chance to give a caption to each image for better accessibility and SEO.
Once you’re satisfied with your image selection and arrangement, click on the button “Insert gallery”. It'll take you back to the main post or page editor.
Step 4: Configure Gallery Settings
In the righthand column, you'll find several setting options to customize your image gallery.
- Image Size: Choose the size for your images (Thumbnail, Medium, Large, Full Size).
- Columns: Decide how many columns you want in your gallery layout. This determines how many images will appear in each row.
- Link To: Decide where each image should link. Options typically include Media File, Attachment Page, or None.
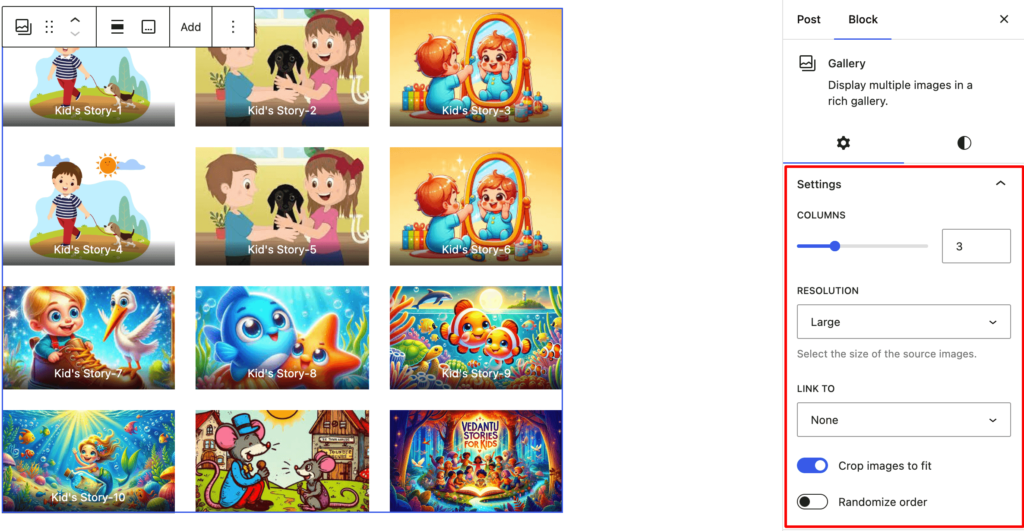
After adjusting the settings, preview your gallery to ensure it looks as expected. When you're satisfied, click Publish or Update to make your gallery live.
Method 2: Creating an Image Gallery in WordPress Using a Plugin
For more advanced gallery features, you might consider using a WordPress plugin. You'll find several useful Image Gallery plugins in the WordPress repository.
In today's guide, we'll use a popular option plugin Envira Gallery.
Step 1: Install and Activate the Envira Gallery Plugin
First, log in to your WordPress Admin Dashboard. From the left-hand menu, go to Plugins → Add New.
Next, type “Envira Gallery” in the search bar and press Enter. Find the Envira Gallery plugin in the search results.

Finally, click Install Now and then Activate. It opens a 5-step setup wizard in front of you.
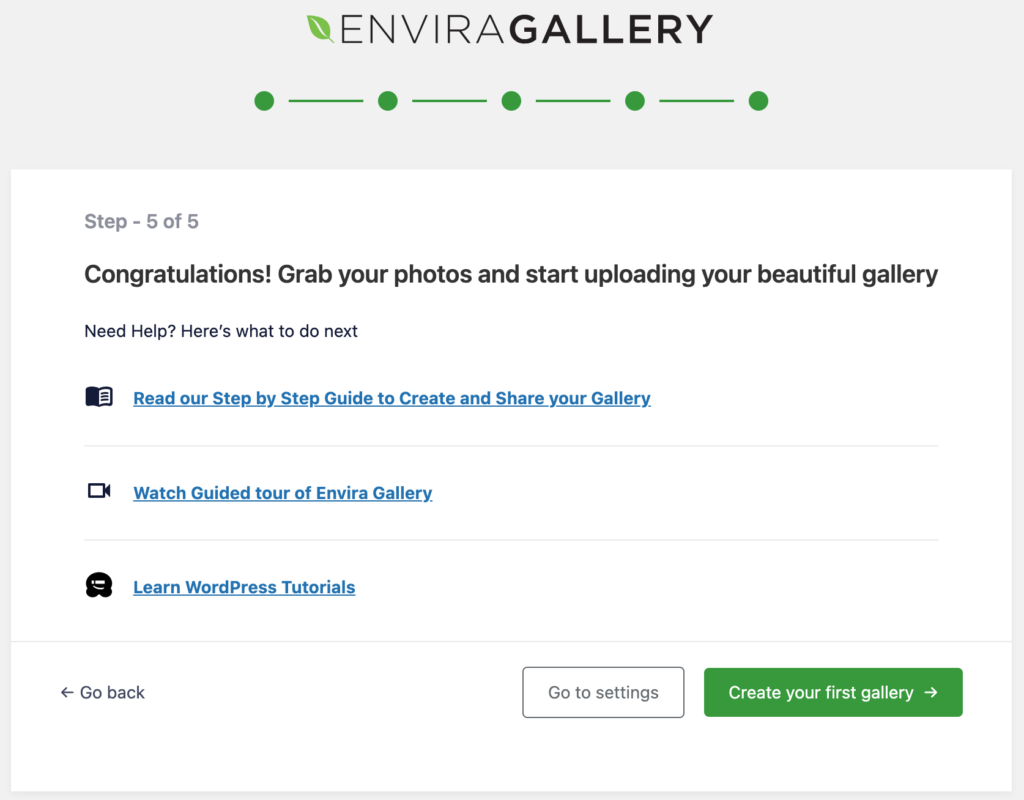
Here, you'll find several options to configure the plugin according to your personal preference.
Step 2: Create a New Gallery
In the left-hand menu, you'll now see an “Envira Gallery” option. Click on it, then select “Add New”.
Enter a title for your gallery.
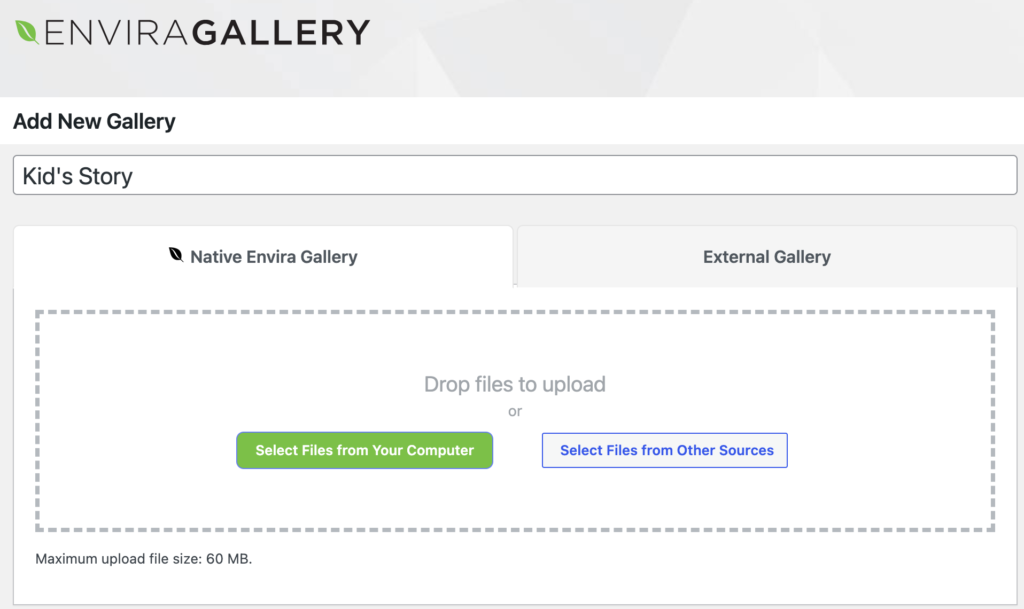
You can drag and drop images into the gallery area or use the “Select Files from Your Computer” button to upload images.
Step 4: Configure Gallery Settings
Once images are uploaded, you can reorder them by dragging and dropping them.
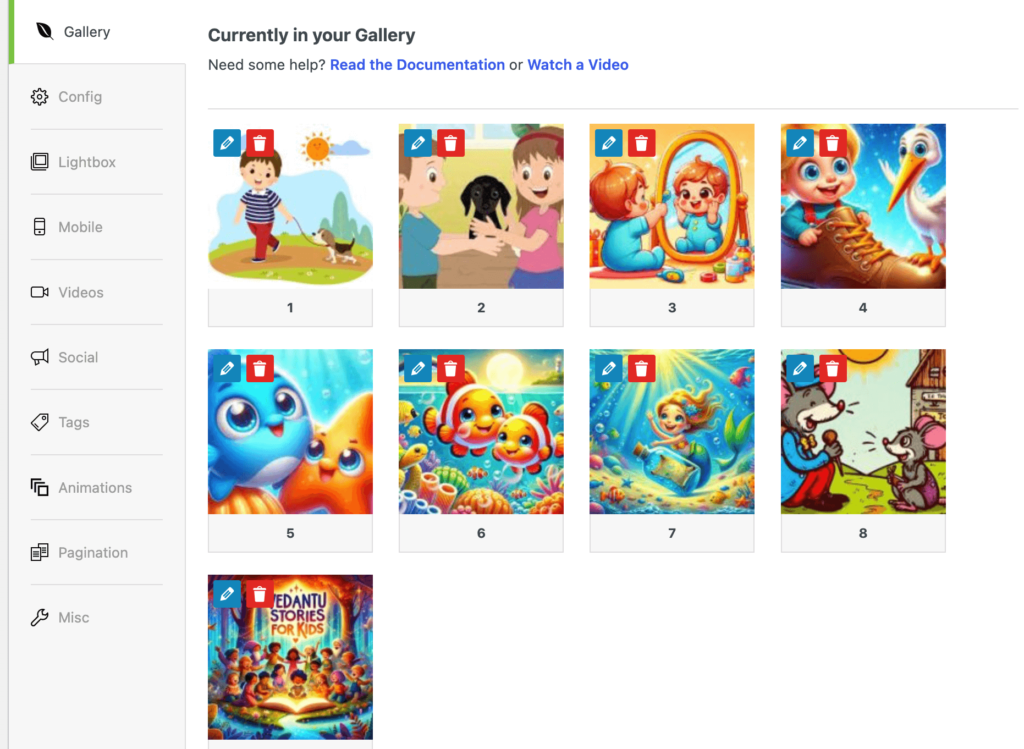
Envira Gallery provides a variety of configuration options to make your gallery more attractive and optimized. Such as:
- Offers a drag-and-drop gallery builder to upload and arrange images
- Provides various layout options such as grid, masonry, square, blogroll, and more.
- Gives the lightbox feature to display images in a fullscreen overlay
- Adds buttons to allow visitors to share images on social media platforms.
- Add custom watermarks to protect your images from unauthorized use.
- Add tags to filter images within galleries.
- Displays large numbers of images with options for pagination or infinite scrolling.
- Includes features like lazy loading to ensure galleries load quickly.
- Optimizes your galleries with features like image alt text for better search engine visibility.
- Organize galleries into albums if you have multiple collections.
These features make it easy to create, manage, and display beautiful and functional galleries on your WordPress site.
Step 4: Insert Gallery into Post or Page
Once you’ve configured your gallery, you'll see a shortcode generated by Envira Gallery. Copy this shortcode.
Go to the post or page where you want to display your gallery and paste the shortcode into the content editor where you want the gallery to appear.

Click “Publish” or “Update” to save your changes.
Envira Gallery also offers additional add-ons and features, such as:
- Social Sharing: Allow users to share images on social media.
- Pagination: Break large galleries into multiple pages.
- WooCommerce Integration: Create galleries for product showcases.
Explore these features to further enhance your galleries.
If you're managing a professional site that requires more functionality and responsiveness in your galleries, you should consider upgrading to Envira Premium. It gives you access to advanced features not available in the free version, such as creating video galleries, more customization options, and improved gallery display settings.
These are the 2 methods to create an image gallery in WordPress.
High-quality images are a game-changer for ecommerce! 🚀 Here are 6 product photography best practices you should follow to boost your eCommerce conversion rates.
Essential Tips for Enhancing Your Image Gallery
Before creating an image gallery, there are several key factors to consider to ensure it meets your needs and delivers an optimal experience for your audience.
Here's a comprehensive list of considerations:
- Optimize Image Quality and Size: Use high-quality images but compress them to ensure fast loading times without sacrificing too much quality.
- Use Consistent Image Dimensions: Maintain uniform image sizes and aspect ratios for a polished, professional look.
- Leverage Responsive Design: Ensure your gallery is mobile-friendly and looks great on all devices by using responsive design techniques.
- Organize with Albums and Tags: Categorize images into albums and use tags to make navigation easier for visitors.
- Implement a Lightbox Feature: Allow users to view images in a fullscreen lightbox for a better viewing experience.
- Choose the Right Layout: Select a layout (grid, masonry, etc.) that best fits your content and design preferences.
- Use Pagination or Infinite Scroll: Depending on the number of images, choose between pagination or infinite scrolling to enhance the user experience.
- Add Watermarks for Protection: Protect your images from unauthorized use by adding watermarks.
- Optimize for SEO: Use SEO-friendly practices like descriptive filenames, alt text, and captions to help your images rank better in search engines.
- Offer Download Options: If appropriate, provide options for users to download images or view high-resolution versions
Relevant images are an integral part of any website. But a wrong presentation can ruin your site's reputation as well. So, always be careful to insert an image gallery into your WordPress site.
Conclusion
A gallery with a collection of high-quality images reflects the professionalism and expertise of the creator or brand. It can significantly enhance audience engagement and convey artistic excellence.
No matter in which industry you are, an image gallery can be a powerful way to showcase and enhance your brand's reputation.
For example, if you are in the real estate business, you can use an image gallery to showcase your property. Use the gallery to display the property's main rooms, exterior shots, and unique features. This helps buyers get a comprehensive view of the property before visiting in person.
Do you need help to enlarge an image without losing quality? Check this guide and get some actionable tips.
Are you planning to insert an image gallery in your WordPress site? Do share your views with us in the comment section section below.