
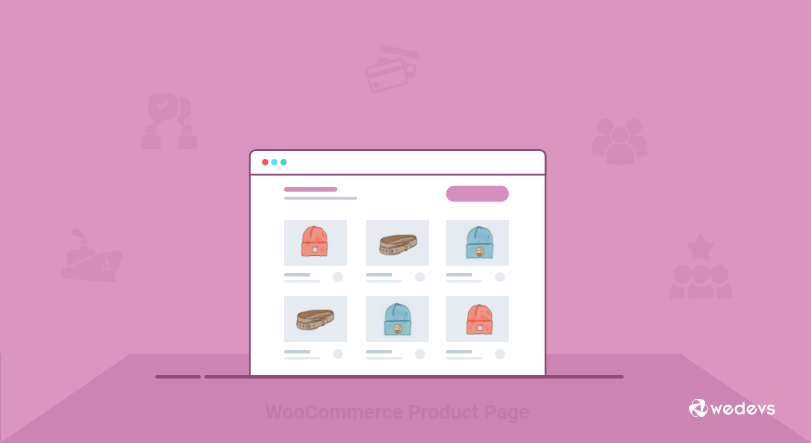
A Definite Guide to WooCommerce Frontend Product Submission for 2026
Looking to enable the WooCommerce frontend product submission feature on your marketplace? The WP User Frontend plugin allows third-party suppliers or vendors to add digital products from the front end.
However, if you're using Dokan to build your marketplace, you will get frontend features for vendors by default. Still, you can extend or personalize the design and customization options with WP User Frontend.
Today we'll walk you through the process of how to create interactive forms using WP User Frontend so that registered members can easily upload products from the frontend. That way you don't need to share your backend access.
Reasons You Should Allow WooCommerce Frontend Product Submission for Your Marketplace
As an admin, you may want to bring certain parts or features of your eCommerce store to the frontend. Unfortunately, with WooCommerce you can't add and manage products, orders, coupons, etc from the frontend.
But you can easily do it with WP User Frontend plugin. It enables you to create a frontend interface so users can post and manage products on your WooCommerce powered website.
There are several reasons you should allow your vendors to upload products from the front end. Such as-
Smooth User Experience
The WordPress backend can be a little complicated for non-technical vendors. You may have added some features that only tech-savvy people can handle. Instead, it would be better to include a frontend submission form for uploading products.
Manage User Role
With the shop manager role, product vendors get access to all the settings within WooCommerce. But as a marketplace owner, your desire might be to keep some features restricted for some users. Therefore, you need a frontend solution for your online store.
Read More: How to Add Custom User Roles on Your WordPress Site.
Form Customization Options
On the backend, users will get the default product fields to upload products to their stores. Unfortunately, you can't change these backend product fields. But with a frontend plugin, you can easily create an interactive product form and display the required fields according to your business needs.
As the competition grows day by day, in order to run a successful eCommerce site, you must keep it very simple. For the marketplace, however, the situation is a little bit more tricky. As you have to take care of both your customer experience as well as effortless vendors transaction. Hence, you should use WP User Frontend to make the process easier, minimize the extra expense, and avail the frontend posting.
Read More: Why and How to add Frontend Submission for WooCommerce.
How to Upload Products to WooCommerce Frontend using WP User Frontend

WP User Frontend is a powerful front-end posting plugin out there. It has dynamic form-building capabilities with custom post types. Using its custom taxonomy and meta key feature you can easily establish a frontend interface to post and manage products of your WooCommerce powered site.
In the below tutorial, you will learn how to upload WooCommerce products from frontend using WP User Frontend Pro-
Prerequisites:
- WordPress (assuming you already have it installed)
- WP User Frontend Pro (Installed and activated)
- WooCommerce Plugin (Installed and activated)
- Post Meta Inspector (optional for additional fields)
After activating WPUF and WooCommerce, WPUF will automatically capture the taxonomy, metas, and post types from WooCommerce. Now if you're not comfortable with the default design of the backend WooCommerce form, it's time to break the monotony by creating frontend forms to upload products.
You can create many useful functions by using WPUF forms and add the forms to the pages simply using shortcodes.

You'll need 3 pages before letting your vendors/users start uploading products by using the WPUF WooCommerce form-
- One Upload page: The main page from where the user will create the product.
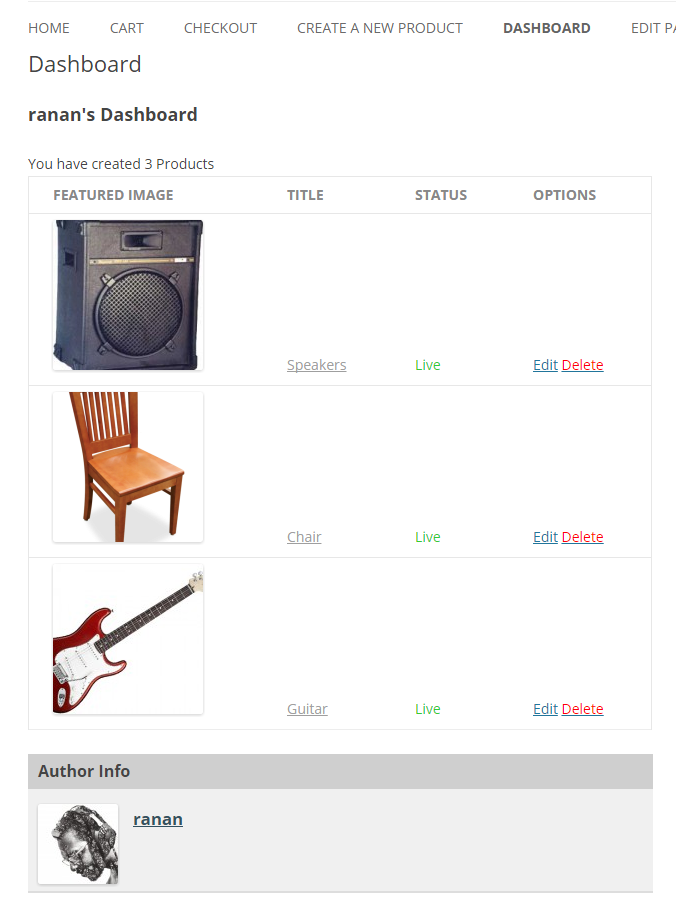
- One Dashboard Page: Vendors can see all the products they've submitted through the form.
- One Editing page: Users will use this page to edit or update the uploaded product if the admin allows the user to.
Today you'll learn to build all these pages using WP User Frontend.
We'll divide the tutorial into two parts:
- Part1: Creating WooCommerce Product Upload Page
- Part2: Creating Other Required Pages for Managing WooCommerce Products
Part 1: Creating WooCommerce Product Upload Page
Firstly, we have to create a WooCommerce product form. Previously, users need to build the form manually. But the new WP User Frontend comes with many advanced features and functionalities to extend the user experience. Just follow the below steps to create WooCommerce product forms and customize the fields-
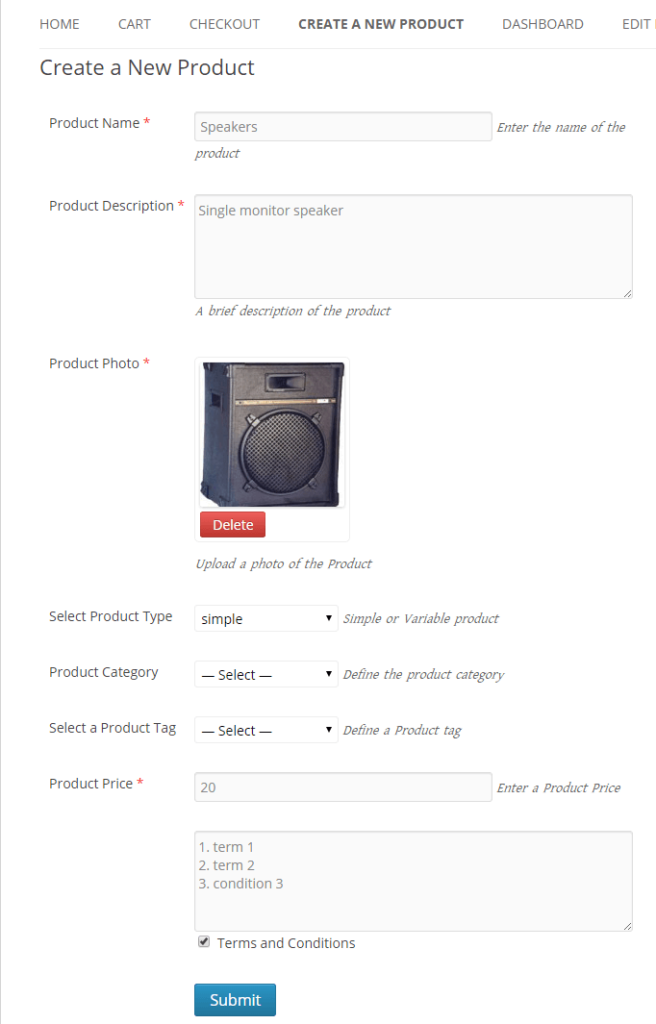
Step1: Design Frontend WooCommerce Product Uploading Form
- Navigate to – WP Dashboard → User Frontend → Post Forms → Add Forms
- Click on the WooCommerce Product template. It will automatically create a WC product form with all your required fields. Later you can delete or edit any field as per your requirement.
- Next, go to the Settings tab and check disable subscription. [Skip this option if you want this form visible for your subscription packs]
- Click on the form id and copy the form shortcode.
- Now, paste the shortcode to a new page/post.
- Once you've done you'll get your own frontend WC product uploading form.
Check this video to learn the process in more detail-
Important Note: You can't create variable products from frontend with WP User Frontend Pro at this time.
Step 2: Adding Customized Field Types to Your WooCommerce Form
Let's show you how to include custom form fields so your users can upload Image Gallery, Downloadable Products, etc.
1. Image Gallery
Previously, users had to include custom code to get an image gallery for WooCommerce product upload page. But in the latest version of WP User Frontend, you'll find the field for image gallery by default on the product uploading form. Therefore, you need not do anything extra.
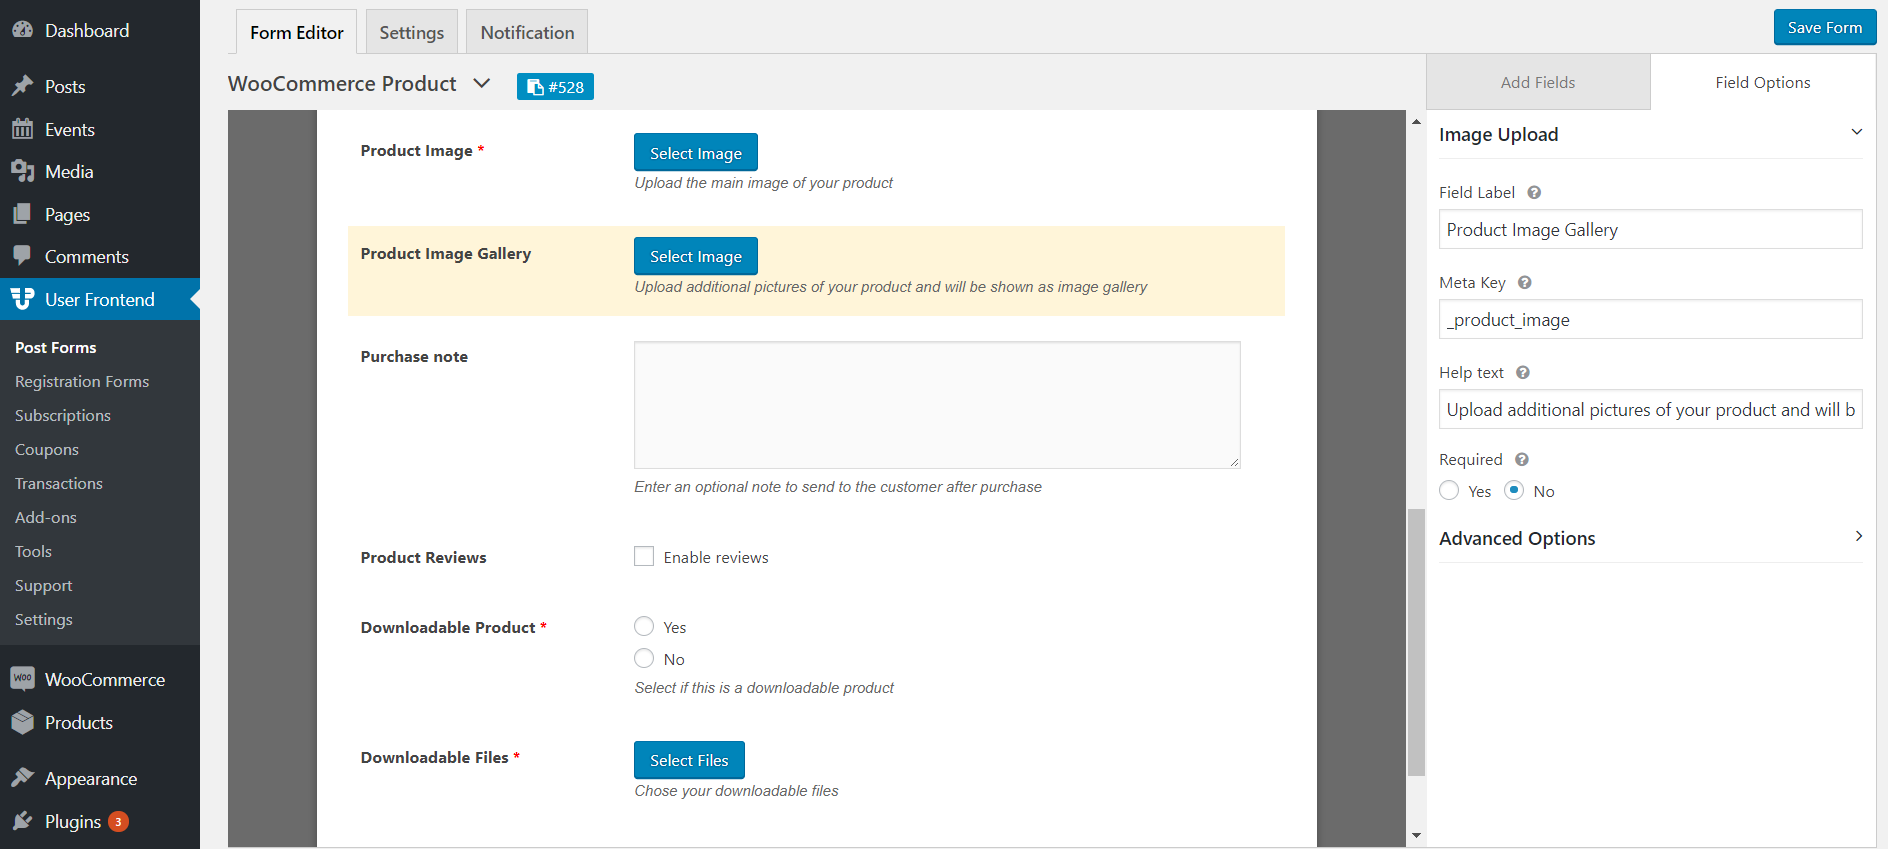
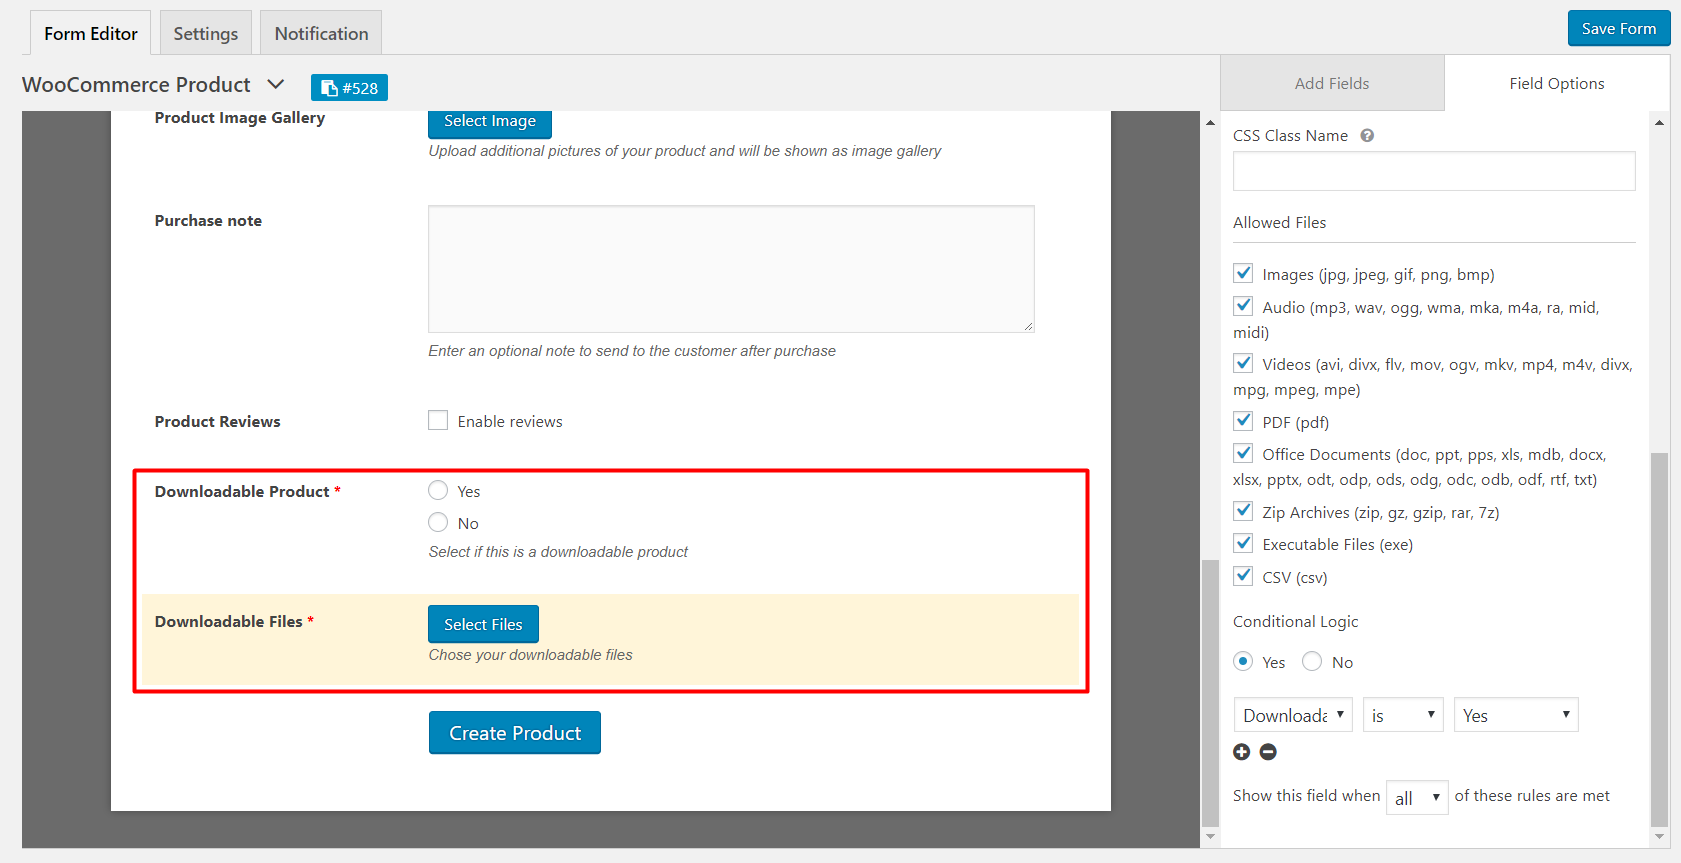
2. Downloadable Products
The new WooCommerce product form template also has fields for downloadable products. So, you can also allow your users to upload downloadable products with the product creation form as well. From the right side customization pallet, you can select the file types for downloadable products.
3. Custom Taxonomies
You'll also get the options to add custom taxonomies for WooCommerce such as- product_type, product_cat, product_tag, product_shipping_class. Add product type (simple, variation, downloadable etc), category, tag, and shipping class if you want the user to set those fields out while uploading.
Step 3: Save the Changes and Check The Final Look
Once you are done with adding fields to the form hit save and copy the shortcode for the form. Design your page where you want to show the upload form for your users and paste the code. Now check the main upload page from where the user will create the product.
Part 2: Creating the Other Required Pages for Managing WooCommerce Products
In this part, we'll create other two required pages that a vendor will need to manage the products of his/her shop.
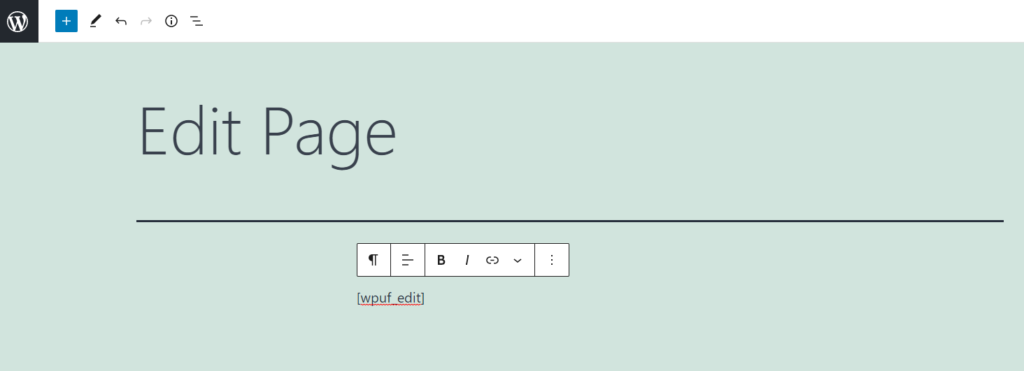
Step 1: Creating the Edit and Dashboard Pages
First, navigate to Dashboard → Pages → Add new page
Next, two new pages are named Dashboard and Edit. Now simply paste the shortcodes in them.
For Dashboard page use [wpuf_dashboard post_type="product"]

For Edit page use [wpuf_edit]
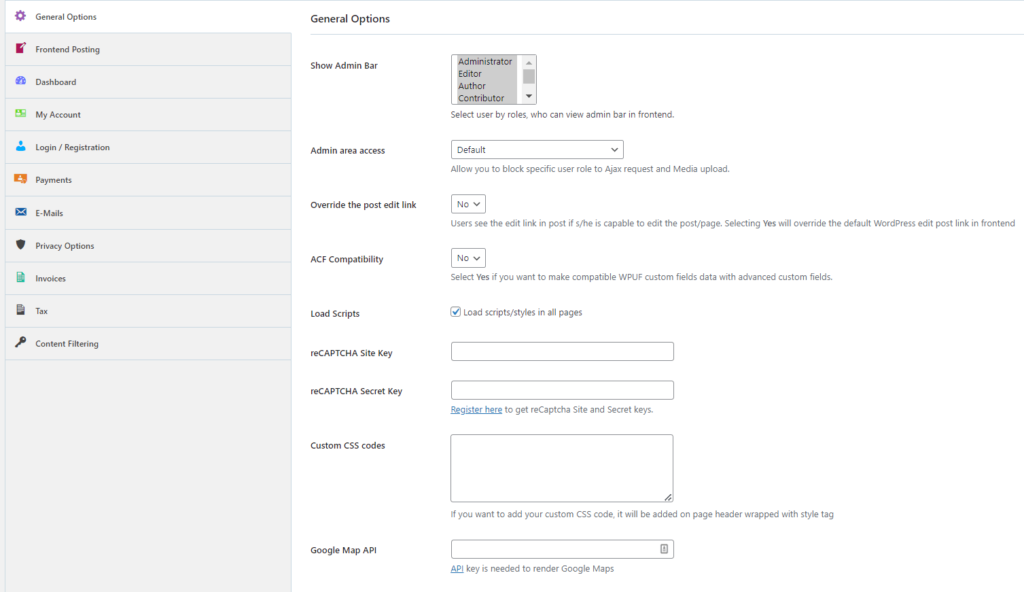
After creating the pages, go to WPUF → Settings → General Options. Here you'll get several options to set the role and restrict any facility for your users. Based on your requirements and business policy select the options wisely.
Step 2: Check the Final Look
You've successfully created the WPUF WooCommerce uploading form and other required pages successfully. It's time to test if it is working as per the planning. Load the page and upload a demo product with product name, description and image or any other mandatory fields.
After submission, go to wp-admin → products. Check now that the product you created and all the information has been uploaded properly.
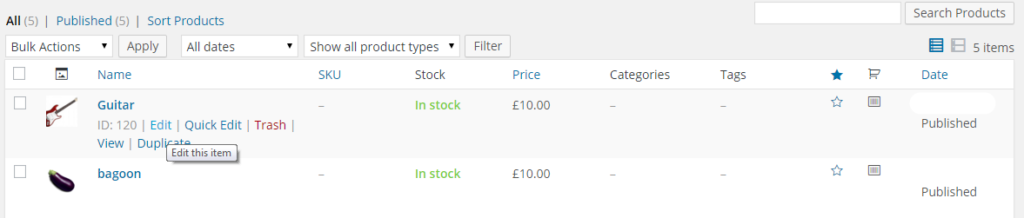
Hopefully, you'll find everything working great. Now click on the Edit button and go to the Edit page from the Dashboard page.
This way, you can easily enable your multivendor marketplace for Frontend Submissions. To extend the facility there is also an option for applying conditional logic. It helps you enable or disable menu items considering the eligibility of a user whether he is allowed to upload products or not. But this will require some coding with your theme.
Check the full documentation here!
Enable WooCommerce Frontend Product Submission & Upgrade Your Vendor Management System
Frontend Submissions provides you with a fully-functional system that elevates customers' experience in your digital marketplace.
This feature is crucial for a multi-vendor marketplace. As a large number of vendors come to host their products in your marketplace, they must require a smooth product submission process to upload and show their products. As an admin, your job is to make the entire system effortless. Moreover, sharing backend access may put your store's confidential information at risk.
Using the duo of Dokan + WP User Frontend you can easily establish an environment where an entrepreneur can easily set up his/her digital business with extended functionalities as well.