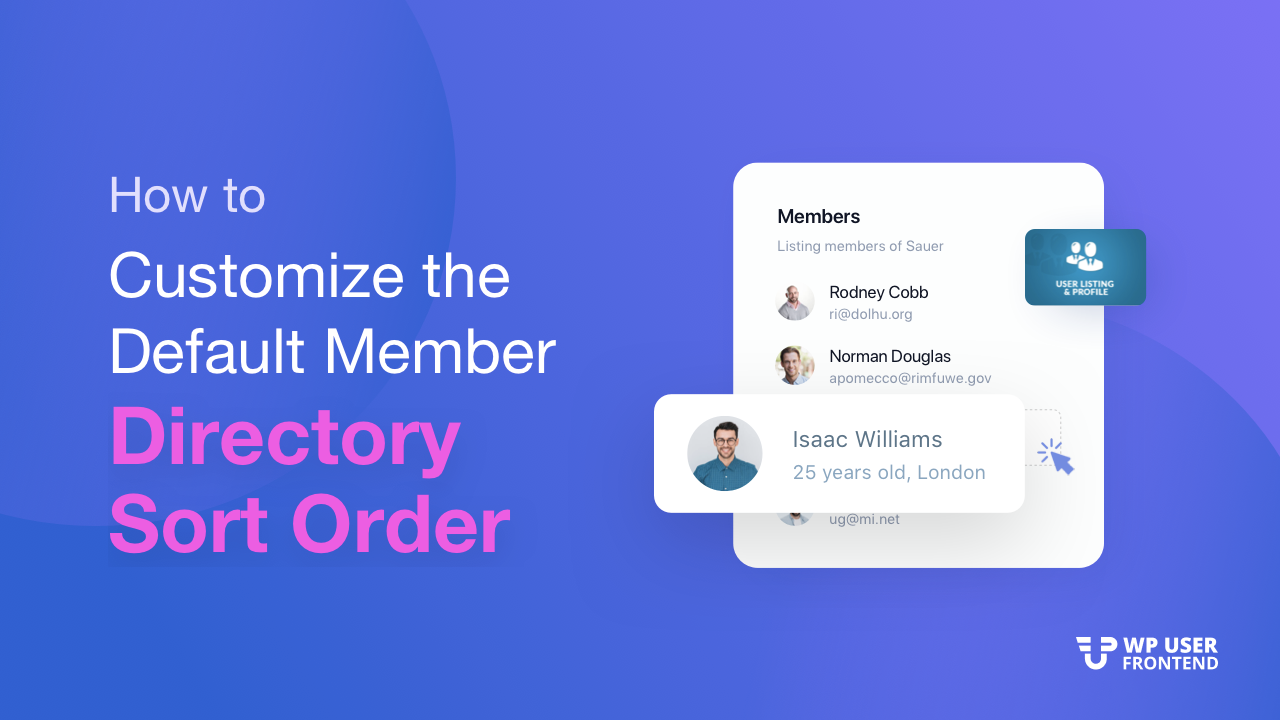
How to Customize the Default WordPress Member Directory Sort Order
A membership site is your perfect solution for creating fresh and consistent content. It not only provides value for the contents but it's also super-convenient for the customers. However, the benefits don't lie only on customers' end, rather it provides significant benefits that can revolutionize your lifestyle, and value as a business owner.
Interestingly, the membership sites built with WordPress have one thing in common – the default WordPress member directory. Using it anyone can search or filter to find a particular member just by clicking through to read their full profile. However, users aren't able to customize the default member directory sort order.
WP User Frontend's User Directory Module can easily do the job for you. This module can customize the default member directory by creating an individual member listing page. And this page will list all of your members with their profile details such as an avatar, with a link to their Member Profile page.
We are going to show you how you can customize the default WordPress member directory sort order.
How The WP User Frontend User Directory Module Works
WP User Frontend has been one of the popular frontend solution plugins in the WordPress industry for quite some time now. And 30000+ active installations reflect the trust of the users on this plugin. The available features and amazing modules of this plugin lets you easily create a membership site.
The User Directory module helps to reorder the default WordPress Member Directory. You can easily create a member directory and user profile as you want to. This add-on will allow you to show user listing by role at the front-end by using a simple shortcode.
You can use this add-on to create a table of lists that shows all the users of the site. It is also customizable so you can set what fields to show and which roles you want to see. Also, you may want to add additional fields from the backend of the site to be shown on the front-end user listing.
Now, lets see how you can customize the default Member Directory sort order using this module.
How to Customize Default WordPress Member Directory
We will go through all the details of installing and how you can use the module to customize your default WordPress member directory.
Pre-requirements
Before going ahead, you need to install this plugins on your WordPress site:
- WP User Frontend
- WP User Frontend Pro
1. Installing User Directory Module
- First of all, you need to navigate to your WP dashboard->User Frontend->Modules. Find User Directory and turn on the toggle button on the top right to activate this module.
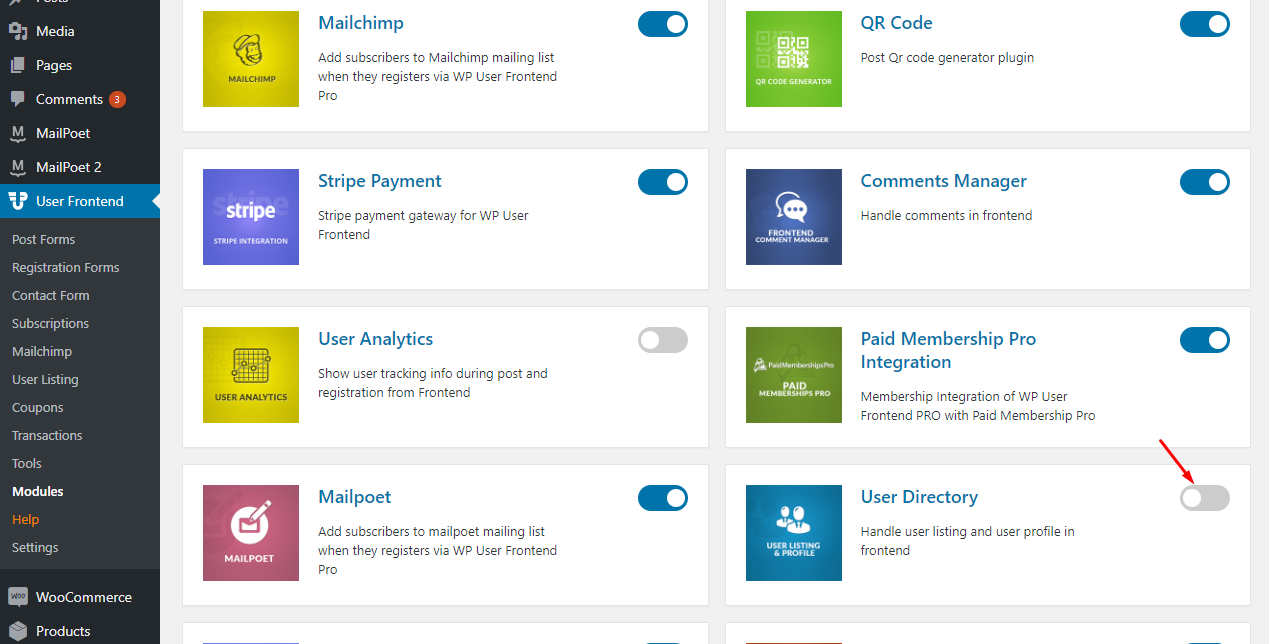
- When you install the User Listing & Profile add-on, you will notice a User Listing sub-menu under the User Frontend menu in your WordPress dashboard. See the image below for an overview of what each section does.
2. User Listing Menu
- This is where you will find the settings of User Listing & Profiles add-on.
3. Enable Avatar
- This checkbox enables/disables the avatars of the users on the User Listing page. If you turn it off, users’ avatars will not be displayed. By default, it is turned on so that user avatars show up.
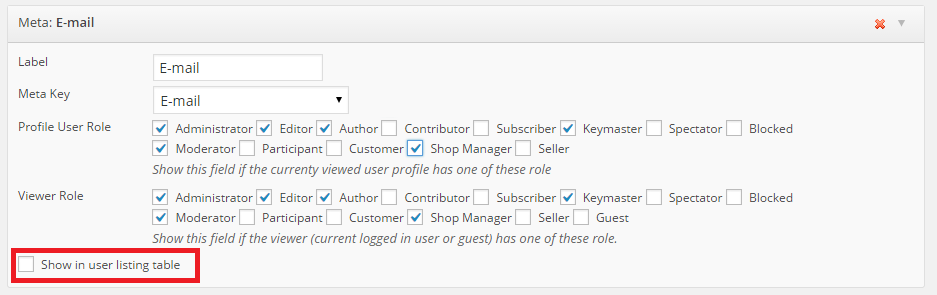
4. Fields
You will find some fields. These are the fields that will be associated with each user and will be shown on the user profile.
When on the User Listing page, users can click on the View Profile link to see a full profile of the user. Every field from this page will be shown on the user profile. However, you can choose which fields to show in the User Listing table and which fields to hide from the table.
As you can see in the screenshot below, turning this checkbox off makes this particular field hidden from the User Listing table. Moreover, you can also choose the roles that are needed to be able to view the profile field on the front-end. The roles are customizable on a per-field basis, so you can really customize them to your needs.
5. Add New Fields
- If you want to add more fields than the default ones, you can simply click on any of these buttons and you’ll be able to add as many custom fields as you want.
6. Settings
Admins can now select among different built-in design layouts for all user-profiles and user listings.
- Navigate to WPDashboard->User Frontend->Settings.
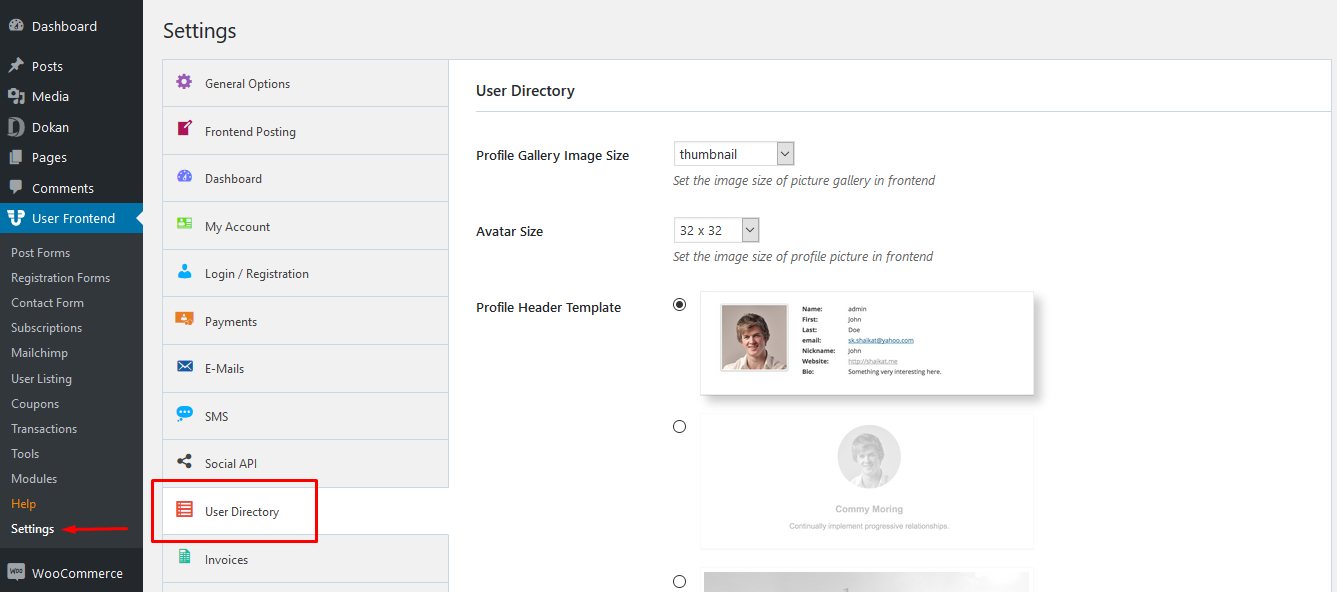
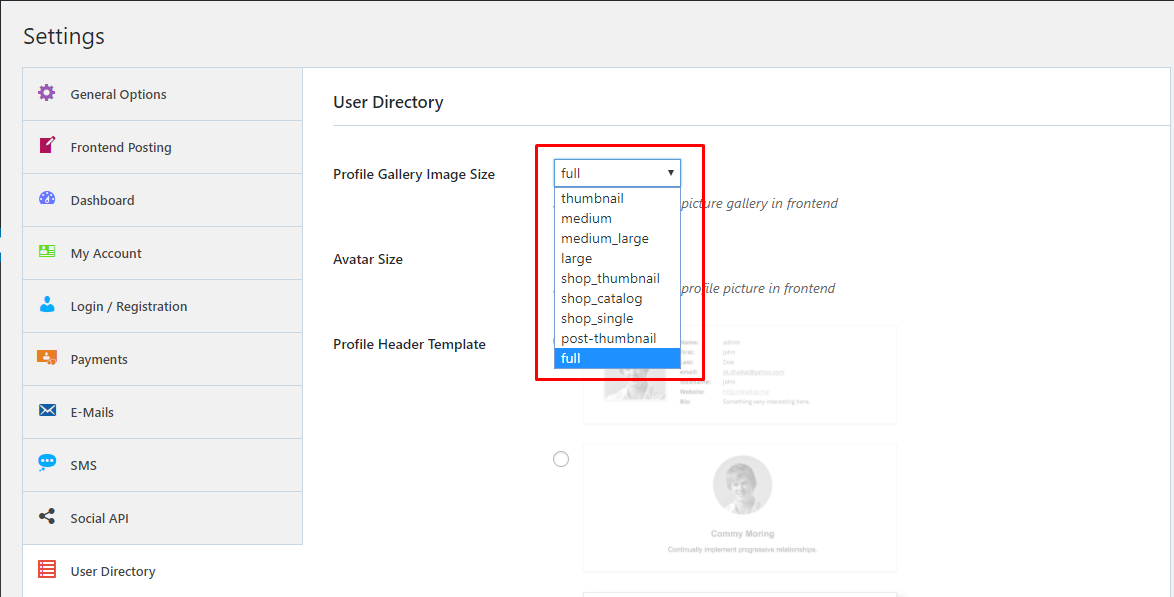
- You can easily change the Profile Gallery Image Size. Just choose the size from the dropdown as shown below.
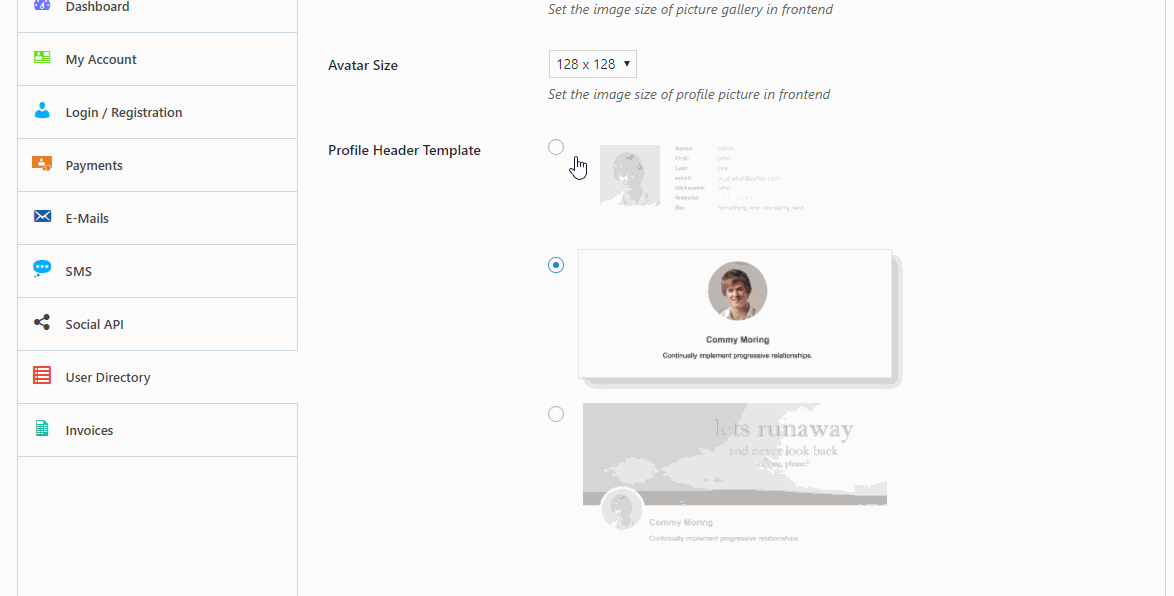
- Also, you can change the Avatar Size, select a size from the dropdown.
- There is an option to change the Profile Header Template. You need to choose one from the 3 predefined templates given.
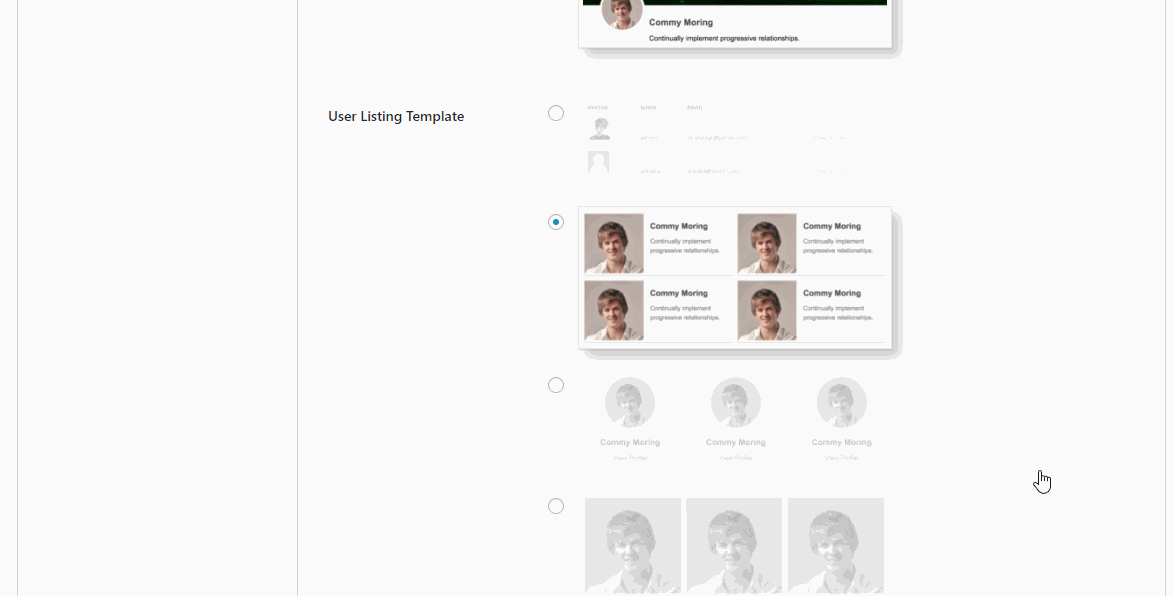
- Now on to the User Listing Template, choose one from the 6 predefined templates given.
7. Show the List
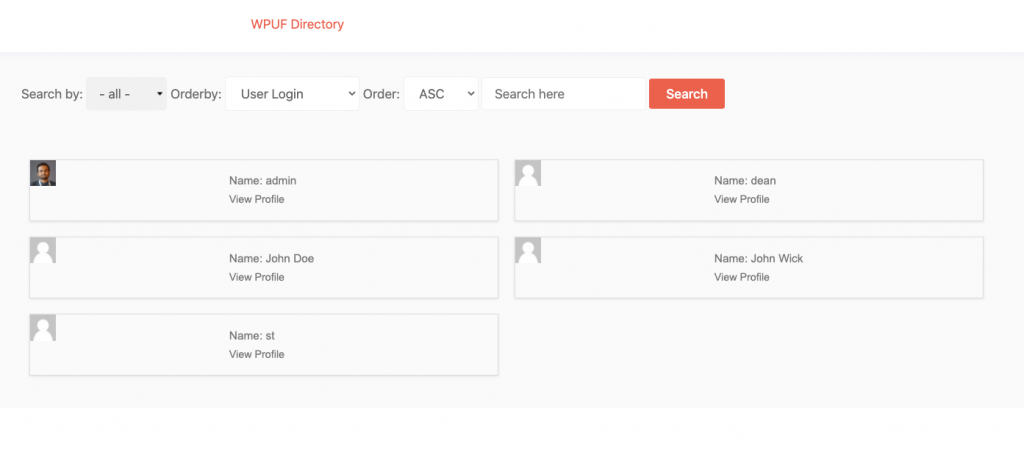
- To show the list on the front-end of your site, first create a new page, give it a title of your choice, and then add the following shortcode to the page body:
[wpuf_user_listing]Then publish the page. The User Listing table will be shown on this page.
8. Customize the Default View
- You can customize the default view of the member directory. There are two ways,
a. Show All The User
You can also control who can see what type of users there are on your WordPress site. According to the user type such as
- Administrator
- Author
- Editor
- Subscribers
- Customers
- Navigate to WP Admin → Post → The page you used the User Directory shortcode in and paste the following code.
[wpuf_user_listing role=”all”]Note: This code will show all the users on your site to everyone.
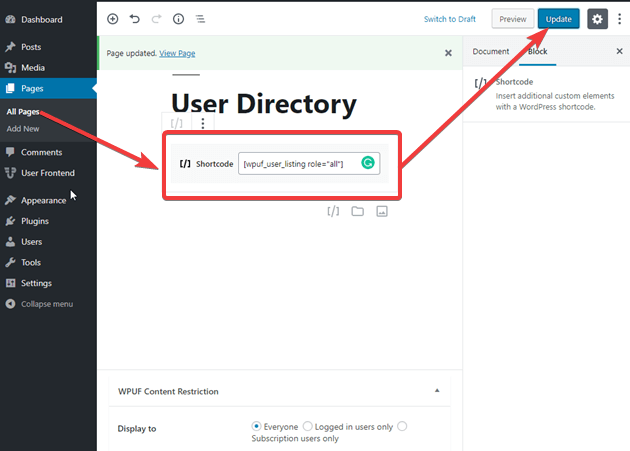
Now if you navigate the frontend of your site and go to the user listing page as another user other than as an admin.
The User Directory will show everyone in the list on the front end.
b. Show Certain Users
- As an admin, you can also limit a certain category of users from the directory list. This will depend on the admin configuration.
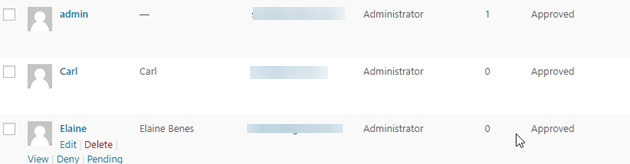
For example here in this user list Elaine Benes is an administrator.
If you enter the following shortcode in place of the previous one it will limit certain viewing capabilities.
[wpuf_user_listing roles_exclude=”Administrator,Customer”]Note: In this shortcode if you can change the roles that will be excluded. Such as vendors, editors, subscribers, etc.
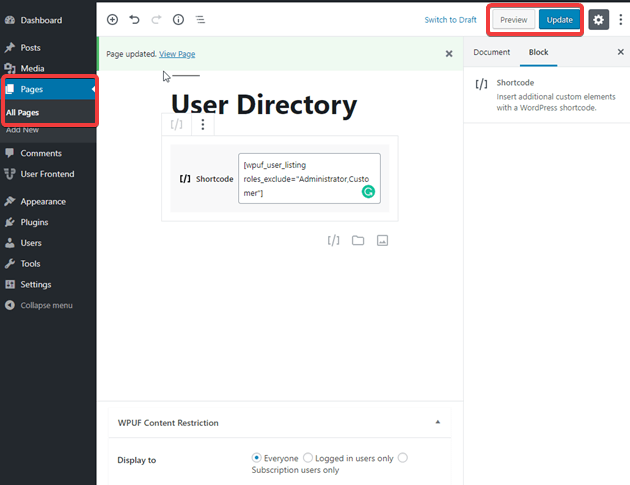
The frontend view will exclude administrator and Customer from the User Directory. (According to the shortcode)
- In the same way, you can limit the number that will be shown on one page with the code below.
[wpuf_user_listing roles_exclude=”Administrator,Customer” per_page=”10″]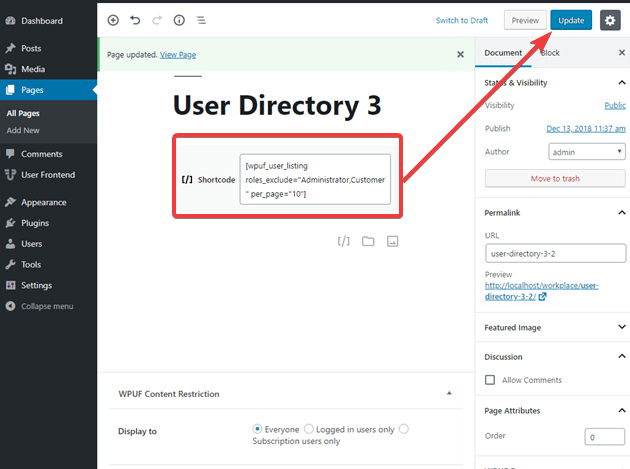
So, this is how you can easily customize the default sort order of the default WordPress member directory using the amazing User Directory module of WP User Frontend.
You can check out the video below, to get more insights.
Create Your Own WordPress Member Directory
WordPress is anything but flexible. As it is an open-source platform, customization is not uncommon. All you need is the right resources and you can design your WordPress site as you like.
At first glance, it may seem like a complicated process to customize the WordPress member directory sort order. But, here we have given you the right ways and resources that will make your job easier. Not only you can create the perfect member directory but also customize your own way. And if you have any queries, feel free to contact us.