


How to Migrate Your WordPress Site to Another Host without Losing Any Data
Looking to learn how to migrate WordPress site using Duplicator plugin? You have come to the right place.
WordPress site migration can be a little bit tricky for regular users. Because if you mess it up then your website may lose important data and also face downtime. This can hamper your site rankings as well.
Well, it sounds like no one should go through with the process of migrating their site. But, that's not the case. If you follow the right guide and do the steps accurately, then you don't have to worry.
In this guide, we will show you how to migrate a WordPress site using the Duplicator plugin without losing any important data.
WordPress Duplicator plugin is one of the most popular migration plugins as it helps safely move any WordPress site to another server without losing SEO. We will talk more about this plugin later in the article.
Now, let's see the steps to migrate a WordPress site using the duplicator plugin-
- Install & Activate the WordPress Duplicator Plugin
- Get Ready to Export the Site by Creating a New Package
- Create a New Database on Your Hosting Server
- Upload and Install Your Duplicator Package to Your New Host
- Redirect Your Domain to New Host
Now let's get into the details!
Step 1: Install & Activate the WordPress Duplicator Plugin
First and foremost, you have to install and activate the WordPress duplicator plugin. Log in to your WordPress dashboard and go to Plugins–> Add New. In the search box, type WordPress Duplicator Plugin. Install and activate the plugin.

After successful activation, you will find the Duplicator on the left-hand side of your WordPress dashboard.
Step 2: Get Ready to Export the Site by Creating a New Package
You can create a package of your whole WordPress site using the Duplicator plugin to move your site quite easily.
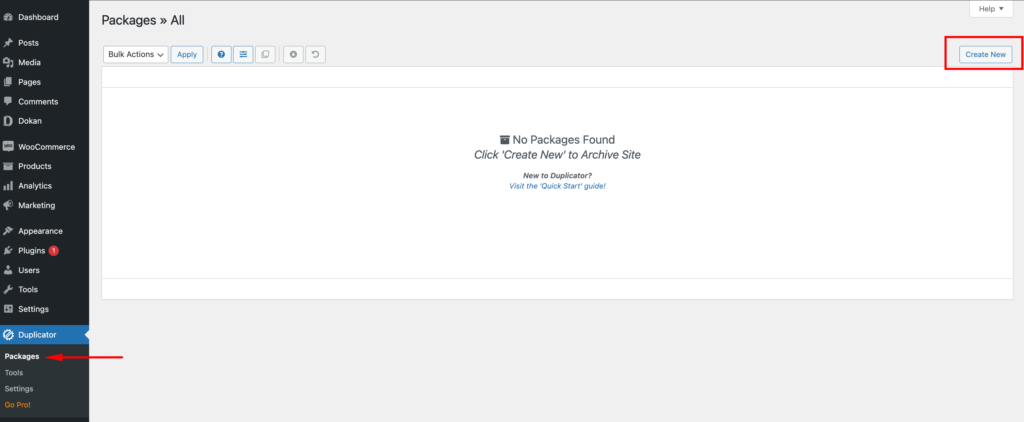
To create a package, go to the Duplicator menu and select Packages. Then click on the Create New button to build a new package.
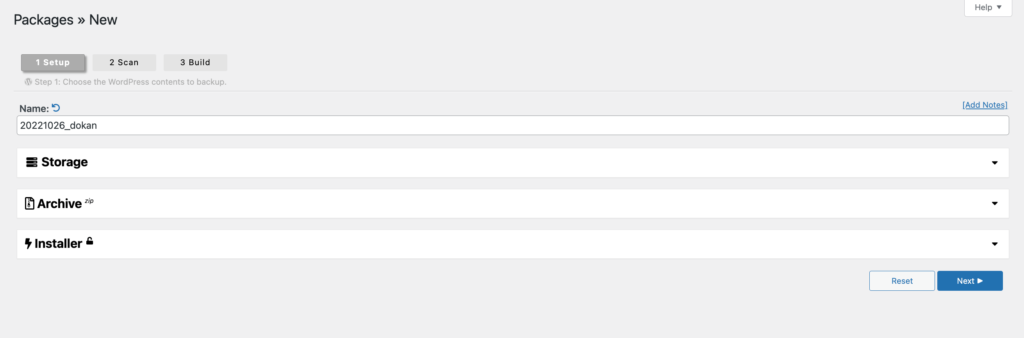
a) Setup Package
Now, you have to set up the package. Click on the Next button to start setup.
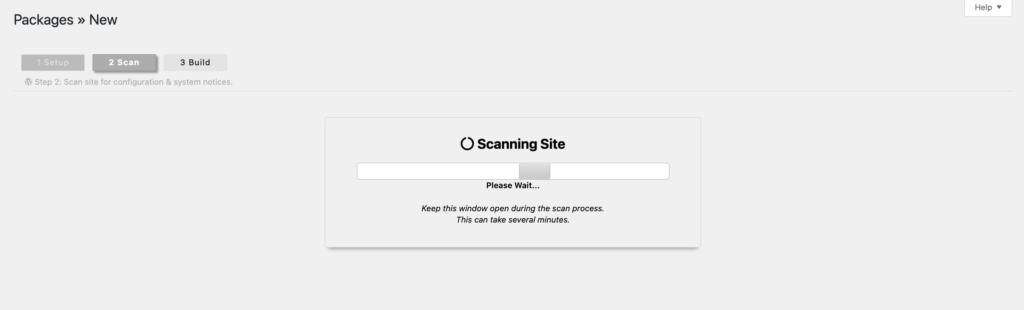
b) Scan Your Website
After you have set up your site, next the system will scan your site.
Checkmark Yes to continue with the build process.
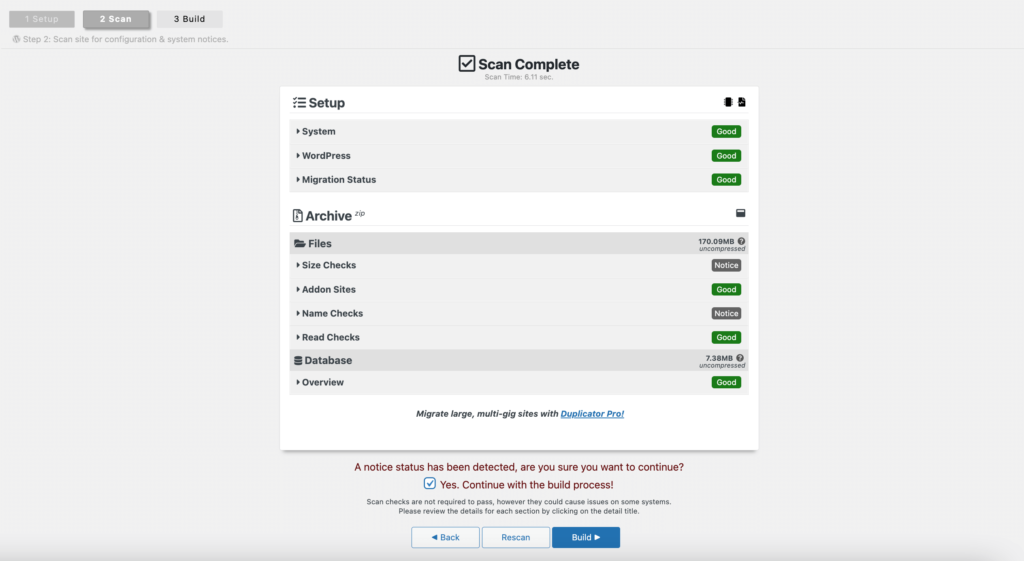
Click the Build button.
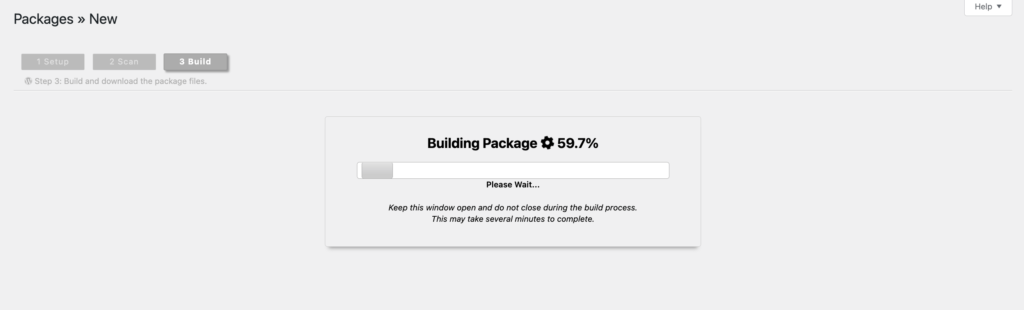
Then you will see that the system is building your package.
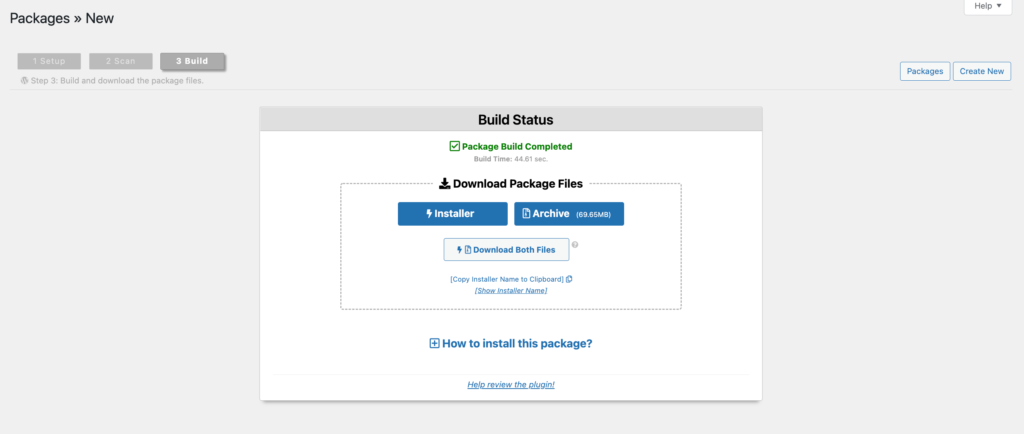
c) Package Build Complete
After the package build is complete, you will get two files, Installer and Archive. You need to download both files on your desktop.
You are done with the backup of your site. Now it is time to move on to the migration part.
Step 3: Create a New Database on Your Hosting Server
In order to place your WordPress files package, you need to create a new database on the hosting server you want to migrate your site to. This is easily done through cPanel. Because it is used by most popular web hosting services.
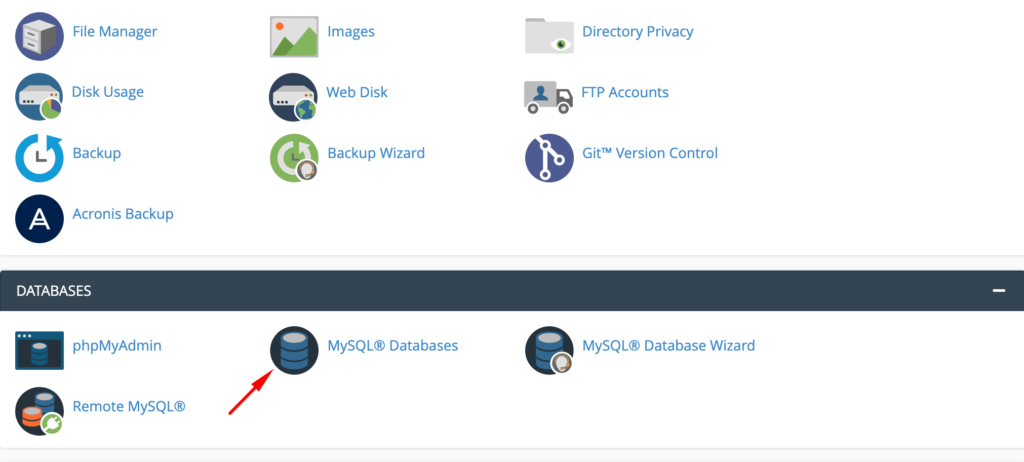
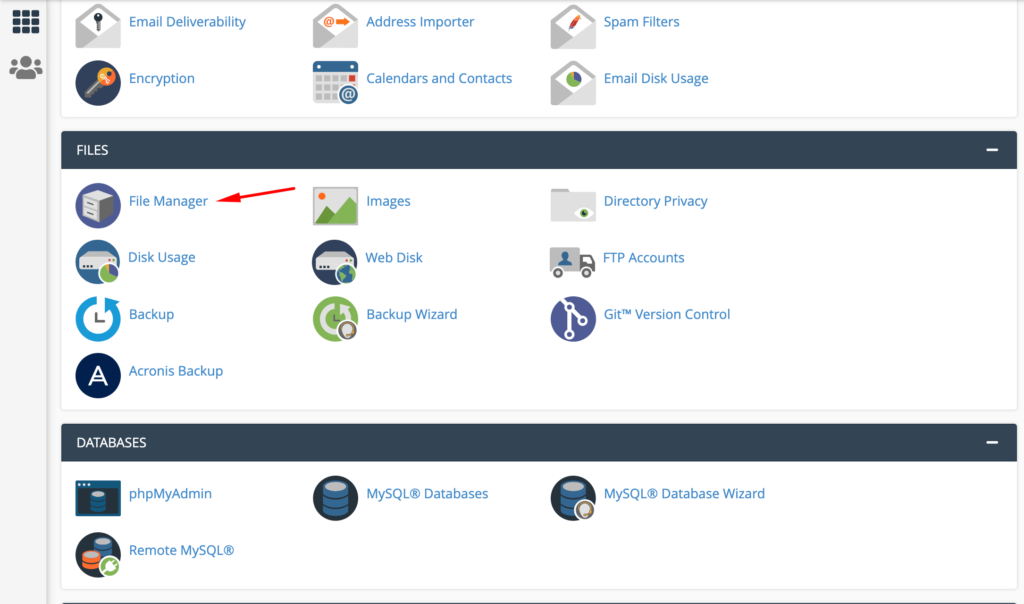
To create a database, log in to your cPanel. From the main menu, select MySQL Databases under databases.
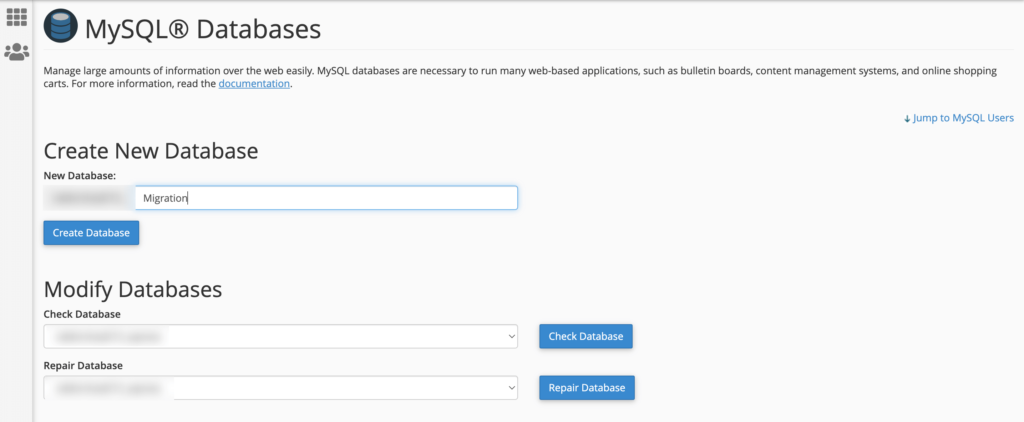
Give your database a new name, remember this name for later use.
You need to add yourself as a new user to modify the database. Under Add a New User, enter a username and password, then click Create a User. Remember these credentials for later. Also, choose the user and database you just created from the dropdowns, then click Add to add yourself to the database.
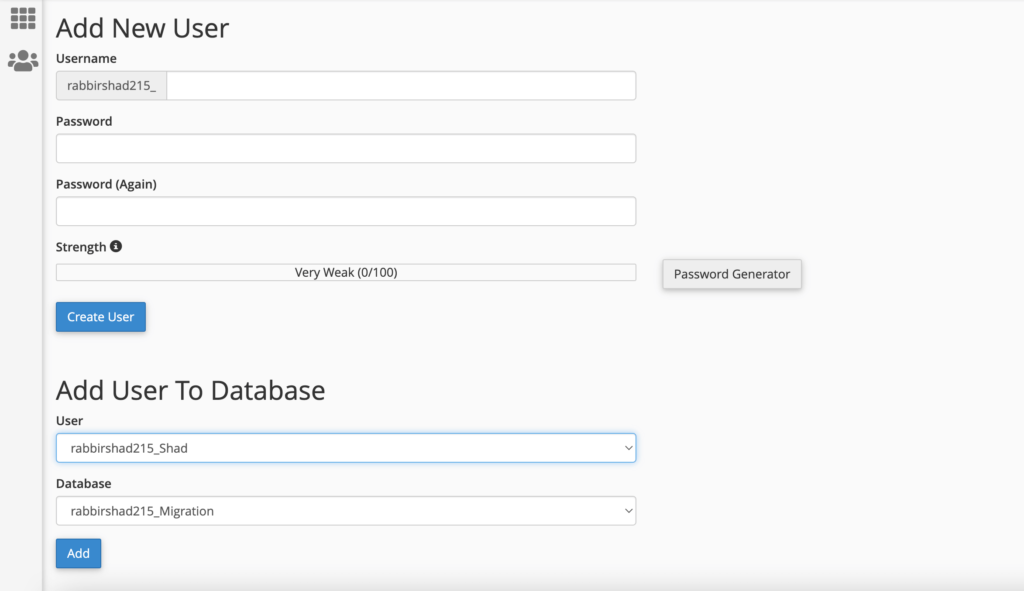
Lastly, in the Manage User Privileges screen, you need to check the All Privileges box to give yourself full access to the database, then click Make Changes.

Step 4: Upload and Install Your Duplicator Package to Your New Host
You are ready to run the installer. And with the database setup, you can upload your duplicator file. Moreover, you don't need to install WordPress on your new host first. Duplicator will take care of that.
Go back to your cPanel. Upload your website backup and installer file to your root directory/file manager.
Now, open your browser with your server running and type http://www.example.com/installer.php. Replace example.com with your domain name. You will see this screen.
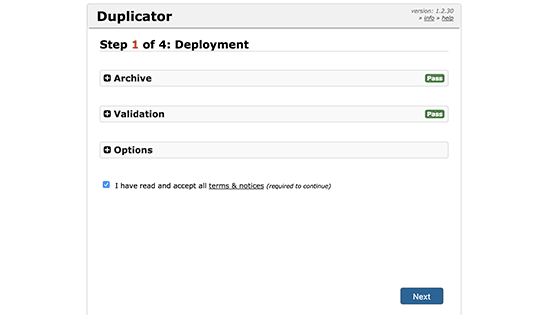
Now, the installer will run a few tests and make sure the system is ok. You need to check the terms and conditions checkbox and click on the Next button to continue.
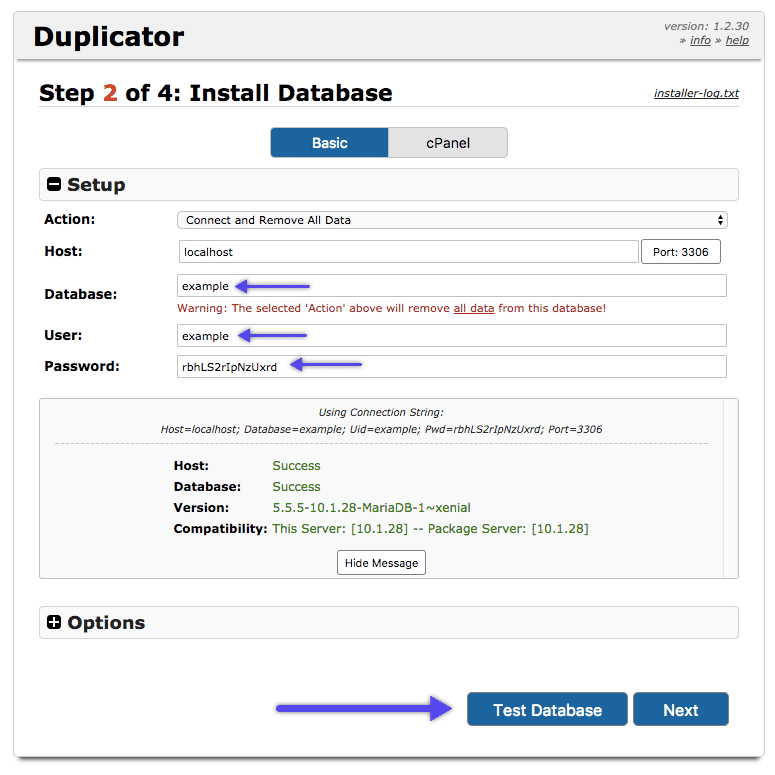
In the next step, you need to enter your MySQL host, database name, username, and password.
Keep your host as the local host. After that, you need to enter the details of the database you created in the previous step. You need to hit the Test Database button to see if you have entered the right information. If Duplicator is able to connect, then you will see a string starting with Pass. Otherwise, you will see the database connection error details.
You are almost there. In the third step, you have to update your site URL or path. If you are not changing your domain name, so you don't need to change anything. Click the next button to continue.
Lastly, the duplicator will run the final steps and then will show you the login button.
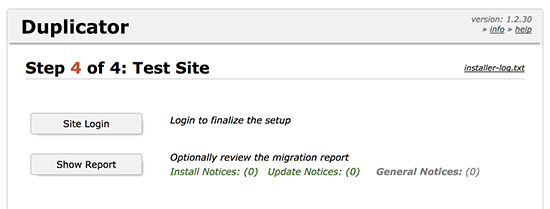
You can log in to our newly migrated site to check if everything is working perfectly.
Step 5: Redirect Your Domain to New Host
The WordPress Duplicator plugin has done its job successfully. Now you need to change your domain name or change your site address to direct users to your new host.
As your host will give you two nameservers, they will connect you to the server hosting your website. Find the two nameservers, and replace the nameservers of your old host with those from your new host. For this to take place, you need to wait a couple of days.
After that, you successfully migrated your WordPress site to a new site. Well done.
How to Prevent Downtime of Your Website While Migrating
After uploading both files to your new host, you need to access the installer.php file. For that, you need to type http://www.example.com/installer.php. Normally, this URL will take you to the old web host and you will see a 404 error.
This happens because your domain name is pointing to your old web host. To avoid this issue you have to change your domain nameservers and point them to the new hosting company. But in the meantime, your users will see a broken site.
There is a solution to access your new site temporarily with your computer, without affecting your new site. This is done with a host file on your computer.
The host file can be used to map domain names to specific IP addresses. In other words, it lets you trick your computer into thinking that the website is moved even though it’s not.
Making these changes will help you to access the files on your new host using your own domain name. Other users will still be accessing your site from the old host. This ensures 100% uptime.
Find the IP address of your new web host server from your cPanel. From Windows go to Programs » All Programs » Accessories, right-click on Notepad, and select Run as Administrator.
On the Notepad screen, go to File » Open and then navigate to the C:\Windows\System32\drivers\etc folder. From this folder, select the host file and open it.
If you’re using Mac, then you need to open the Terminal app and enter this command to edit the host's file:
sudo nano /private/etc/hosts
Now, enter your domain name “192.168.1.22 www.example.com”.Once you’re done, save your changes.
You can now access your files on the new host using your domain name on your computer.
Note: Undo the changes you made to the hosts' file after you have finished migration.
Benefits of Using WordPress Duplicator Plugin
You have learned how to migrate a WordPress site using the Duplicator plugin.
But why use the WordPress Duplicator plugin as there are more alternate plugins available in the repository?
WordPress Duplicator plugin helps WordPress users migrate, clone, or copy their websites with ease. This plugin is user-friendly. So, beginners won't have any problem using this plugin and creating a backup of their website.
Although it requires you to know more about database credentials and required information.
Here are the advantages of using the WordPress Duplicator Plugin:
- Migrate WordPress websites from one host to another
- Manual backups of WordPress websites
- Migrate a live site to localhost
- Website duplication
- Schedule backups
- Email notifications
- Connect to cPanel directly from the installer
- Database creation built into the installer
- Integrated transfer to cloud storage services such as Dropbox, Google Drive, and Amazon S3.
So, you can see why we have opted to use the WordPress Duplicator plugin to show the migration process.
When You Should Think About Migrating Your Website
There comes a moment when staying on the same hosting or platform slows your growth. Many site owners notice small problems at first. Pages take longer to load. Plugins stop working properly. The website goes down more often. These signs are easy to ignore, but they usually point to one thing. Your site has outgrown its current setup.
You should also think about migrating when you want stronger security. Some hosting providers do not offer enough protection. If your site keeps getting attacked or your server lacks basic security layers, moving to a safer environment is often the right call.
Another reason is scalability. Maybe your traffic has increased. Maybe you are running a store, and you need more power to handle orders. When the website feels slow during peak hours, a migration can give you the speed and stability you need.
Some people migrate because of better features. Modern hosts offer automatic backups, built-in caching, staging areas, and stronger uptime. If your current provider cannot give you these tools, it may be time for a switch.
Finally, cost is a big factor. If you’re paying more but getting less support or performance, a move to a better host can save you money in the long run.
In simple words, you should think about migrating when your website feels slow, unsafe, limited, or expensive to maintain. A new environment often brings better performance and peace of mind.
How to Migrate WordPress Site Using Duplicator Plugin – Common FAQ(s)
1. What Are Some Other Good WordPress Migrator Plugins?
Here are some popular WordPress Migrator plugins-
- WordPress Duplicator
- All-in-One WP Migration
- BackupBuddy
- UpdraftPlus WordPress Backup Plugin (UpdraftPlus Migrator)
- WP Migrate DB
- Migrate Guru
- VaultPress
- WP Clone
2. How do I manually duplicate a WordPress site?
In order to manually duplicate a WordPress site-
- Create a copy of your site files and download it to your computer.
- Upload the copy to a web server.
- Export your live site's database.
- Set up a database for your site's clone.
- Import your live site's database into the clone's database.
- Edit the wp-config. php file.
3. Is it a crime to clone a website?
The act of website cloning is 100% legal, especially when performed for non-commercial and/or non-malicious purposes. However, the act of website cloning may also breach existing copyrights, trademarks, IPs, or patents of the original website owner, and this is when it can be illegal.
4. What are the alternative ways to migrate WordPress sites?
Other than using WordPress plugins, you can use other ways to migrate WordPress sites like,
- Using FTP or File Manager
- Using the auto migration service that your new host provides
- Using old and new WP Dashboard
- Using the GitHub method
Migrate Your WordPress Site the Right Way Without Losing Any Data!
At first glance, WordPress site migration may look complicated. But when you have the right tool and the right guide then the task becomes easier.
We have tried to give you all the steps that will help you migrate your WordPress site on your own.
However, if you face any issues like “Error connecting database“, you might like to check if the tables are added to the new database. And if the WP-config.php file has the correct database credentials or not.
Hopefully, this will solve your issue.
If you face any further issues, then do let us know in the comment section.