How to Setup Google Ads Conversion Tracking to Your WooCommerce Store
Running a WooCommerce store isn't that difficult anymore. However, taking out the most from a WooCommerce store sometimes become impossible if you can't predict your users' behavior.
Google Ads conversion tracking by WCT is something that helps you collect users' data and lets you get a clear picture of your users' behaviour.
Also, this tracking would help you to know what your customers are actually looking for. Thus you can redesign your web campaign strategy and make sure the maximum ROI from retargeting.
Now the question is- do you know how to setup Google ads conversion tracking on your WordPress website?
Today, we are going to show you the easiest way to setup WooCommerce Google ads conversion tracking using our WooCommerce Conversion Tracking plugin. So, let's get started!
Why You Need to Setup WooCommerce Google Ads Conversion Tracking
You may have already got a shallow idea of what is Google ads conversion tracking and what's the purpose to use it. Having said that, here, we're going to break down the steps to show you more precisely why we use a Google ads conversion tracking plugin. WooCommerce Google ads conversion tracking helps you to –
- Determine whether or not your web strategy is successful
- Focus on customer behaviour
- Track the ROI of your campaigns
- Analyze which products are popular with your audience
- Run A/B testing and select the more suitable option to generate leads
- Carry out experiments related to design, products, banners, and more.
Apart from all these features, you can also find out which products are not performing well. All these data will help you to find out what your customers are actually craving for and how should you run your business according to their demands.
Why Should You Choose WooCommerce Conversion Tracking As Your Google Ads Tracking Plugin
There are quite a few top-rated WooCommerce Google ads conversion plugins available now. You can use any of them as per your requirements. However, if you want to rely on us, then we would recommend you to use the WooCommerce Conversion Tracking plugin to track your Google ads conversion on your WooCommerce store.
Why?
Because using the WooCommerce Conversion Tracking plugin, you'll be able to track conversion data of –
- products that were added to the cart
- people who have initiated checkout
- those who have purchased from you
- users who successfully completed registration in your marketplace
- viewed a specific product
- viewed a certain product category
- searched for an item to buy in your store, and more.
On top of that, it supports five popular ad platforms including Facebook, Twitter, Google AdWords, and the popular retargeting platform Perfect Audience.
How to Setup WooCommerce Google Ads Conversion Tracking to Your Website
As it's your WooCommerce store, so we assume that you're already actively using WooCommerce with your site. Having said that without installing and activating WooCommerce on your site, you won't be able to use the Google ads conversion tracking plugin properly. So, in any case, if you have forgotten to install WooCommerce, get the WoCoomerce installed first on your site.
Setting up WooCommerce Google ads conversion tracking to your website is an easy peasy task. You just need to follow these below three steps to get your job done.
- Install WooCommerce Conversion Tracking Plugin
- Customize Integration Settings
- Get the Google Ads Account ID
Note: After completing this part, we've also shown you how to run your first Google ads to your website. So. don't miss that segment.
Step 01: Install WooCommerce Conversion Tracking Plugin
Now, let us show you how to install the WooCommerce Conversion Tracking plugin to your site.
- To install the WooCommerce Conversion Tracking plugin, first, go to your WordPress dashboard.
- Navigate to Plugins >> Add New.
- Search the plugin name on the search box and choose the plugin “WooCommerce Conversion Tracking” from the search result.
- Click on the Install button and Activate it after being installed.
Step 02: Customize Integration Settings
Once your plugin is activated, you would see a new menu “Conversion Tracking” menu appear on the left side under the WooCommerce tab.
Under the Conversion Tracking tab, you can see the plugin integration setting. Google Ads supports several integration options including:
- Google Ads
- Custom
As we're working with Google ads, so, we'll toggle the Google Ads button to activate it. After activating the Google Ads, you could see the tab where you need to add Google Ads Account ID (something like AW-123456789).
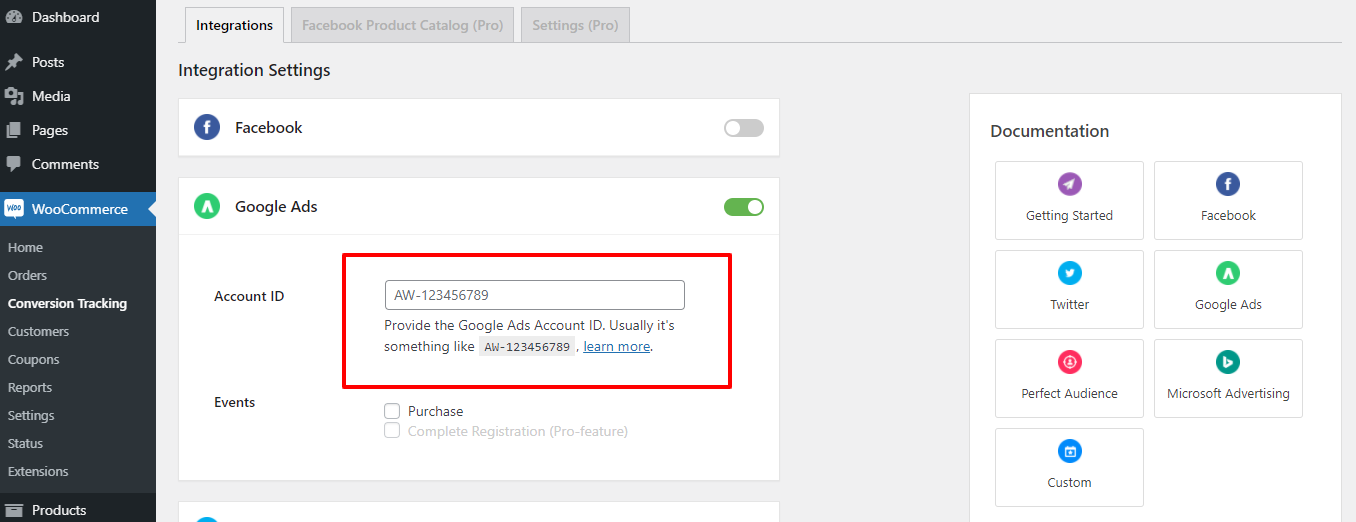
Now, we will create the Google Ads Account ID.
Step 03: Get the Google Ads Account ID
To know how to get the Google Ads Account ID, follow the below procedures;
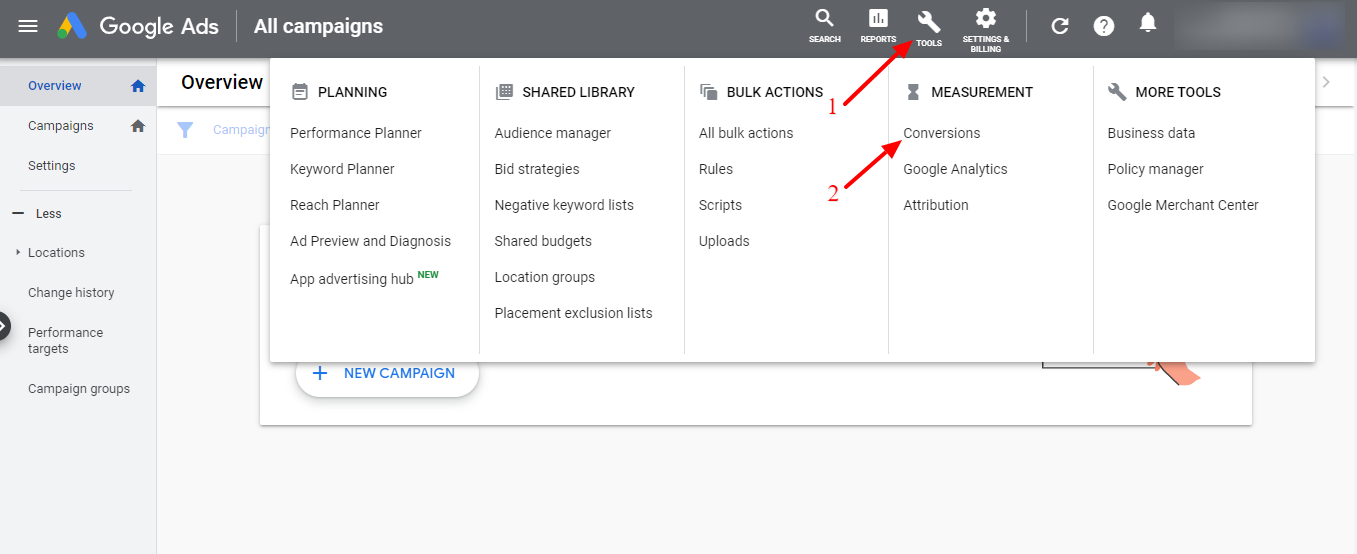
- At first, sign in to your Google Ads account. If you don't have an account yet, create an account and log in now.
- On the Dashboard, you can see the option Tools. Click it and navigate to Measurement > Conversions.
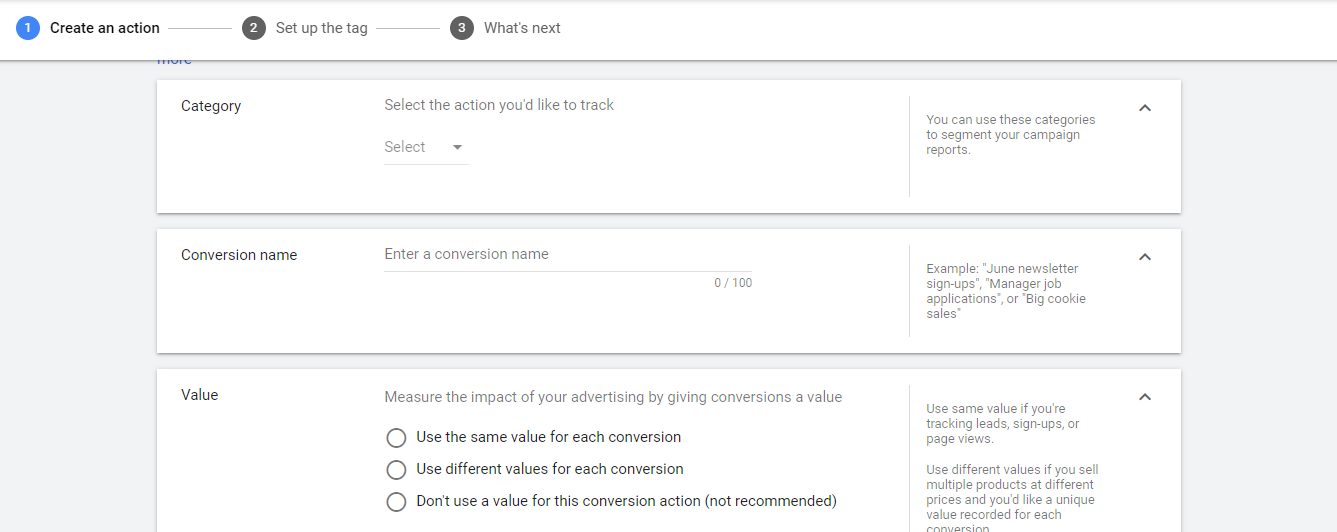
Here you can see a few options such as website, app, mobile, import. You set up one conversion action at a time but can track multiple conversion actions at once. Select a conversion type that you want to track. Here we have chosen the Website option to demonstrate to you how it works.
- Create a conversion action for your website. Select category, conversion name, value, as per your requirements.
- You have three options to add a tag to your website. Let’s select the first one.
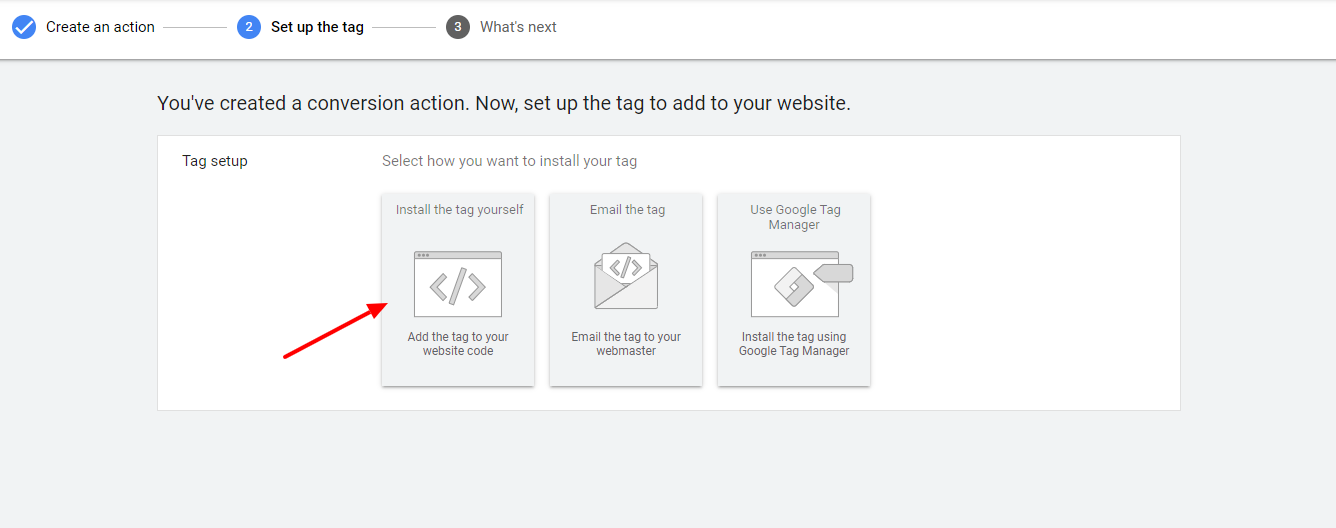
- Next scroll down to the Global site tag option. Here you can see the Google conversion tracking ID.
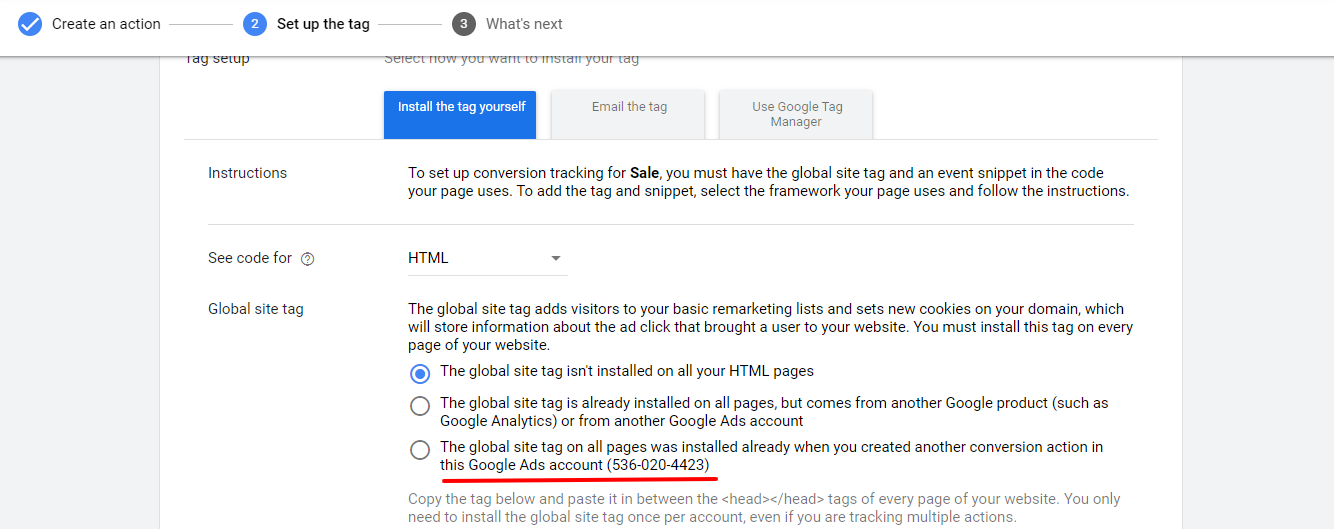
Copy this ID and go back to your WordPress admin dashboard. Navigate to Conversion Tracking and paste this code into the Google Ads tab. Click Save Changes, and you are done configuring Google Ads Account ID!
Bonus: How to Create and Track Your First Google Ad to Reach Your Target Audience
Creating the first Google ad is always exciting. But don't let your excitement get over you. Because, if you don't launch your ad properly, it won't be profitable for you. So, learn the proper way to create your first Google ad by following the below steps.
Step 01: Set Your Advertising Goal
- Go to Google Ads dashboard
- Click on the Start Now button
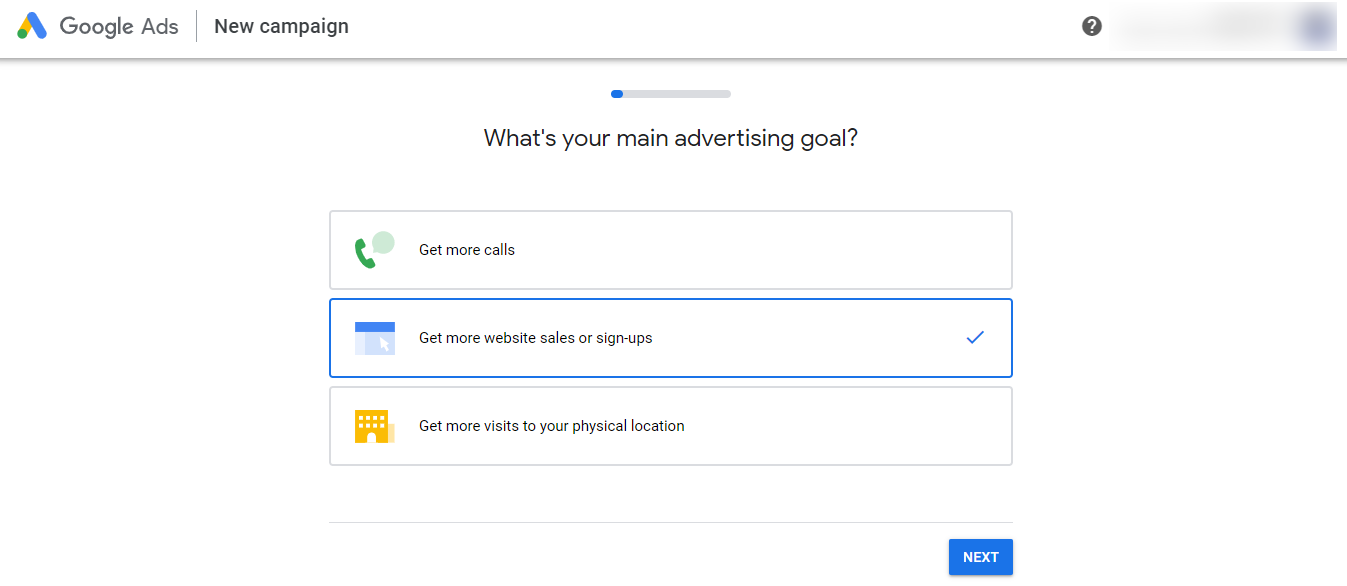
- Now set your advertising goal
You'll see there three options –
Get more calls: If you want to get more calls from your potential customers. select this option.
Get more website sales or sign-ups: If you want to get more sales from your websites and at the same time want to get more subscribers, you should select this option.
Get more visits to your physical location: You should choose this option when you want your customers to visit your store physically.
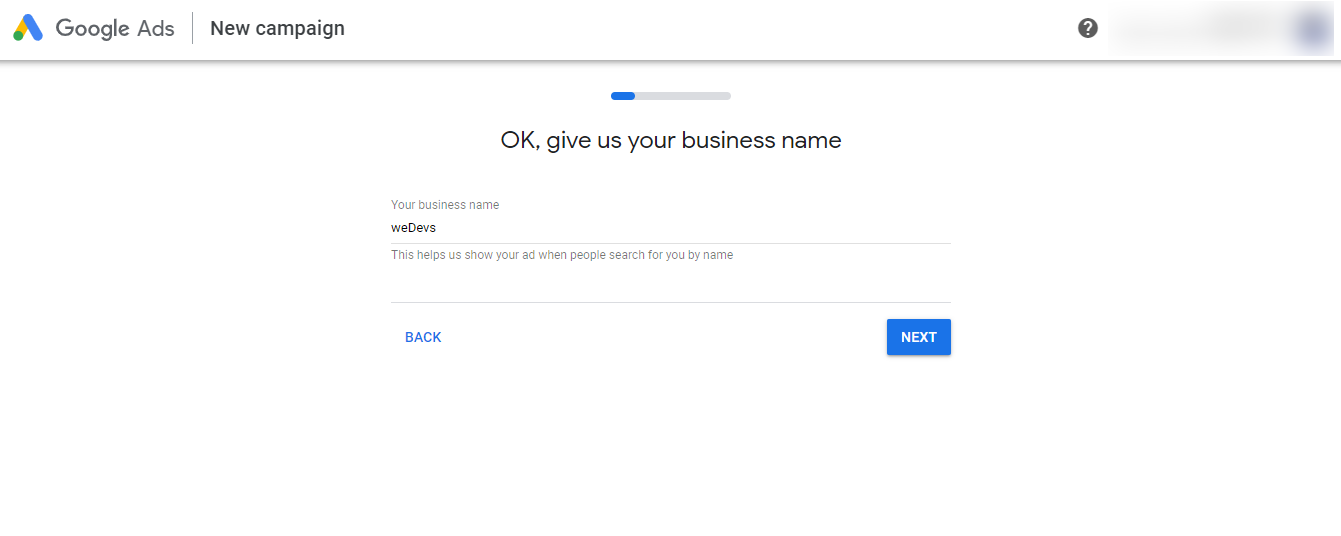
Step 02: Set Your Business Name & URL
It's time to set your business name. You can give any name as you wish, e.g., your site name or your product name. It helps Google to show your product or business name when people search by that name.
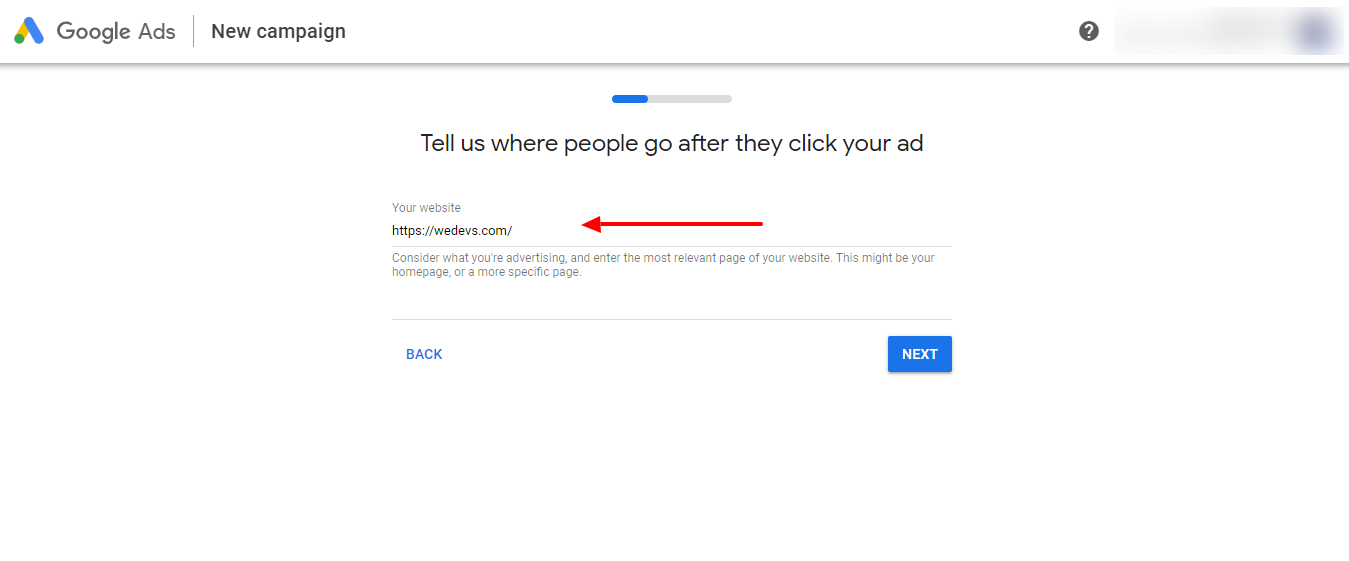
Now, give your website URL. This might be your website homepage or a more specific product page. After giving the website URL, it will show you how it looks on both of the mobile and desktop versions. Then click the Next button.
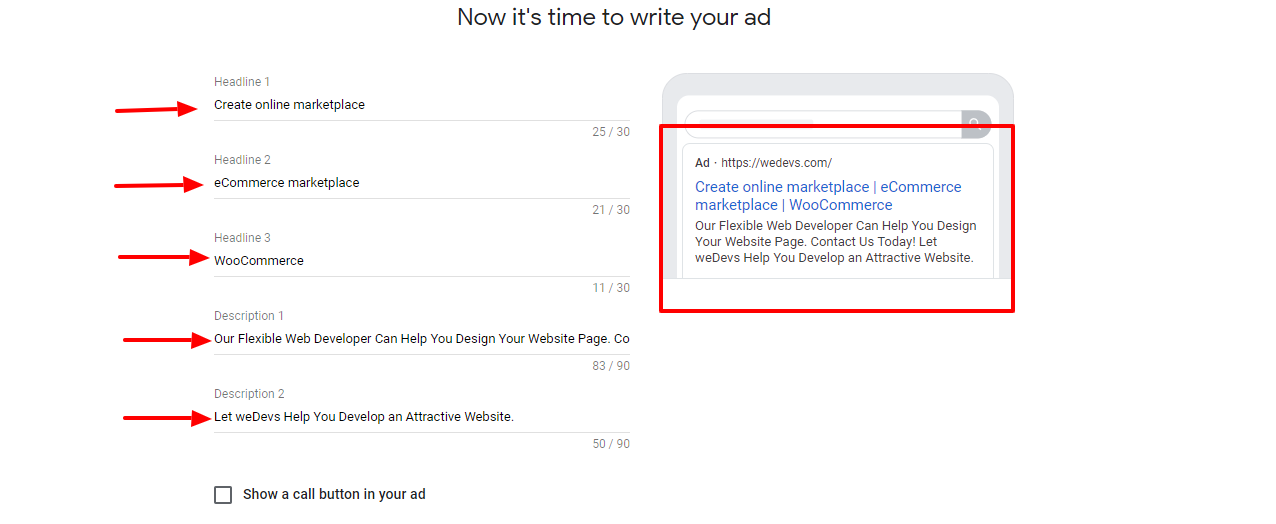
Step 03: Write Your Ad Copies
The headline is one of the most important parts of the ad because this attracts the viewers into clicking the ad. You should come up with several variations and experiments to see what works. You can see a preview of the ad, complete with the headline to see how your ad would look in action.
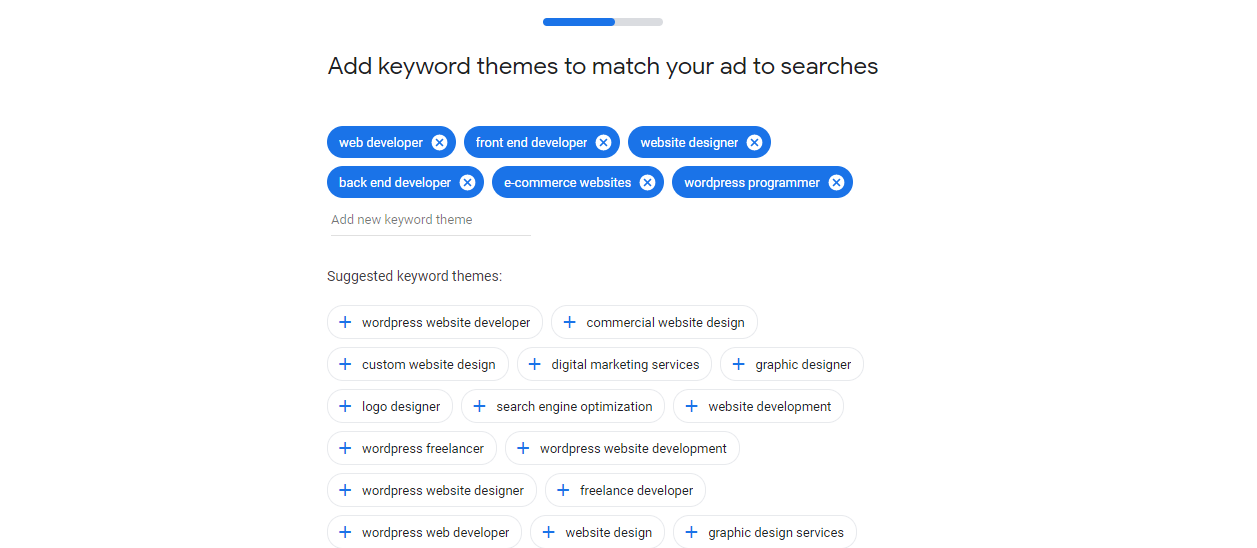
Step 04: Add Keyword Themes to Match Your Ad to Searches
Add keywords that you want to target. If you don't want to pick from the suggestions, you can write and set keywords as per your requirements.
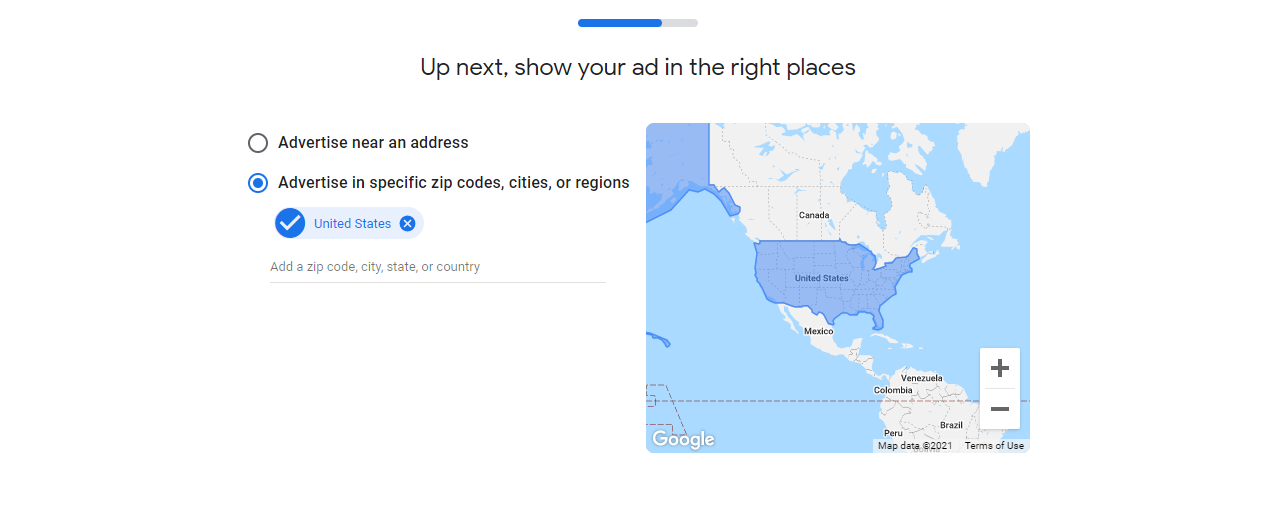
Step 05: Choose the Location Where You Want to Show Your Ads
Where do you want to show your ads? Choose your target audience. You can set multiple locations if you want to. You can add zip code, city name, or country name.
Step 06: Set Your Budget
Next, select a budget option. There will be three options given to you. Apart from it, you will be able to set your budget manually.

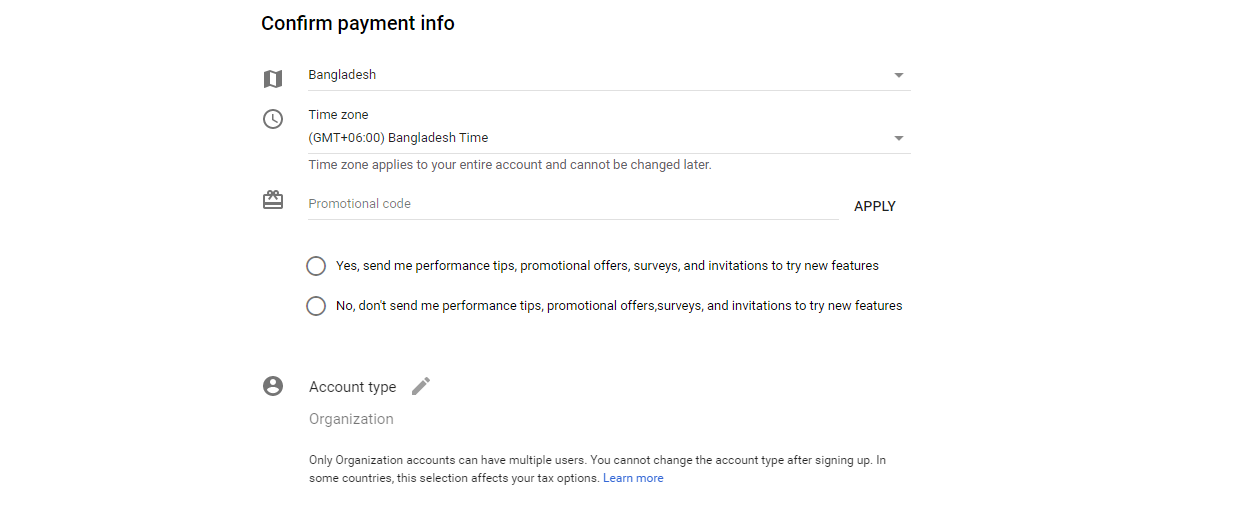
Step 07: Confirm Payment Info
Now give your payment information. Then click the Submit button to live your ad.
Congratulations! You've just created your first Google ad. Exciting, right?
Step 08: Track Your Ads Performance
After creating your first ad, it's time to track the performance to identify if the strategy is right. To track it, go to WooCommerce > Reports.
There you'll get Orders, Customers, and Stock information. It will help you to filter the customer data and sales reports using different parameters.
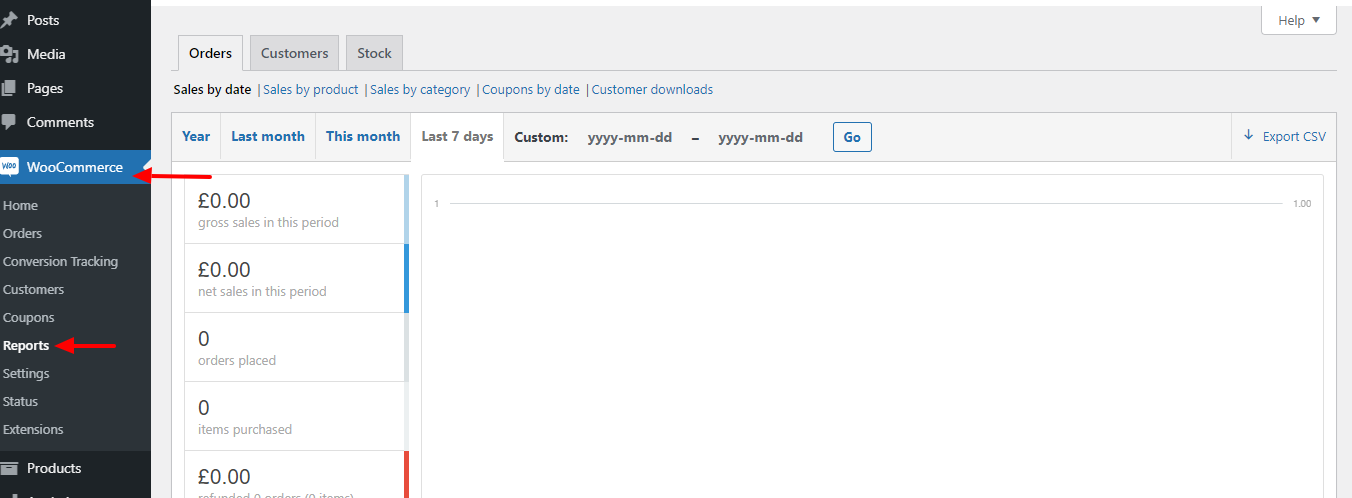
Using these data, identify how your campaign is performing and keep updating your campaign strategy to reach more and more people.
Are You Ready to Setup WooCommerce Google Ads Conversion Tracking to Your Store?
Now you know how to setup Google Ads conversion tracking and launch Google ads from your website. So, why are you waiting for! Prepare your WooCommerce store by following this tutorial and run your first Google ads all by yourself.
Just install the WooCommerce Conversion Tracking plugin on your website, customize the settings, and then integrate your Google ads account ID to your website. That's it. Then launch your ad as per your requirements.
If you face any complications while customizing your website, let us know through the comment box below. We'd love to help you out. Good luck!