A Smart Way to Utilize WooCommerce Product Table on Your Online Marketplace
The online marketplace plugin, Dokan powers over 50,000+ websites worldwide right now and is the perfect solution to transform your WooCommerce store into a multi-vendor marketplace.
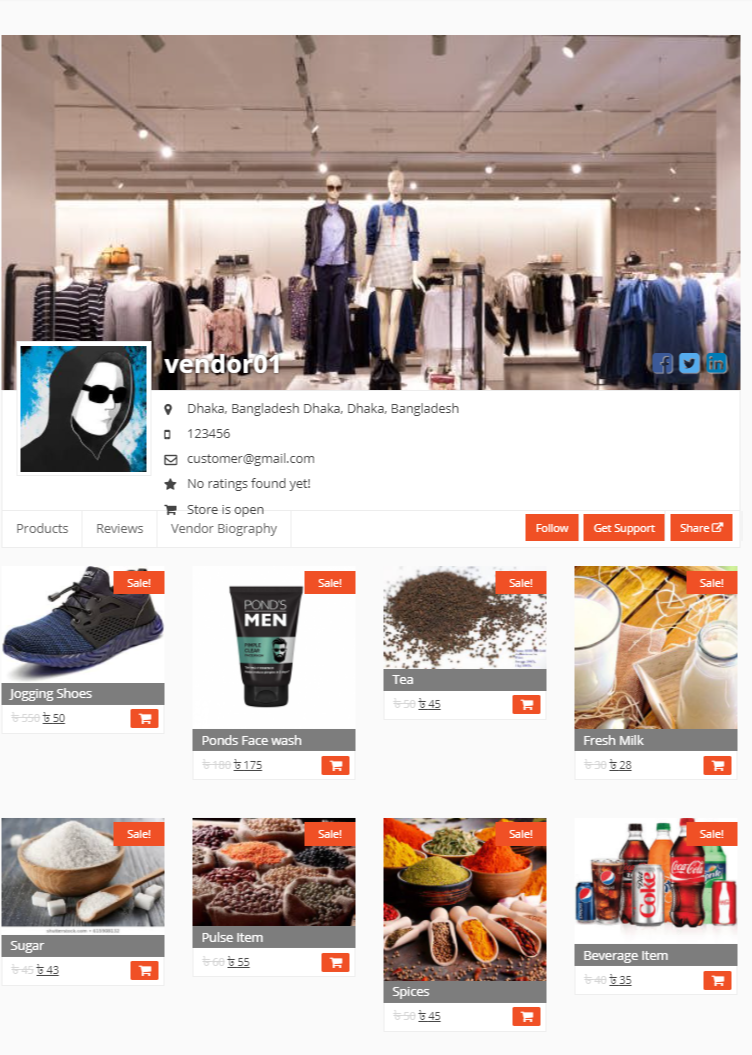
After installing Dokan, your vendors' products are listed in a 4-column grid. Basically, this is ideal for selling a wide range of products easily. However, there are lots of reasons why you might want to list products from your marketplace in a different layout.
So, in today's write-up, we're going to share how you can easily utilize the WooCommerce Product Table in your online store using the Dokan multi-vendor marketplace plugin and the WooCommerce Table addon.
But first of all, we'll briefly talk about why a WooCommerce product table layout can give users easy navigation and increase sales. After that, we'll explain the setup process side by side.
What is a WooCommerce Product Table Layout?
The average WooCommerce store lists products in a grid layout with a medium-sized image, product name, price, and add to cart button.
A product grid layout is ideal for presenting different types of products. However, products sell better when listed in a more structured format, with extra data or info about each product, and more products being displayed in the same amount of space.
Benefits of Adding Product Table in Your WooCommerce Store
There are lots of reasons why you can boost sales by adding product table layouts to a WooCommerce store. Here are a few of them listed below:
List your entire marketplace on a single page
When you create a Dokan marketplace, vendors will get their own store to list their products. This can be divided into categories as required, creating a shop-within-a-shop for each vendor.
In addition to this, you might want to create a single page listing everything in the entire marketplace. A product table is a perfect tool to do this. You can automatically list products from all vendors in a table, keeping everything in one centralized place.
As a result, customers will be able to see everything that is on offer, regardless of the vendor. They can then purchase products from different vendors as usual.
Provide extra product details to help customers' buying decisions
First of all, the default marketplace store layout displays the product image, name, price, seller, and add to cart button. That's fine for some products, but not for all.
By listing products in a table layout, you can show extra columns. Hence, you can show attributes, custom fields, taxonomies, weight, dimensions, stock, customer ratings, embedded audio, and videos, and more.
This gives customers everything they need to make a buying decision, all on the main marketplace listings page.
Select quantities & variations directly from the WooCommerce marketplace listings
Normally in WooCommerce, you can add simple products to the cart straight from the product listings page. However, you have to click through to the product detail page to select quantities and choose variations.
By listing your online marketplace products with WooCommerce Product Table, customers can do all this directly from product listings pages. This transforms your marketplace into a one-page WooCommerce order form. As a result, customers can buy much more quickly, which is great for improving conversion rates.
Makes it easier for customers to find vendors' products
Finally, it's worth mentioning that most WooCommerce online marketplaces grow faster than single vendor stores. This is because every time a new vendor signs up, they add their own products. Before you know it, your store is huge!
WooCommerce is built to scale, so it can handle an unlimited number of products.
However, you can sell these products only if you make it easy for customers to find them.
By listing products in a structured layout with sorting, keyword search, and multiple filters, customers can quickly find products based on data such as a seller, category, tag, attribute, etc. This makes a big difference to conversion rates because if a customer can't find what they want quickly, they'll give up and look elsewhere.
Next, we'll show you how to use Dokan with the WooCommerce Product Table and add table views to your online marketplace.
First, Set Up Your WooCommerce Online Marketplace
Before you can start using the WooCommerce Product Table, you'll require to have the following things:-
- WordPress
- WooCommerce
- Dokan
- eCommerce Theme
- WooCommerce Table Feature (Free)
- WooCommerce Table Addon (Pro)
Do make sure that you have successfully installed and activated these plugins on your WordPress site.
How to add a WooCommerce Product Table To an Online Store
First of all, you need to add products to your store. Or if your vendors have already added some products, then it's fine!
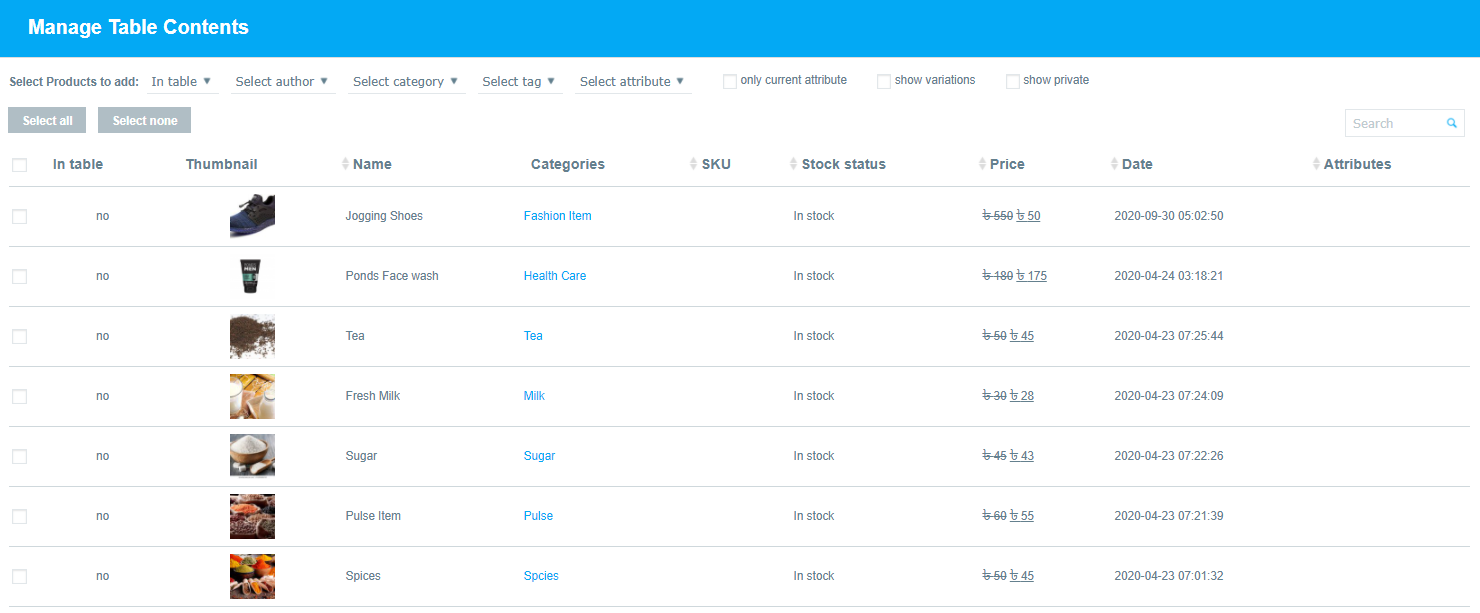
Now to create a table, navigate to WP Dashboard>Woo Product Table>Create a Table.
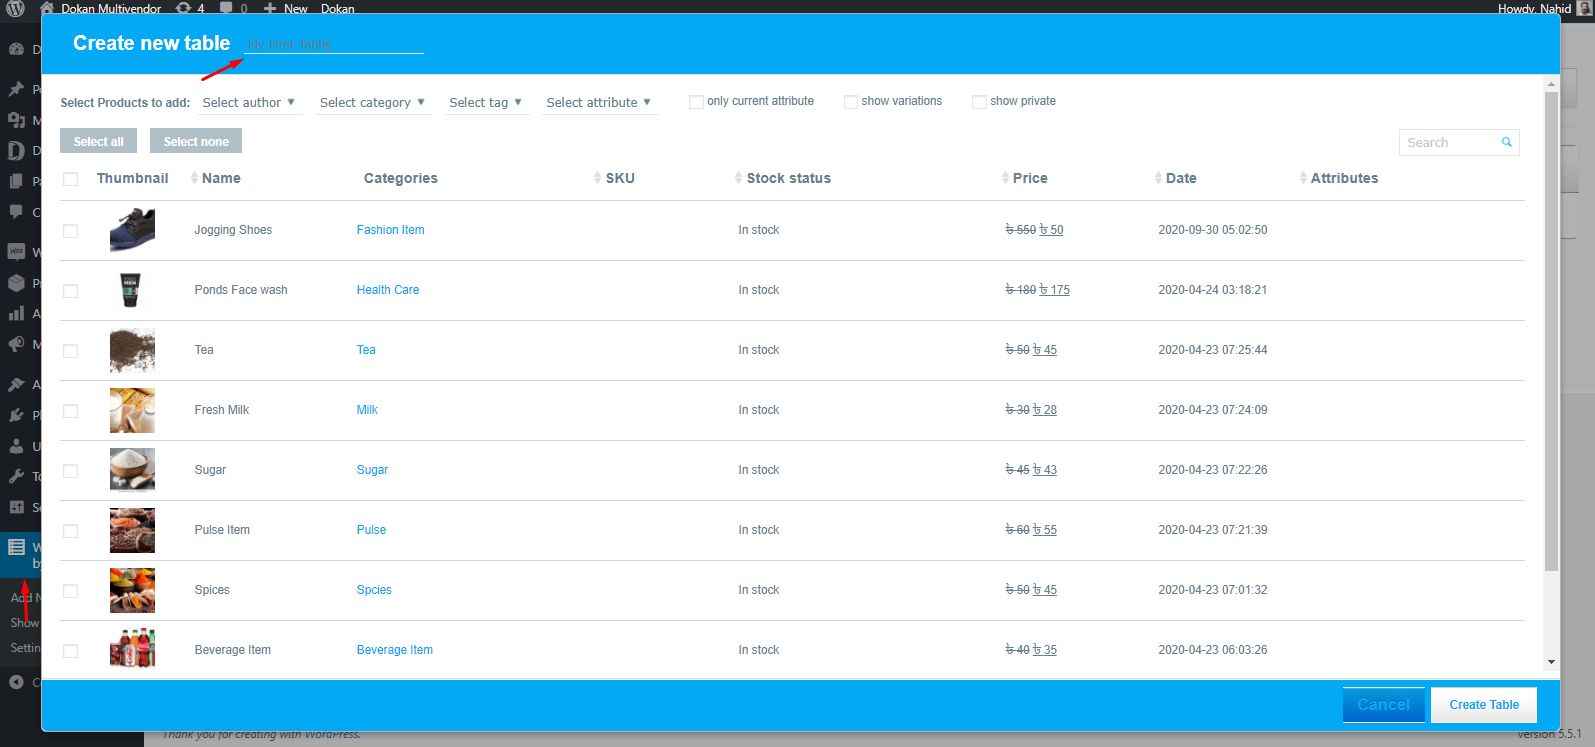
Here you can see all your products being appeared. So all you need to do is, select all the products.
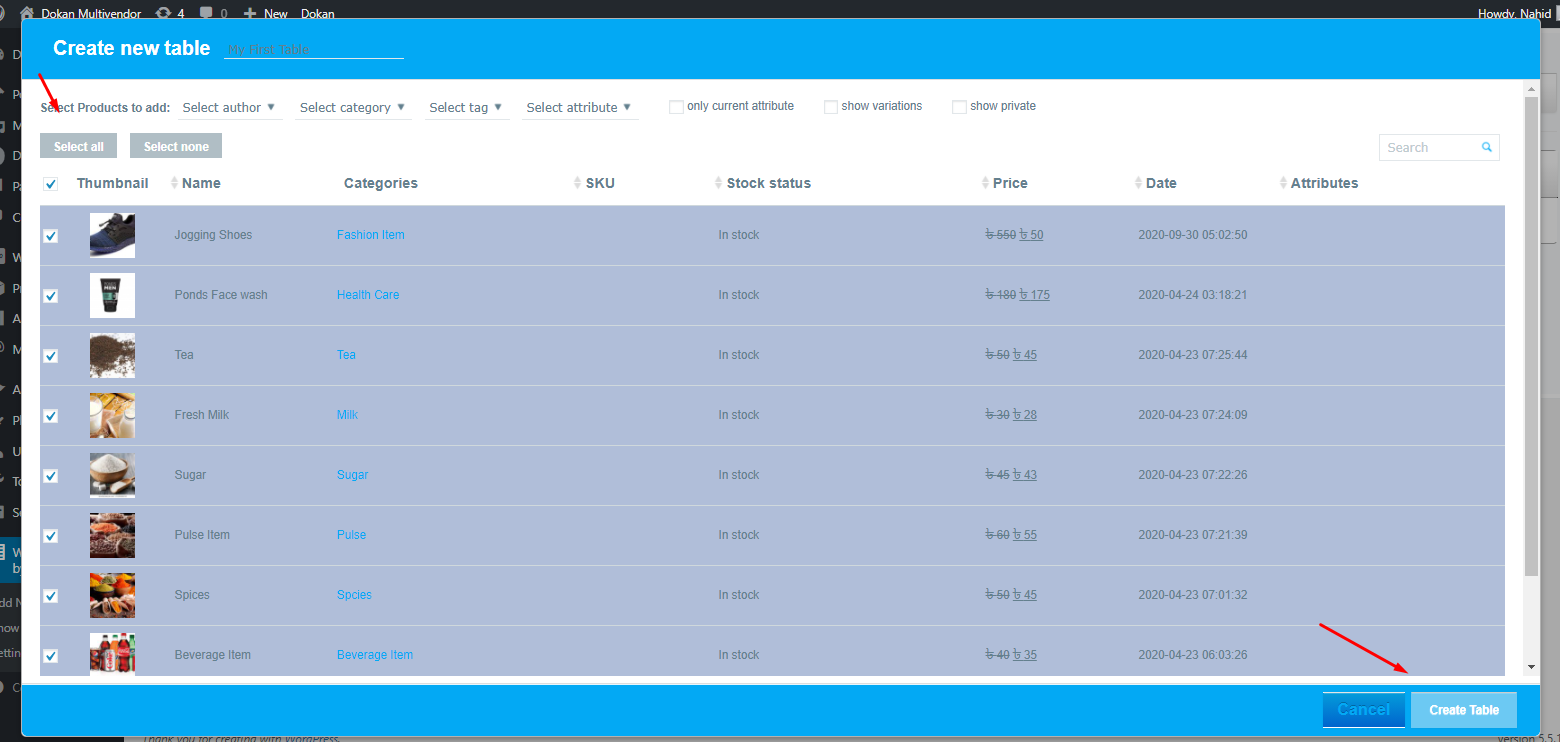
So now your table is ready for use. But before that, you can customize certain things. Such as add more columns to the tables.
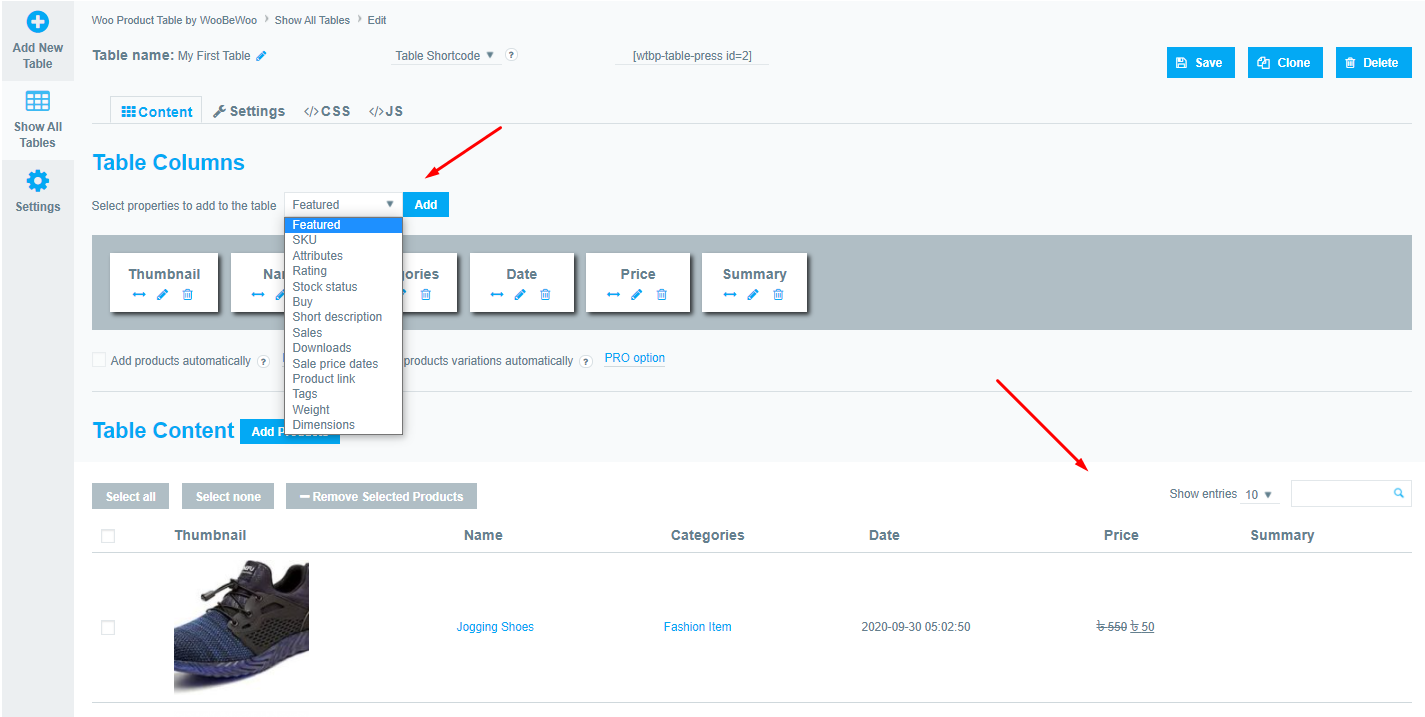
After customizing the table, now hit the save button and copy the table code.

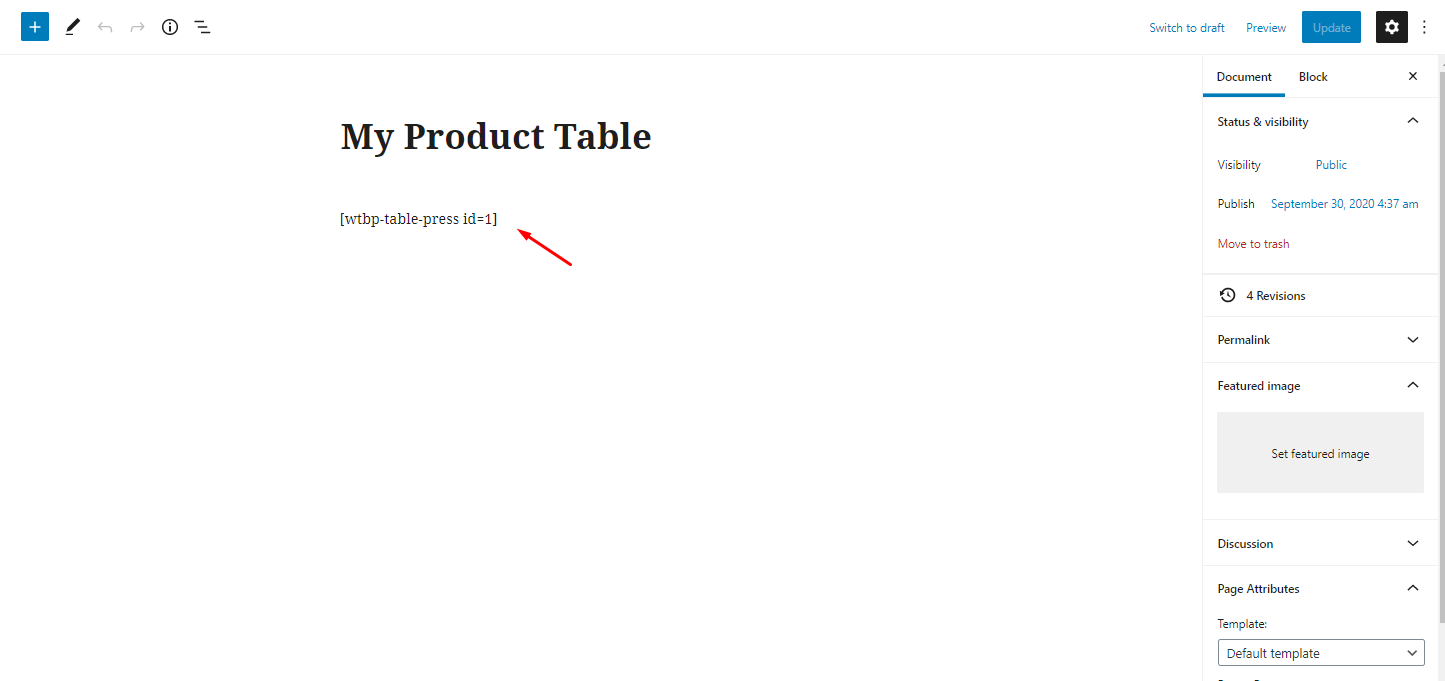
Now create a page and paste the shortcode on that page. And publish it!
In this way, the WooCommerce product table will list all the products in your entire online marketplace. This includes listing the vendor name in the table; adding options for customers to filter the list by the vendor, and listing products for specific marketplace vendors only. We'll look at these one at a time.
So here is how your product table page will look like:-
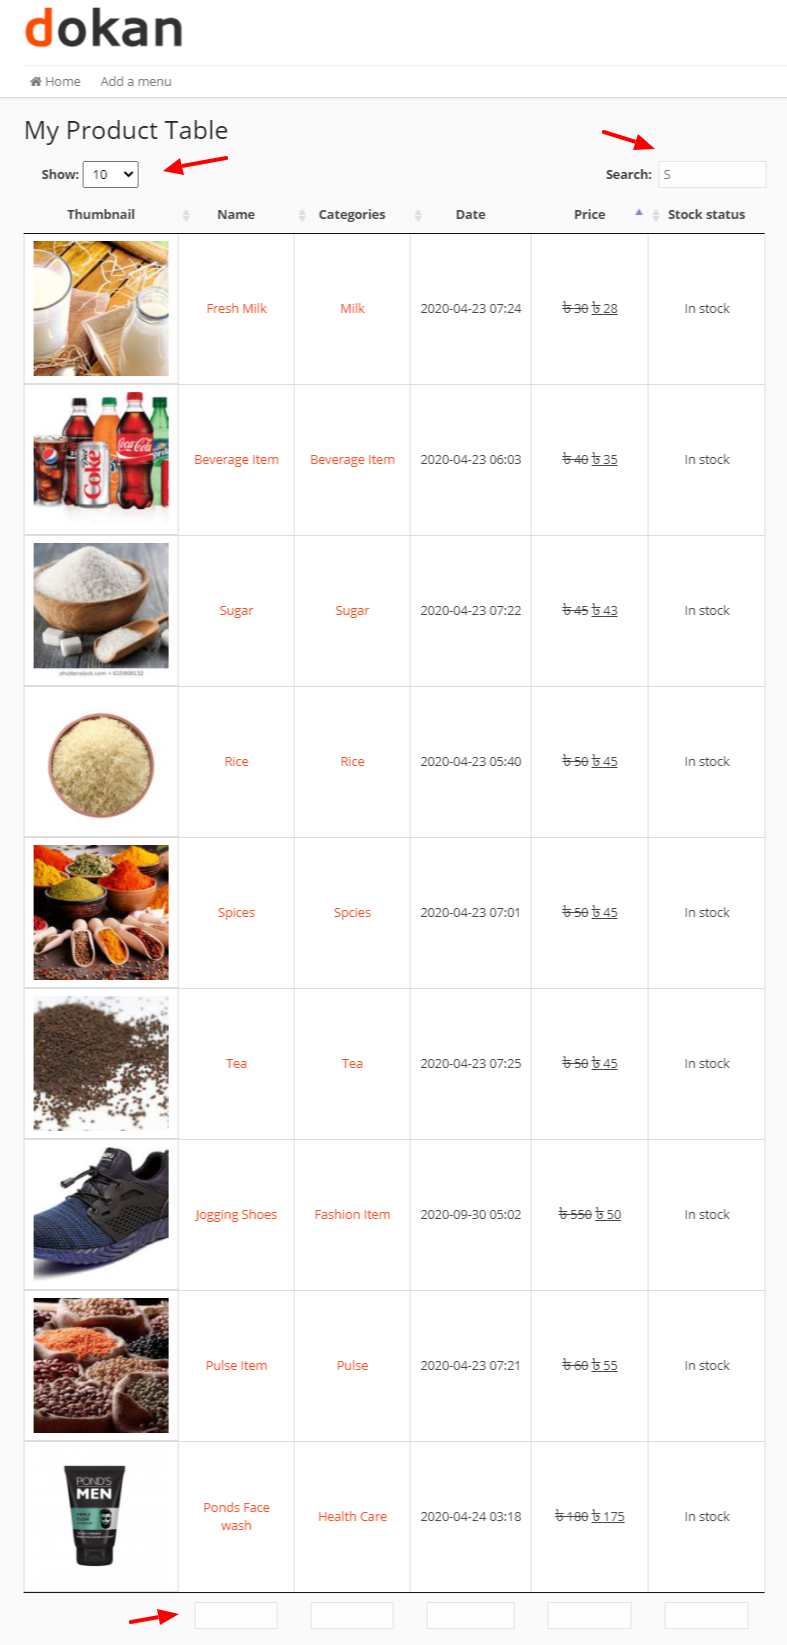
Here you can filter products by their name, category, dates, and stock status.
However, you can add more customizing options & features to your online store using the Pro version of WooCommerce Product Table. So for a detailed guide, check out the official documentation of WooCommerce to a product table on an online marketplace.
Add a ‘Vendor' Column to the Multi-Vendor Product Table

You can add a ‘Vendor' column to the product table. This tells customers who are selling each product without having to click through to the single product page.
- First, you need to decide where you will be storing the vendor name which is displayed in the table. The simplest way to do this is to use the product tags that come with WooCommerce itself. If you're already using product tags for something else, then you should create a custom taxonomy called ‘Vendor' instead.
- You'll find your product tags or taxonomy on the right-hand side of the ‘Edit Product' screen in WordPress. Use this to tag each product with the name of the vendor.
- Now, expand your WooCommerce Product Table shortcode to include a ‘Vendor' column. For example, this shortcode will list all products with columns for product name, vendor (we're using tags for this, but we have renamed the column to ‘Vendor'), price, and add to cart:
[product_table columns=”name,tags:Vendor,price,add-to-cart”]
This will add a Vendor column to the WooCommerce product table. If a product has multiple sellers, then all the vendors will be listed. When a customer clicks on a vendor in the table, it will filter the list to show products of that vendor only. Neat!
Let Customers Filter the Marketplace by Vendor

In the previous section, we talked about how customers can click on a vendor in the table to view all products of that vendor. Let's be honest – not everyone will realize they can do this!
Even better, you can add a ‘Vendors‘ filter directly above the product table. Customers can select a vendor from the dropdown list to view all products of that seller.
To do this, you need to have used product tags or custom taxonomy to record which product relates to which vendor. I told you how to do this in the previous section.
Once you've done this, you need to add the ‘filters' option to your WooCommerce Product Table shortcode, for example:
[product_table columns=”name,tags:Vendor,price,add-to-cart” filters=”tags”]
This is a good way to list marketplace products. When the WooCommerce product table first loads, it will show all the products in the marketplace. That's a lot, so customers need to be able to refine the list. That's why you need a Vendor filter.
To make your product table even better, add other types of filters too. For example, you can add filters for things like categories, attributes, variations, and even other custom taxonomies. You can show as many filters above the table as you like. It's a great way to help customers find products more easily, taking full advantage of the product table feature.
List Products for Specific Marketplace Vendors Only
So far, we've shown you how to create a single product table listing the inventory for all your vendors together. That's fine, but it's not the only option.
If you prefer to create a separate table listing products for a specific vendor only then again to do this you would need to have used tags or taxonomy to record the vendor for each product. Then, you just need to specify a vendor in the WooCommerce Product Table shortcode:
[product_table tag=”vendor1″]
This will list products for a vendor called vendor1. Obviously, you need to replace ‘vendor1' with the actual name of your vendor.
Adding Product Tables to the Vendor Shop Pages
As we saw earlier, the Dokan Multi-Vendor Marketplace plugin comes with its own layouts for your vendors' actual store pages. So far, we've focused on how to list your vendors' products in a table which you would list on a page elsewhere on your site.
If you prefer, then you can add product tables globally throughout your store and use them on your vendors' store and category pages. That's a bit more technical because it involves editing template files, which is outside of the scope of this article.
However, any good WordPress developer will be able to do this for you. Or if you want to do everything yourself, then you can list your marketplace products using the methods described above.
Final Words
Well, the post has come to an end. We hope it is going to help you to perfectly use the WooCommerce Product table in your online multi-vendor marketplace. So try to follow the above steps carefully and apply them accordingly.
If you have already tried utilizing the WooCommerce product table yourself then we would love to hear your experience & how you have used the plugins together. Please leave a comment below to share it with us.