
How to Backup WordPress Site to Dropbox in 4 Easy Steps
Want to learn how to back up a WordPress site to Dropbox? You have come to the right place.
It's a smart practice to regularly back up your website to a secure location like Dropbox. This practice ensures you won’t lose important elements like site settings, plugins, and theme designs. If something goes wrong, restoring your site becomes a simple task.
You might lose your data for various reasons, such as a security breach or a plugin conflict. Instead of spending time troubleshooting and risking further issues, you can quickly restore your website from your Dropbox account.
Ready to learn how? Let's get started. But first-
Why Should You Back up Your WordPress Site to Dropbox?
Samaira is an up-and-coming fashion designer and ready to launch her clothing line. She set up her online store using WordPress as she has little to zero coding knowledge and is ready to show the world her designs.
With a limited budget, Samaira purchased a domain name, hosting, a few premium plugins, and a stylish fashion theme to kickstart her venture. She dedicated several late nights to reading guides on how to configure the plugins and customize the theme, ensuring her site would look stunning.
After a week of hard work, she felt ready for the big reveal. The night before her launch, she noticed a new update for one of her plugins. Without hesitation, she clicked “update,” thinking it would enhance her site.
However, disaster struck: the update broke her site’s design, leaving it a chaotic mess, and her carefully configured settings were lost.
She had no backup, so she couldn't get the site back to where it was before and had to delay the launch by a few days.
You don't want to end up like Samaira, do you?
With regular backup, your site will be secured and you can handle any unfortunate incidents like Samaira's without any problem.
So, Why Dropbox?
Storing your WordPress backups on your computer’s hard disk or website server can be risky. If your hard disk fails or the website server gets compromised, you’ll lose all your backups.
That’s why storing backups in multiple locations is a good practice, including cloud storage services like Dropbox.
Dropbox is a popular file-hosting service that lets you store and back up files to the cloud. The best part is that you can access, save, and share these files from anywhere.
Now let's see how you can back up your WordPress site to Dropbox.
How to Backup Your WordPress Site to Dropbox- Step by Step
You know about the importance of backing up the website to Dropbox. So now you must be thinking about setting up a configuration that will automatically back up your website to Dropbox.
But don't worry we can help.
We are going to use the popular UpdraftPlus backup plugin to do this task. This is a very famous plugin that WordPress users to back up their website. The plugin has 3+ million active installations. You can use this plugin to backup your website to Dropbox, Google Drive, Amazon S3 (or compatible), Rackspace Cloud, FTP, DreamObjects, OpenStack Swift email, etc.
Now, let's see how you can use that plugin to backup your website-
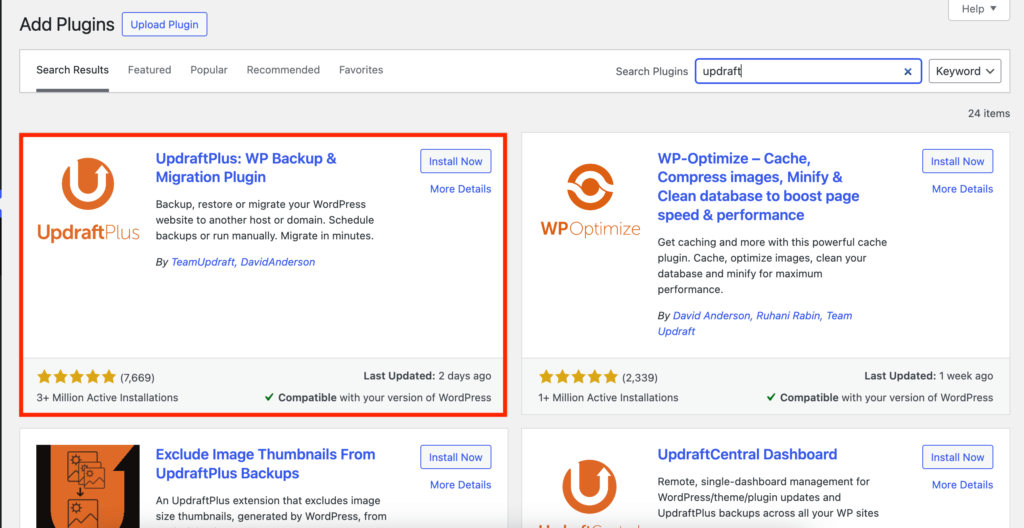
Step 1: Install the UpdraftPlus Plugin from Your WordPress Dashboard
Log into your WordPress dashboard and go to WP-Admin–>Plugins–> Add New. From there type UpdraftPlus, install and activate the plugin-
Step 2: Choose Dropbox As Your Backup Option
In the left-hand side of your WordPress menu click on UpdraftPlus and choose the Settings option. There you will find Dropbox under “Choose your remote storage (tap on an icon to select or unselect)“. Select that-
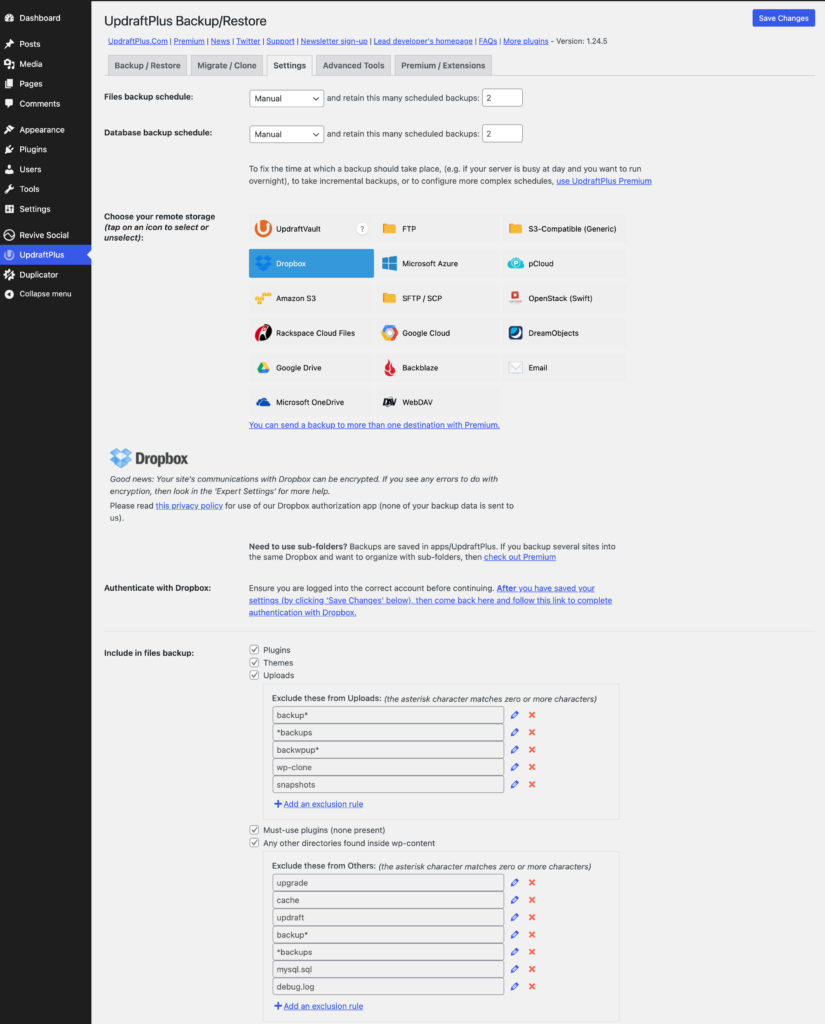
Don't forget to include Plugins, Themes, and Uploads in your backup file. Hit the Save Changes button after you are finished.
Step 3: Allow Remote Storage Authentication
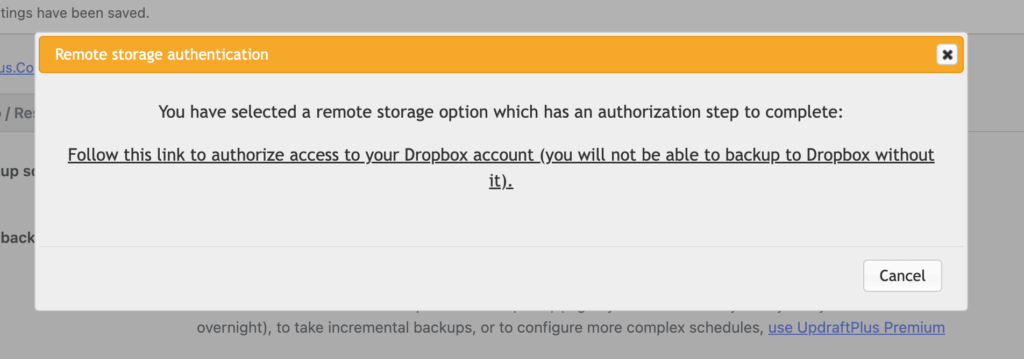
Now, you need to authenticate UpdraftPlus to remote storage authentication. You will get a pop-up window where you will get a link to authorize your Dropbox account to connect to UpdraftPlus.
Now, you need to choose your Dropbox account-

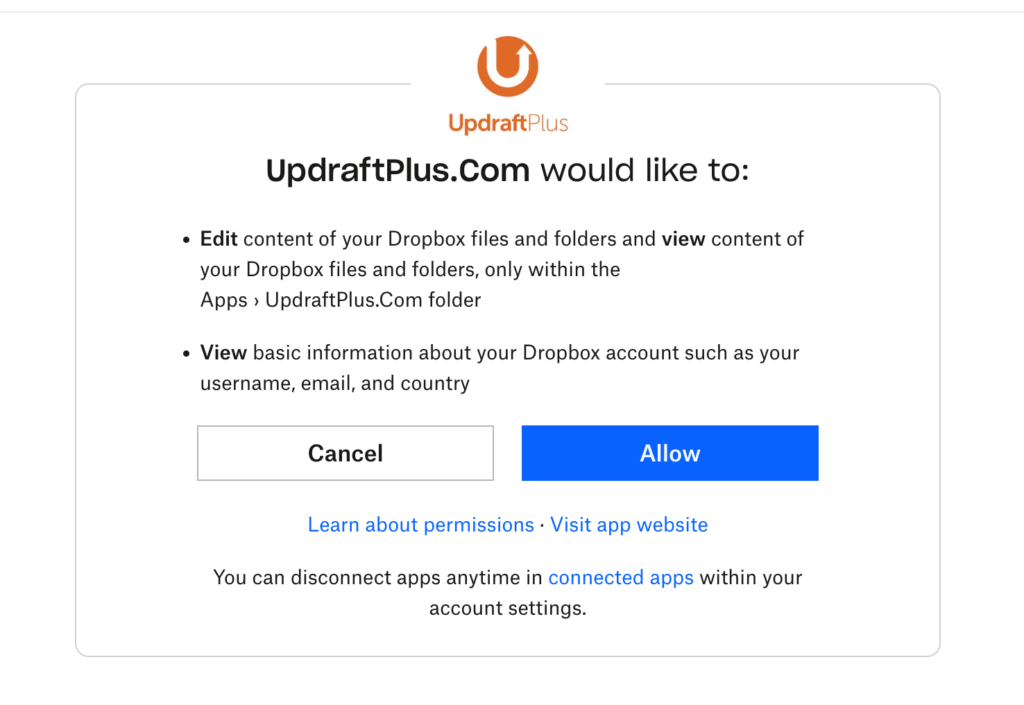
After choosing an account, allow UpdraftPlus permission to Edit information and view basic content-
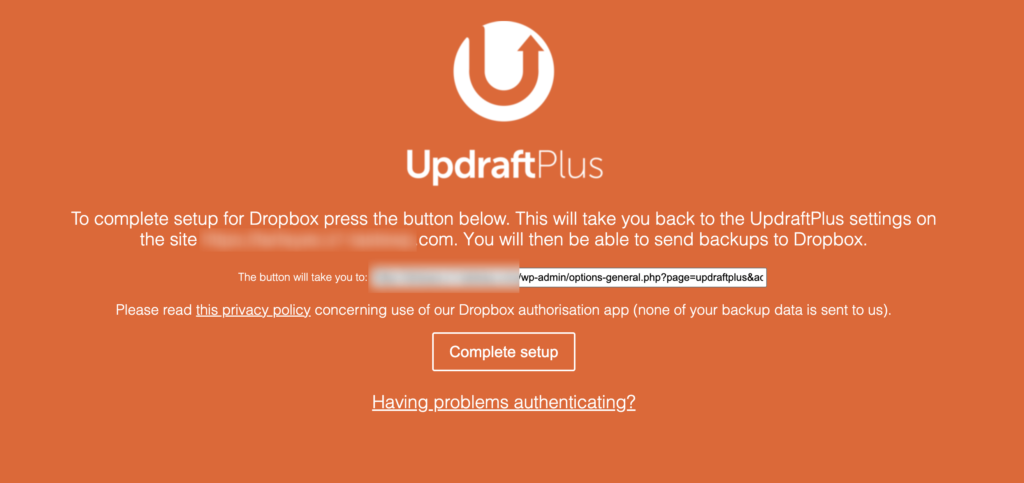
Now, click on the Complete the Setup button to fully authenticate UpdraftPlus-
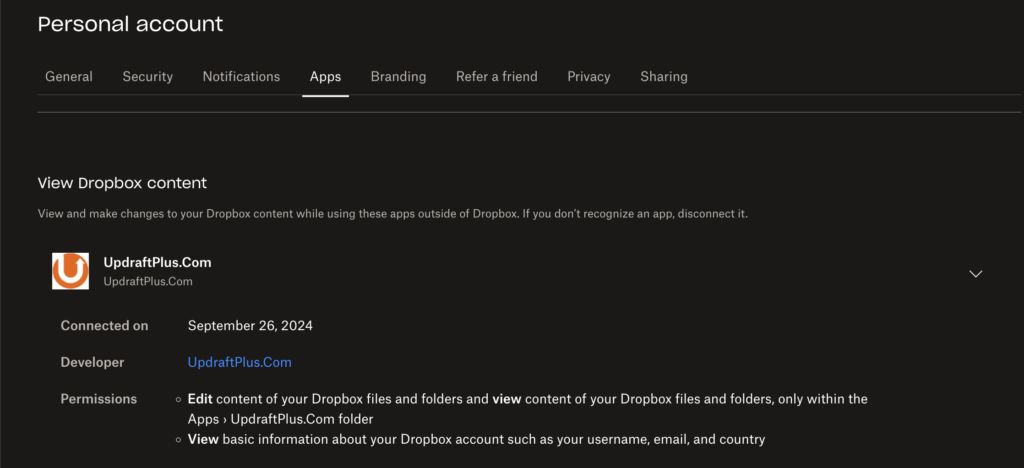
You can see that Dropbox has connected with UpdraftPlus-
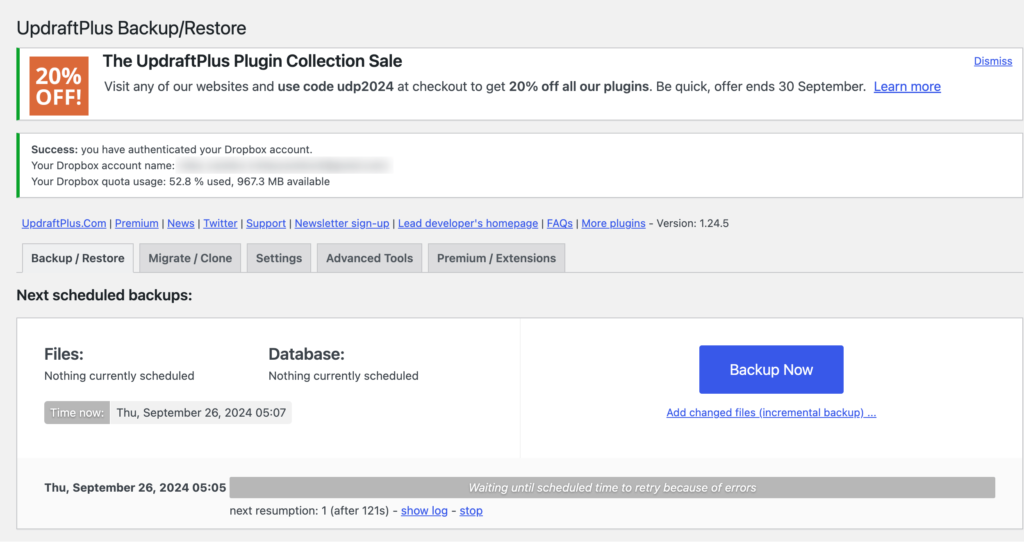
If you go back to your WordPress dashboard, you will see that the authentication is fully completed-
Step 4: Back Up Your WordPress Website
You are almost there. Now you need to start backing up your website. Click on the Backup Now button to start backing up your website.

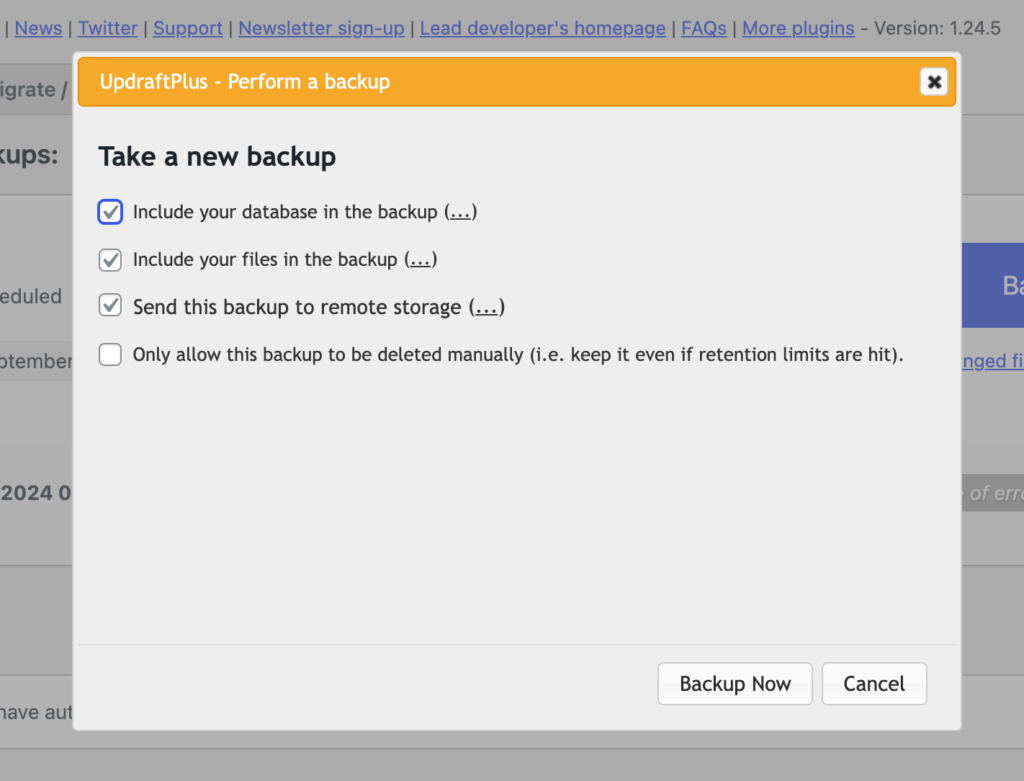
You will get a pop-up box. On the pop-up box choose if you want to backup your database and files. Make sure the Send this backup to remote storage option is checked, then click the Backup Now button.
The backup will then begin, this may take some time to complete based on the size of your site. When the backup is complete the Last log message will say “The backup apparently succeeded and is now complete.”
This is how you can back up your WordPress website to Dropbox.
Final Thoughts
Backing up your WordPress site with UpdraftPlus to Dropbox is a straightforward and effective way to protect your content. By setting up automated backups, you ensure that your site’s data is secure and easily retrievable if anything goes wrong.
Regularly checking your backup settings and testing the restoration process will help you to manage your site seamlessly.
Want to check other top backup plugins for WordPress sites? You can read our blog on best WordPress backup plugins to find the most-suited plugin for you.
Overall, using UpdraftPlus with Dropbox is a smart move for anyone looking to keep their WordPress site safe and sound. Start today, and enjoy the confidence that comes with knowing your site is backed up and secure.