How To Create a Variable Product in WooCommerce with Easy Steps
When you're running an online store with WooCommerce, it's smart to offer customers more options for a single product, like different sizes, colors, or styles. A variable product in WooCommerce allows you to do just that.
In this guide, we’ll walk you through the simple process of how to create variable products in WooCommerce and how offering variations can help enhance your product listings and boost sales.
Let's get started-
Benefits of Variable Products and How They Impact Sales
Variable products are a great way to improve your store’s shopping experience and potentially increase sales. Here’s why:
1. Offer More Options
With variable products, you can offer different variations of the same product, such as multiple sizes, colors, or styles. This gives your customers more choices without cluttering your store with multiple separate product listings.
2. Improve User Experience
Instead of browsing through many different listings for the same type of product, customers can quickly see all available options in one place. This experience helps them find what they want faster, leading to better satisfaction.
3. Simplify Inventory Management
With variable products, you can manage stock levels for each variation separately. For example, you can have different inventory for small, medium, and large sizes. This makes it easier to keep track of stock and avoid overselling or running out of stock.
4. Boost Sales
By offering more choices in a single product listing, you increase the chance that customers will find exactly what they’re looking for. This could lead to higher conversion rates and, ultimately, more sales.

How to Create a Variable Product in WooCommerce
Creating a variable product in WooCommerce is straightforward. Follow these simple steps to add variations like size, color, or style to your product listing.
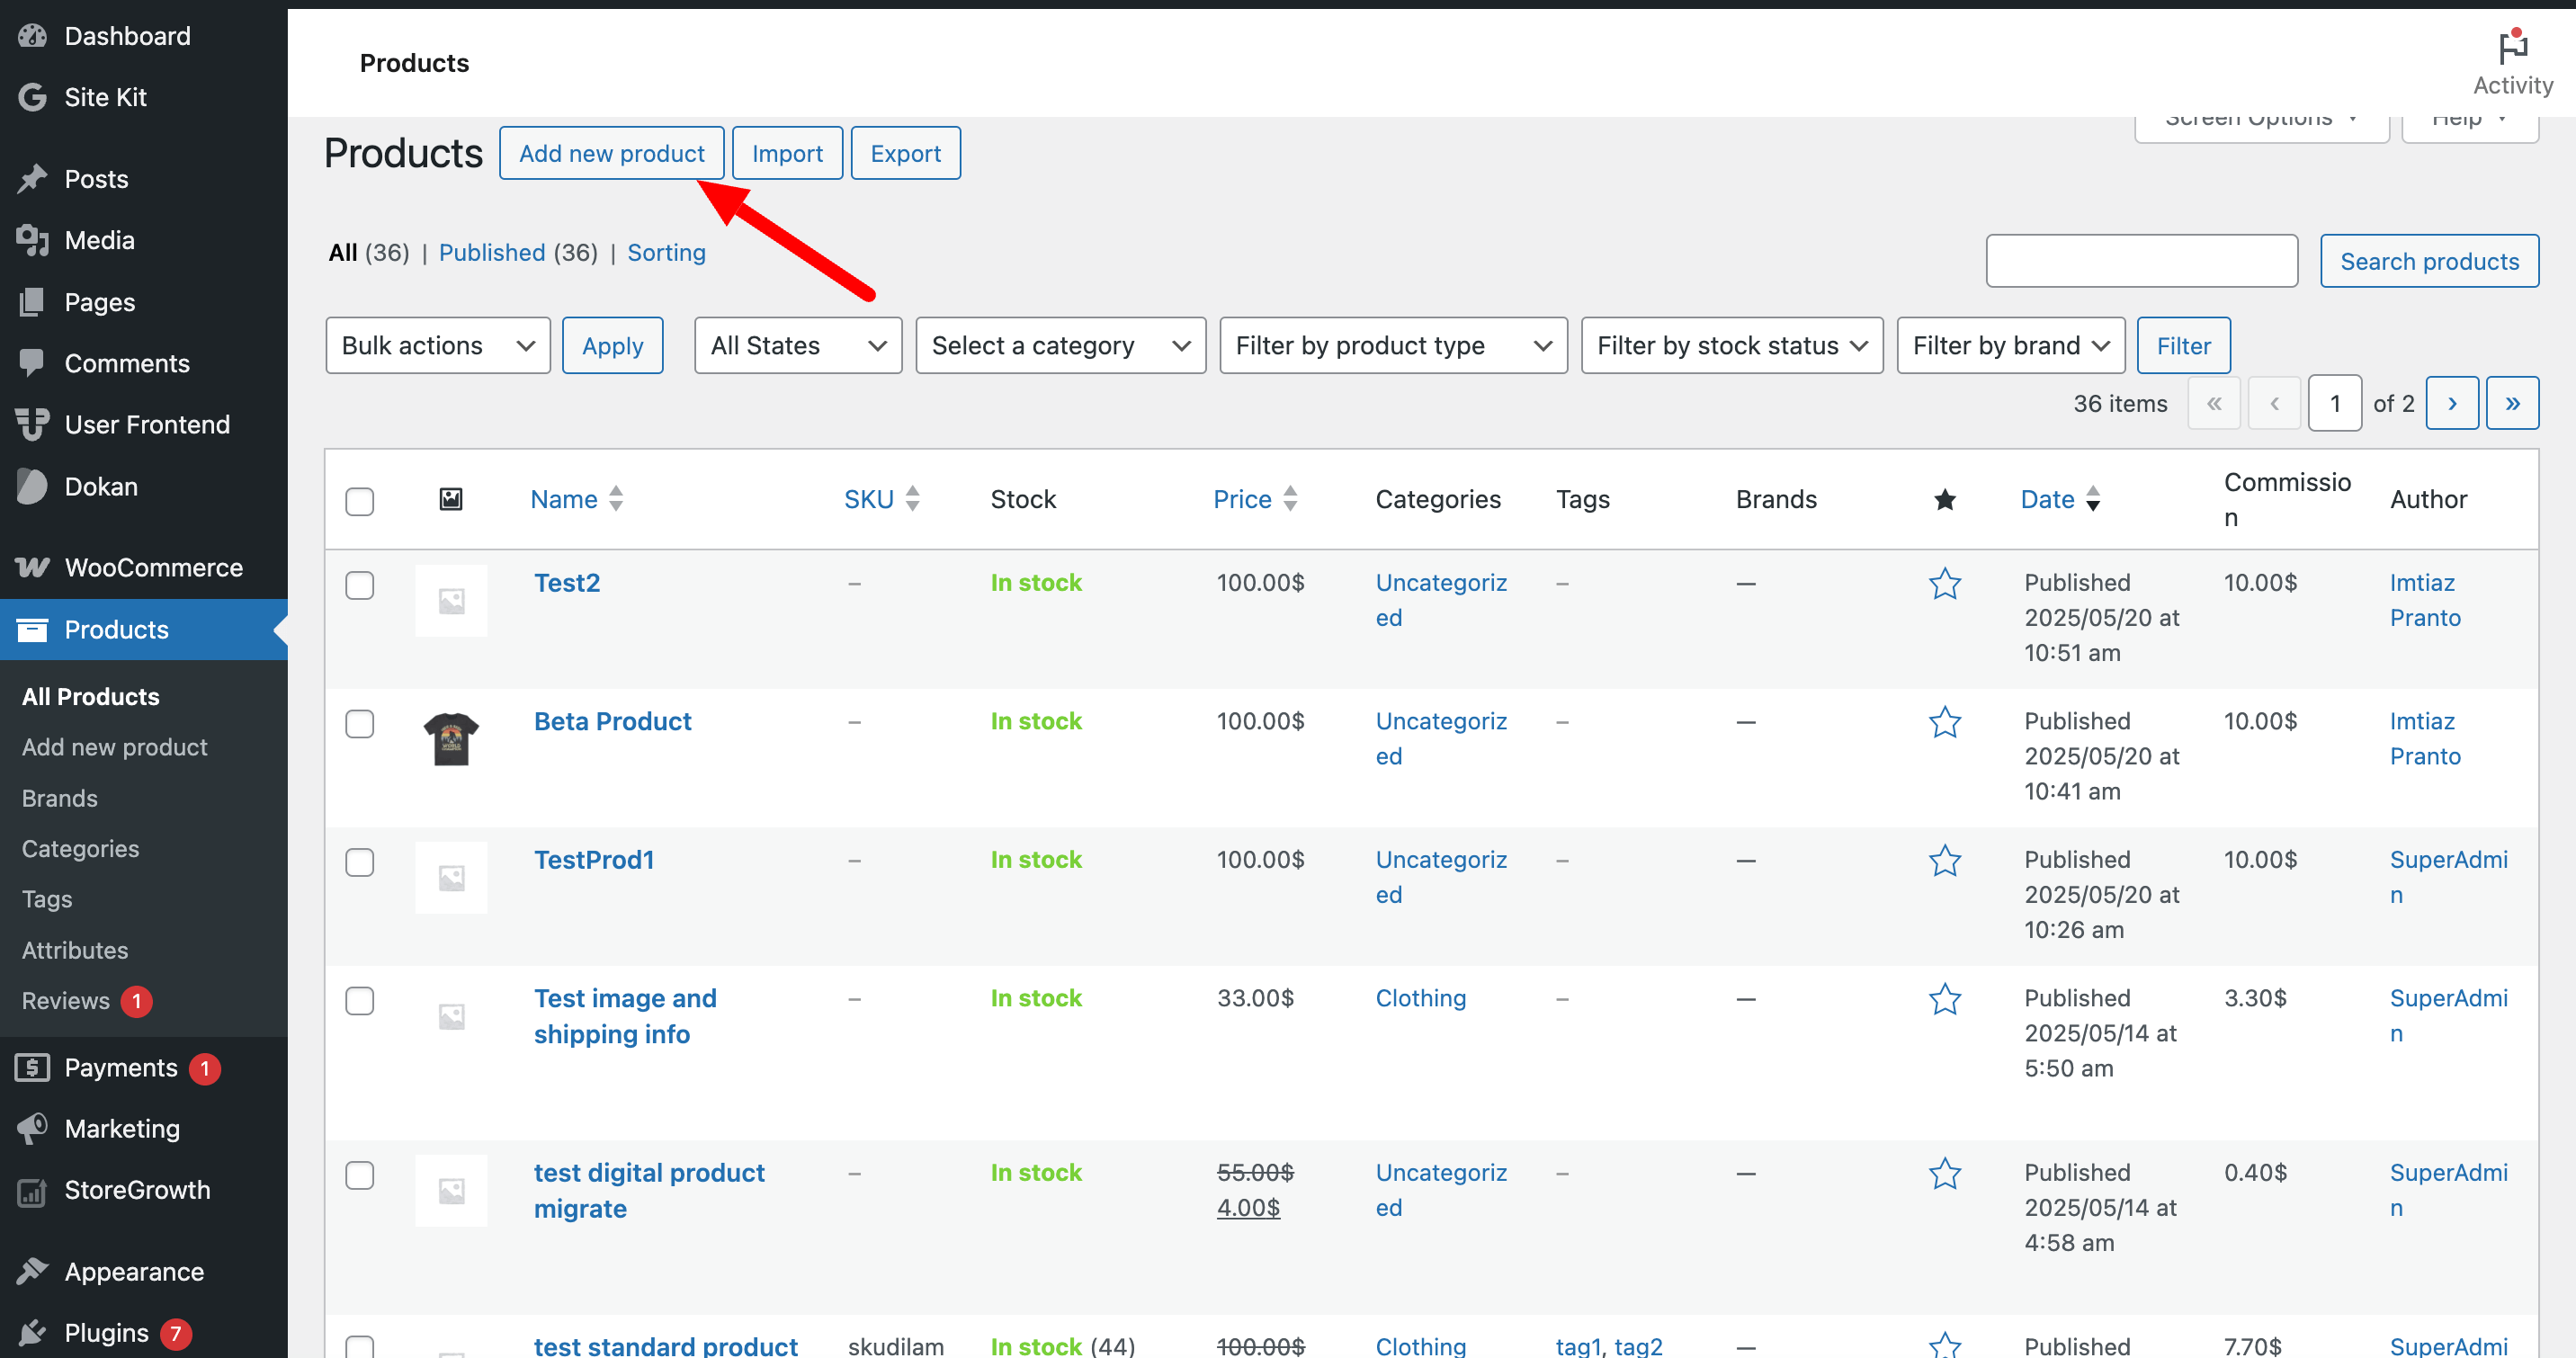
Step 1: Add a New Product
First, log in to your WordPress dashboard. Then go to Products > Add New.
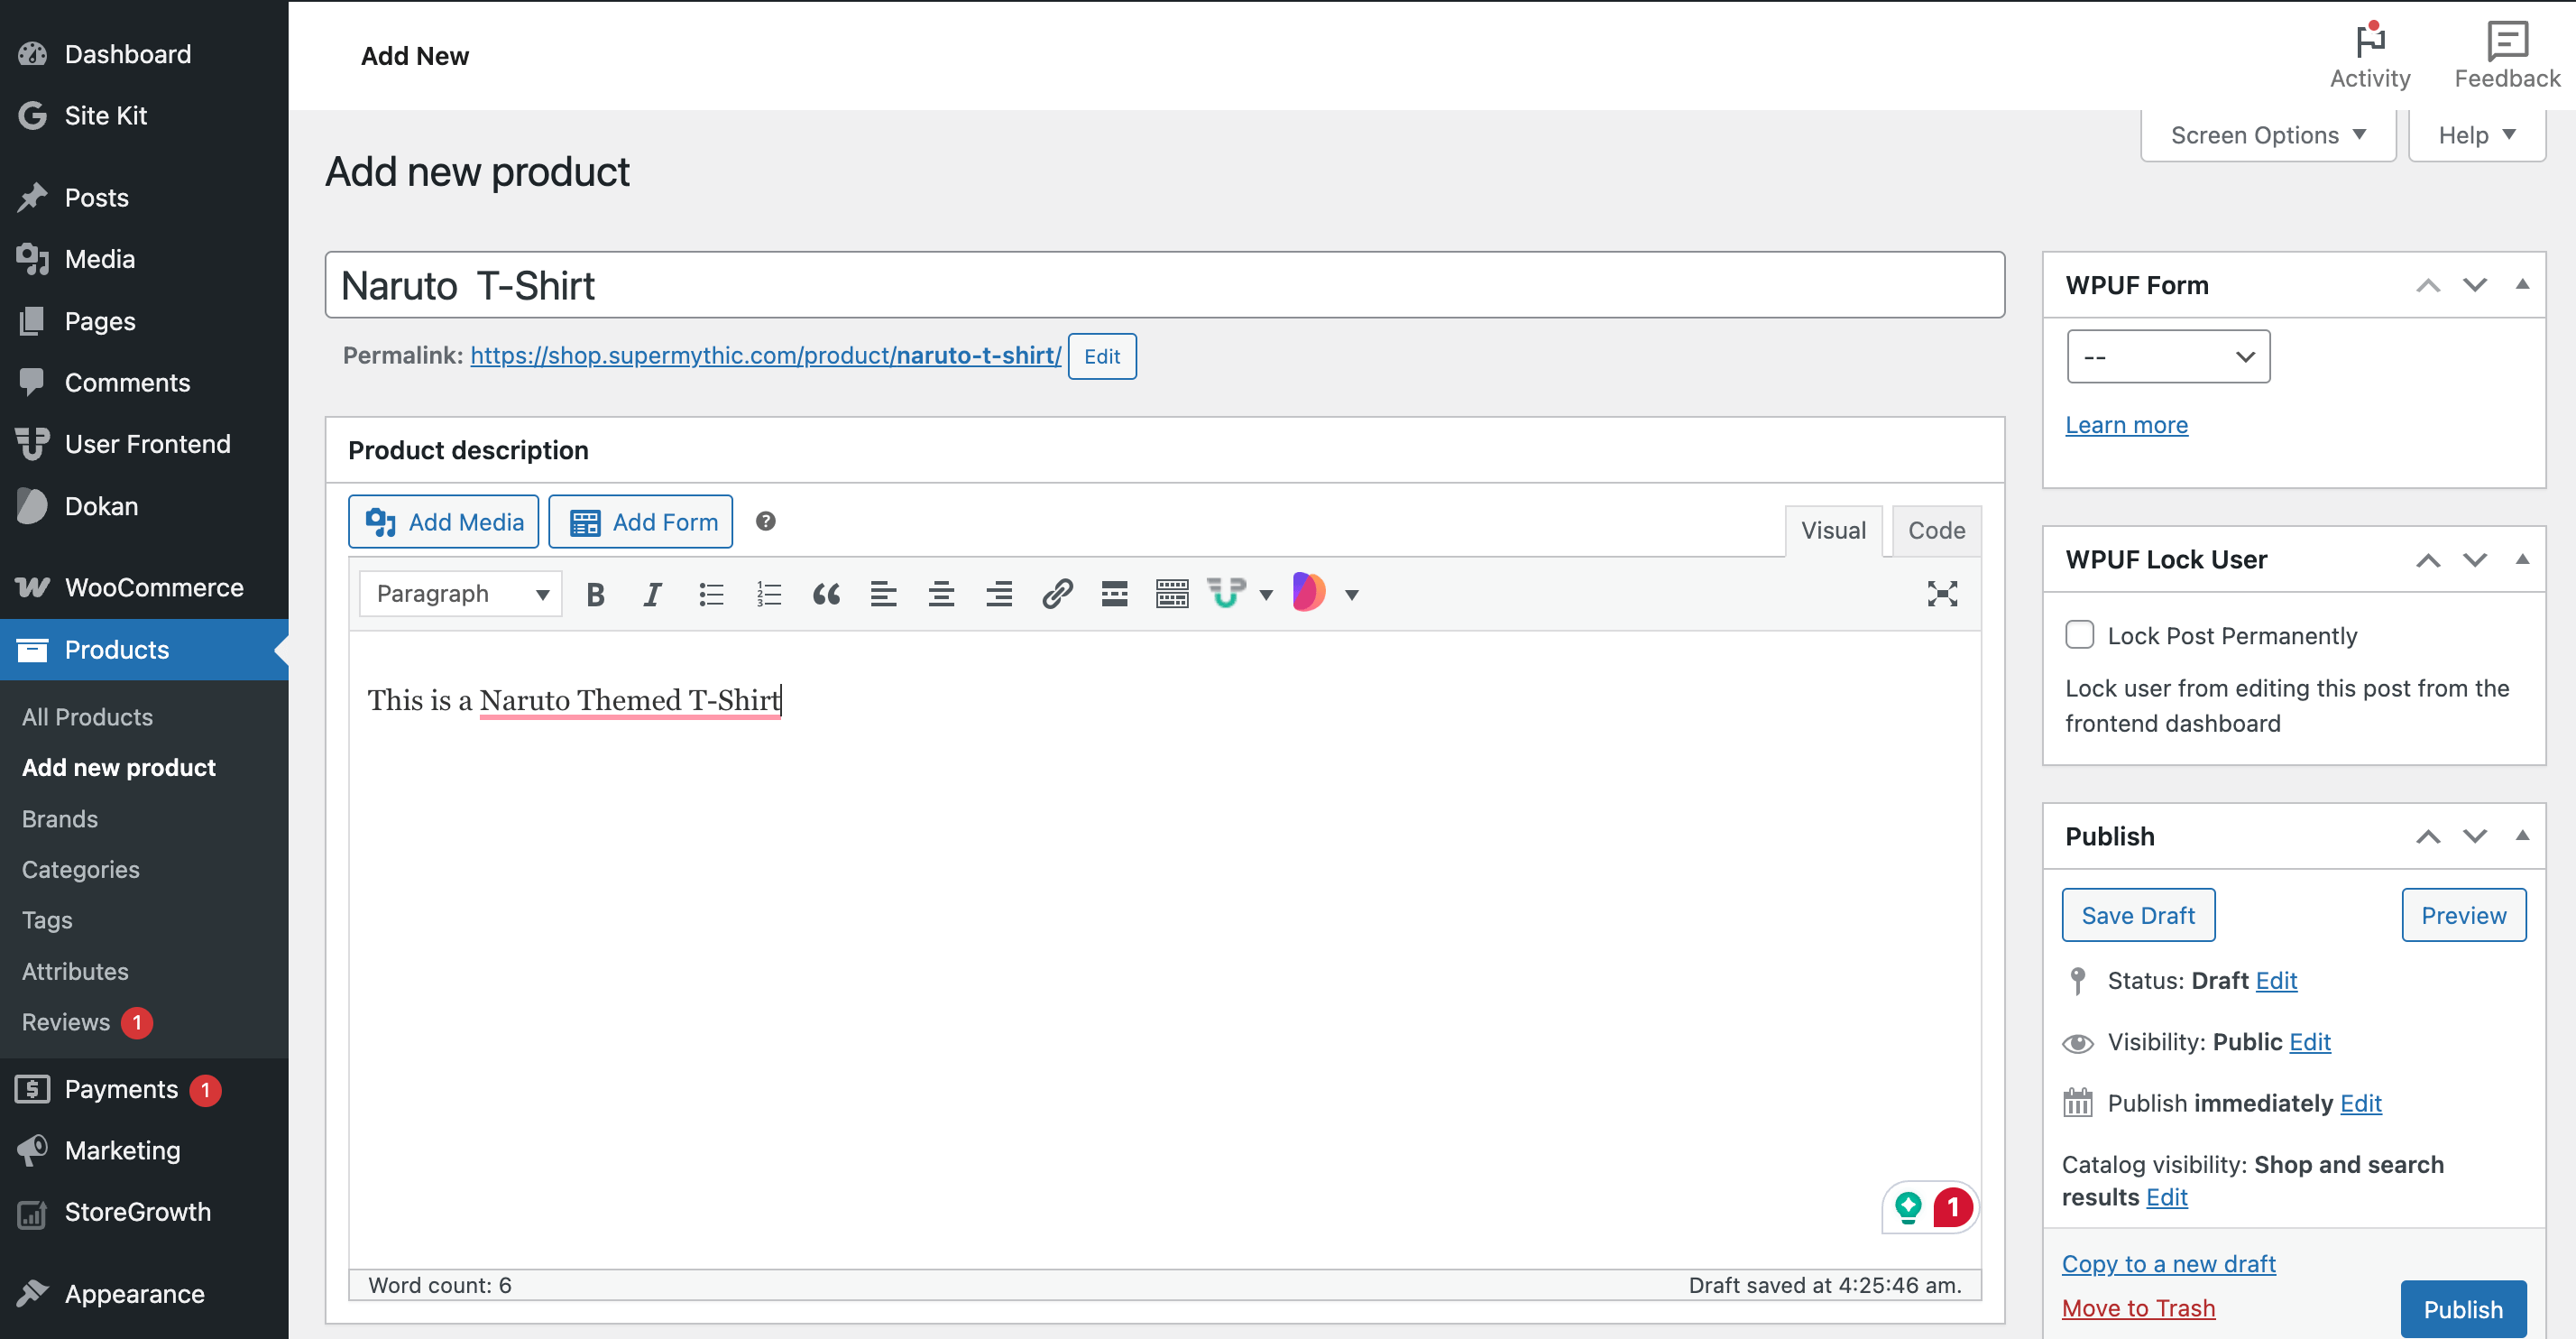
You will get a new page. There you need to enter the product name and description.
Step 2: Set the Product Type to Variable
You will find the product section when you scroll down. In the Product data section, choose Variable product from the dropdown menu.
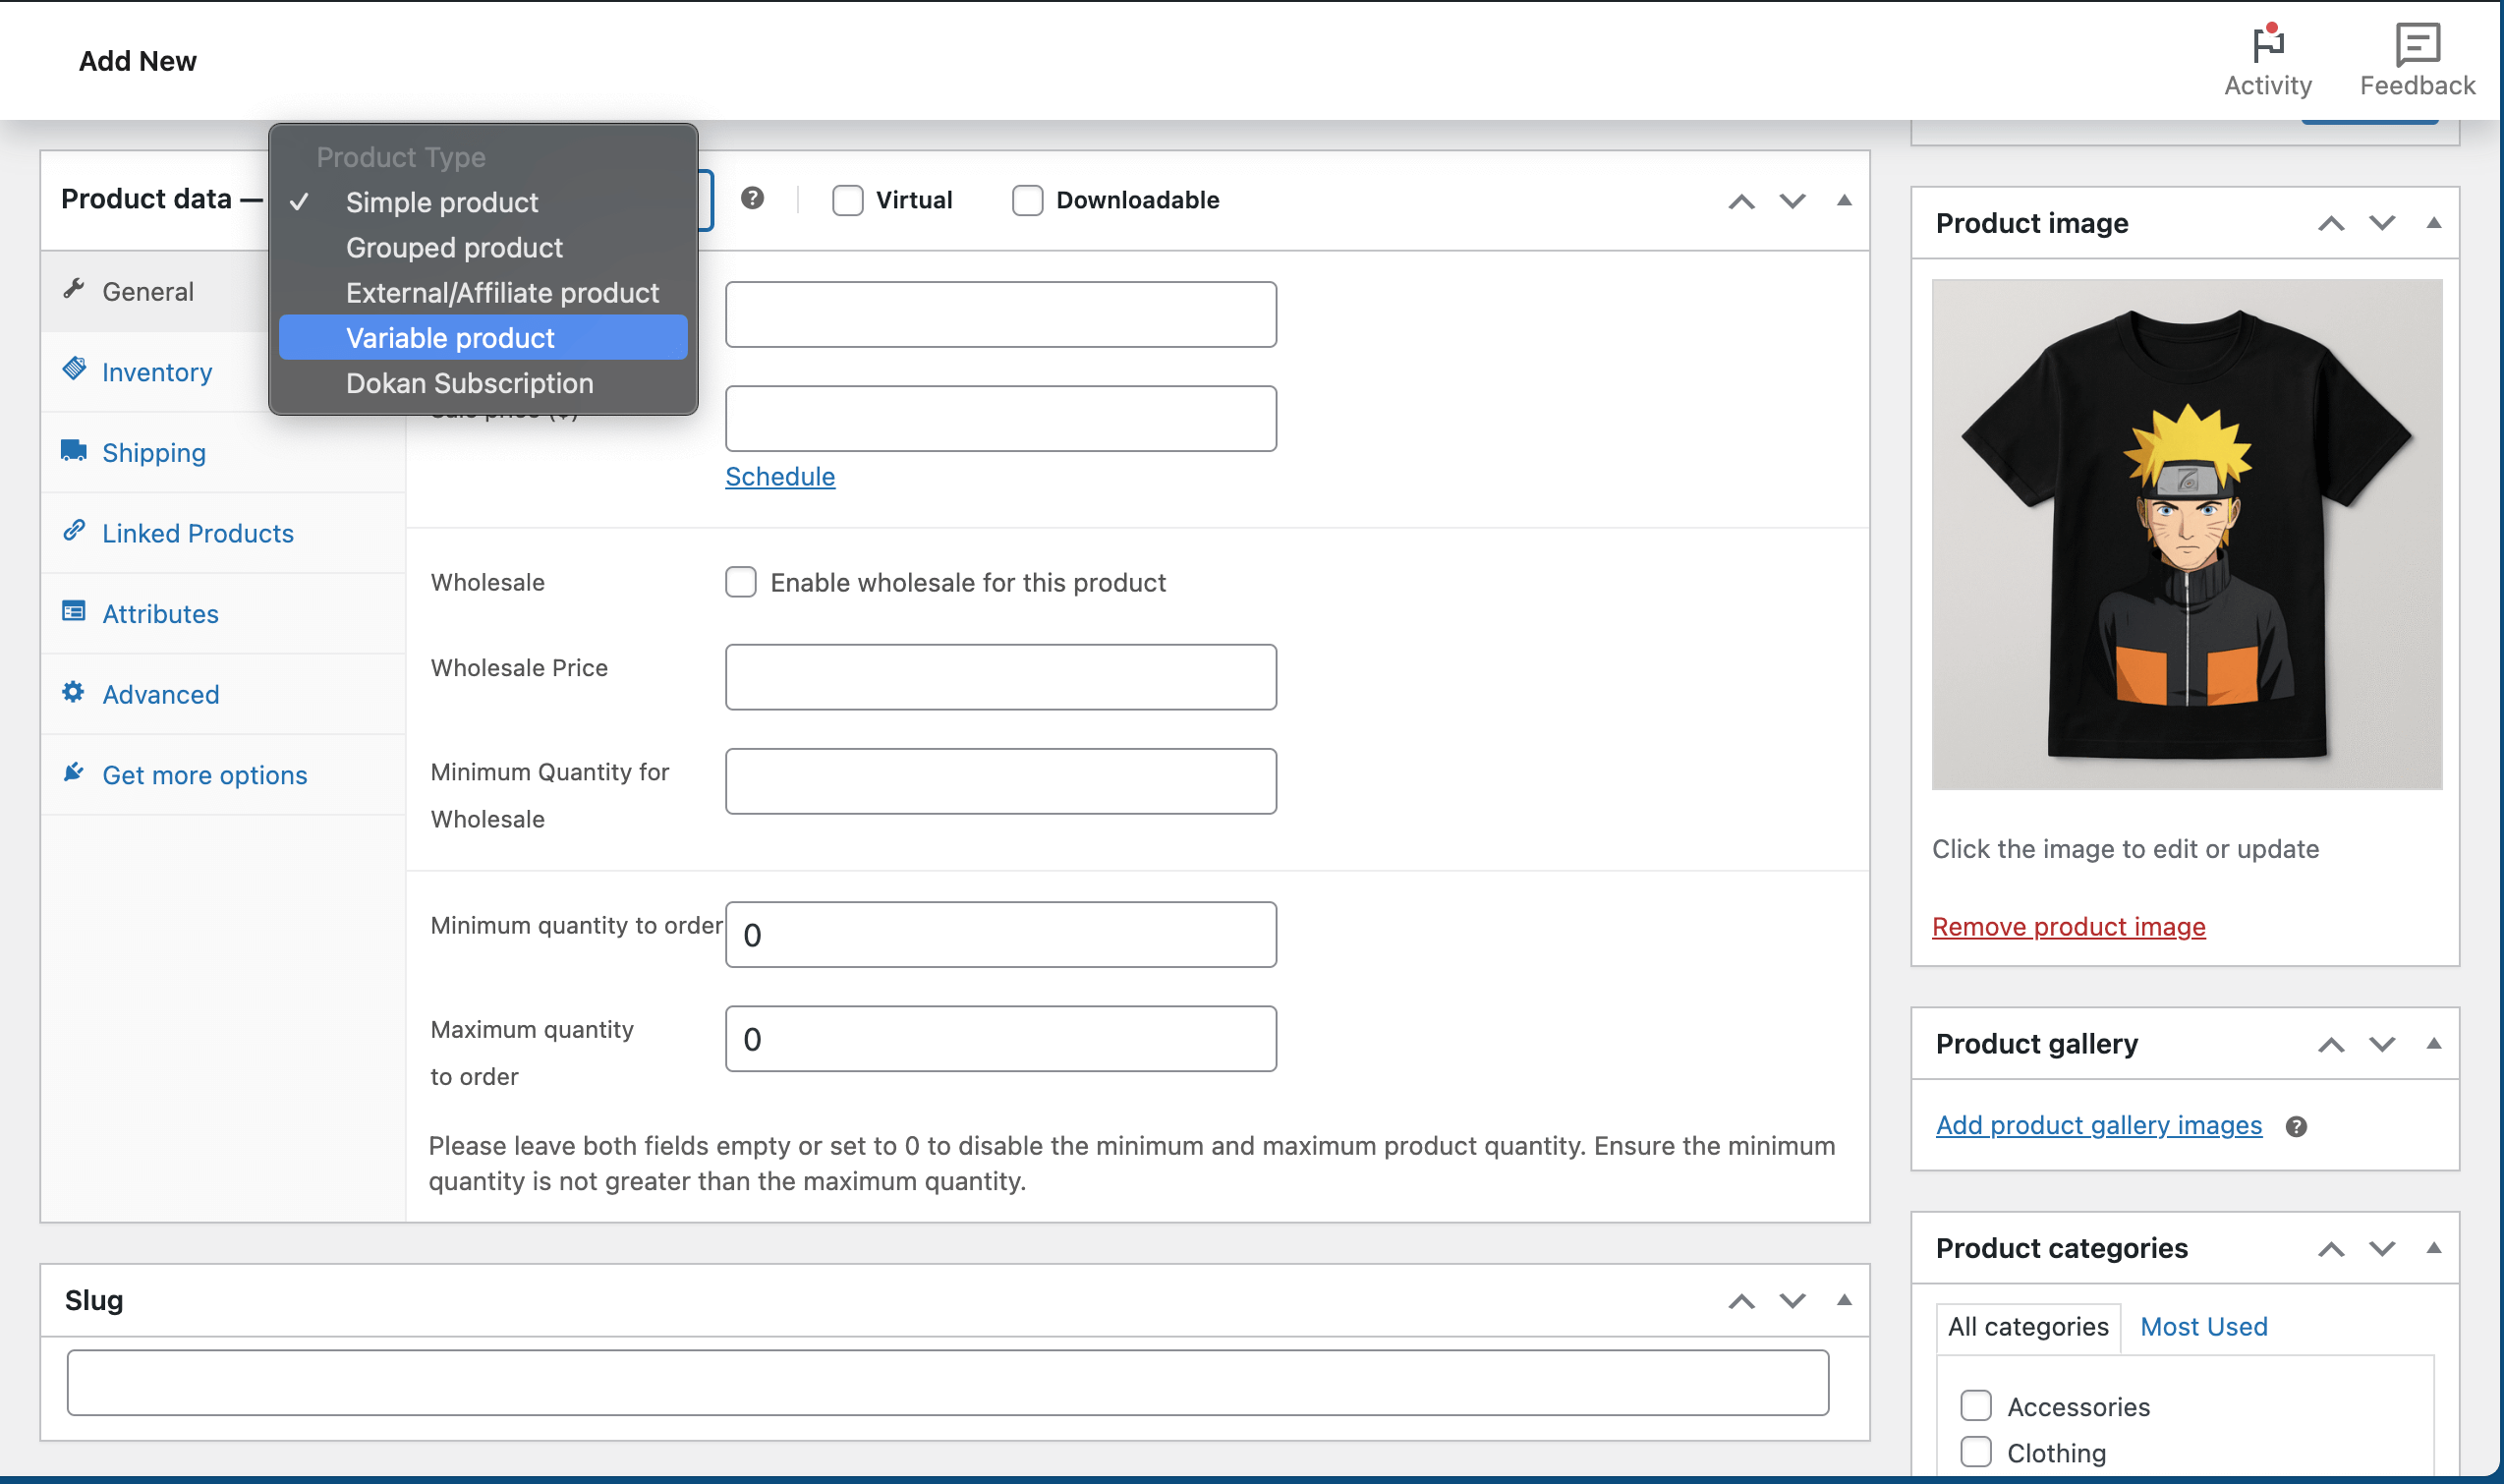
This will unlock additional options for adding product variations.
Step 3: Add Attributes
Next, click on the Attributes tab under the Product data section. Then you have to choose the attribute (such as Size or Color) that you want to add and click Add.
Add the values for the attribute (e.g., Small, Medium, Large for Size or Red, Blue, Green for Color).
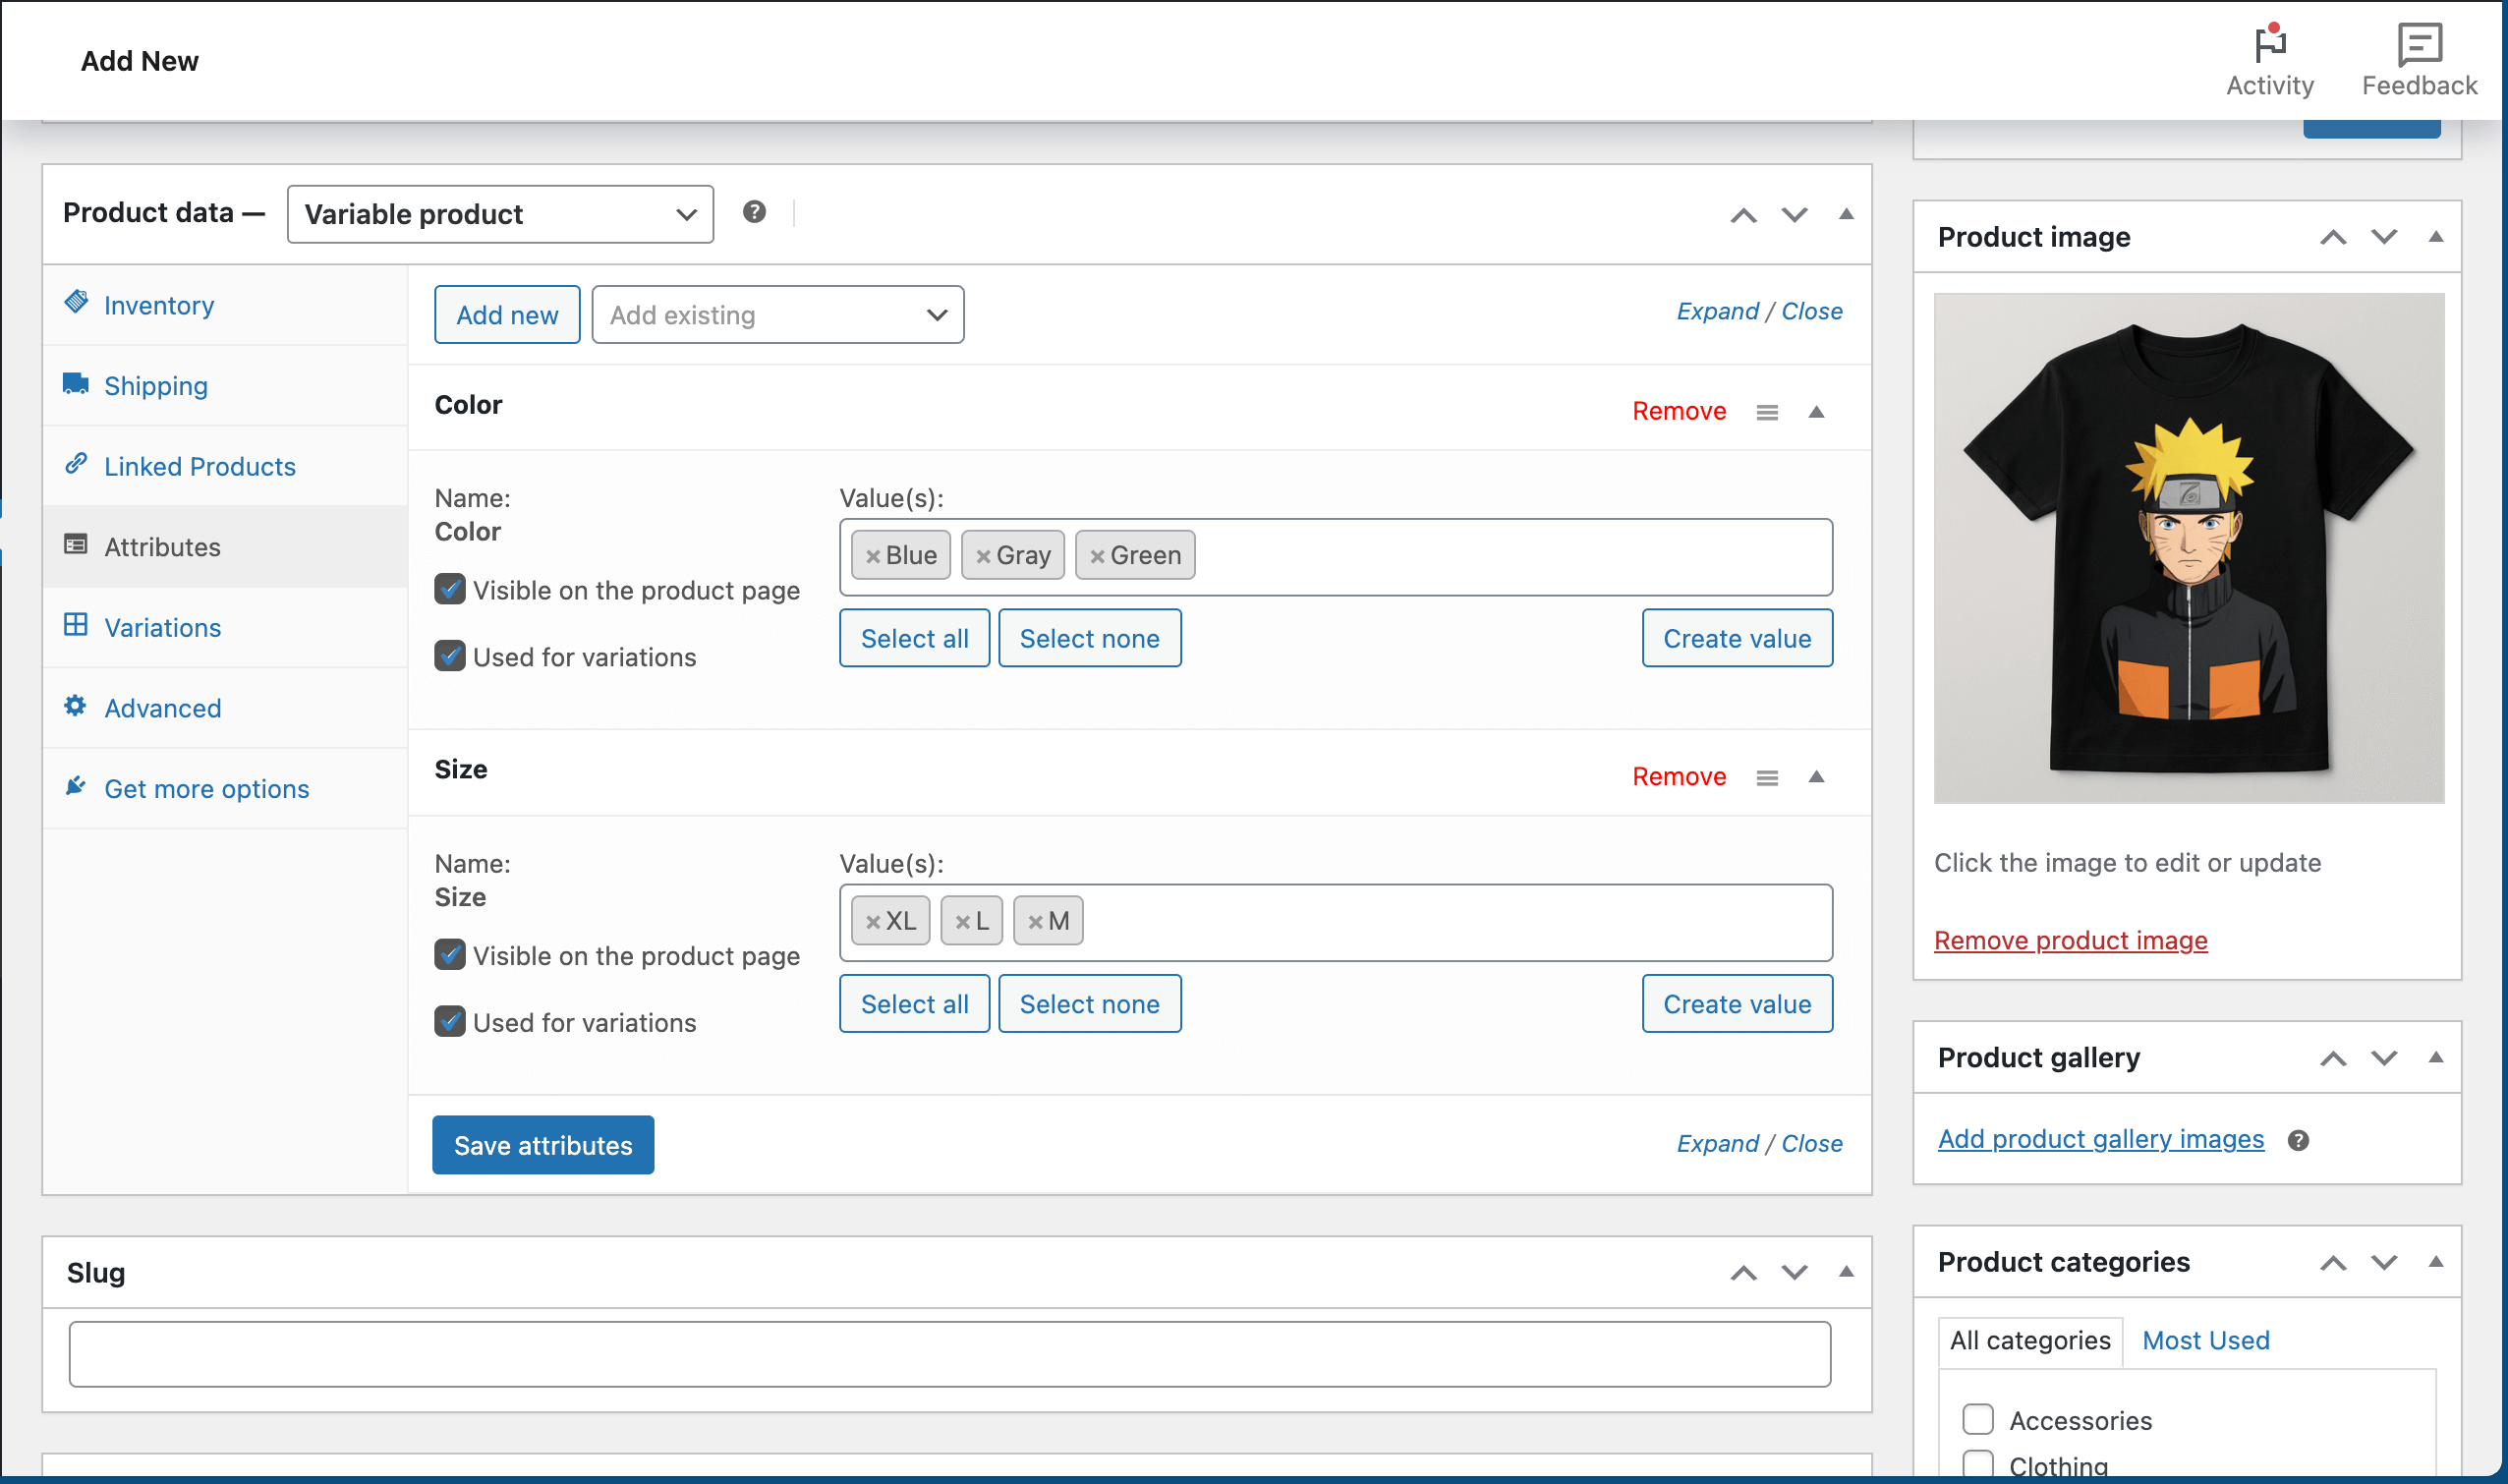
Don't forget to to check the box for Used for variations to allow these attributes to be used in the variations.
Step 4: Create Variations
After adding the attributes, click on the Variations tab. Then hit the Generate Variations button.
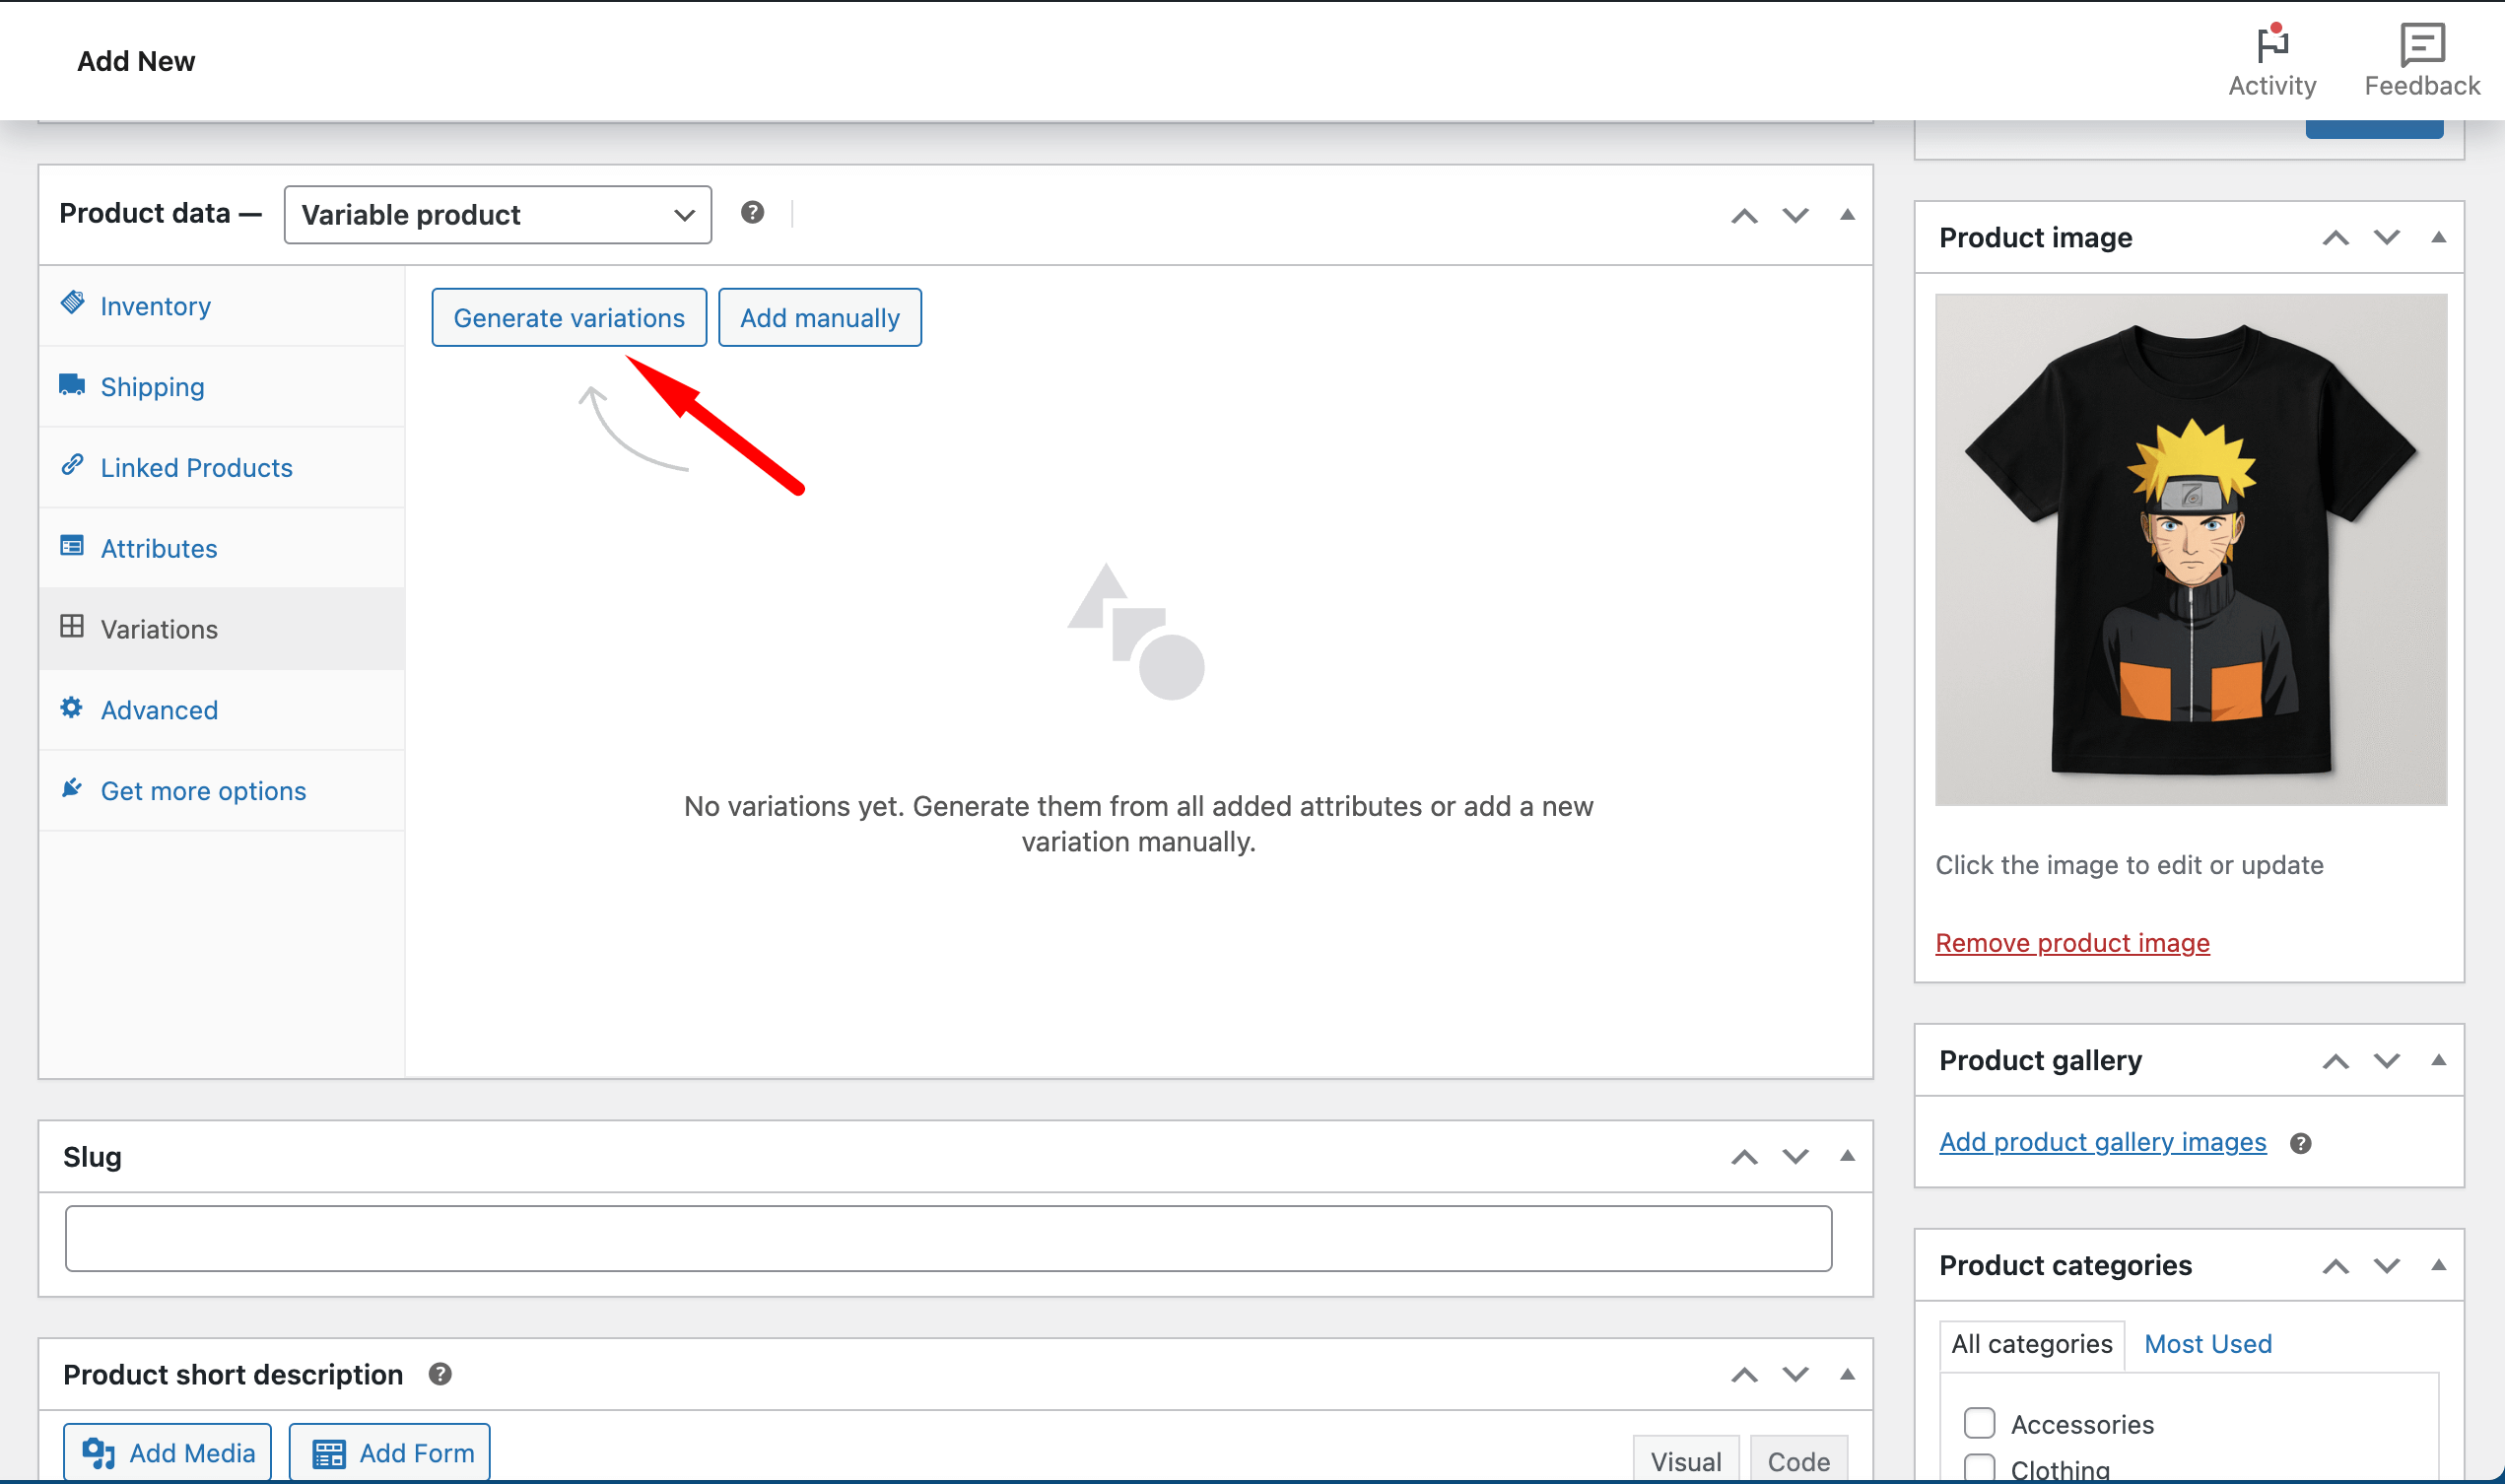
WooCommerce will automatically generate all possible variations based on the attributes you added.
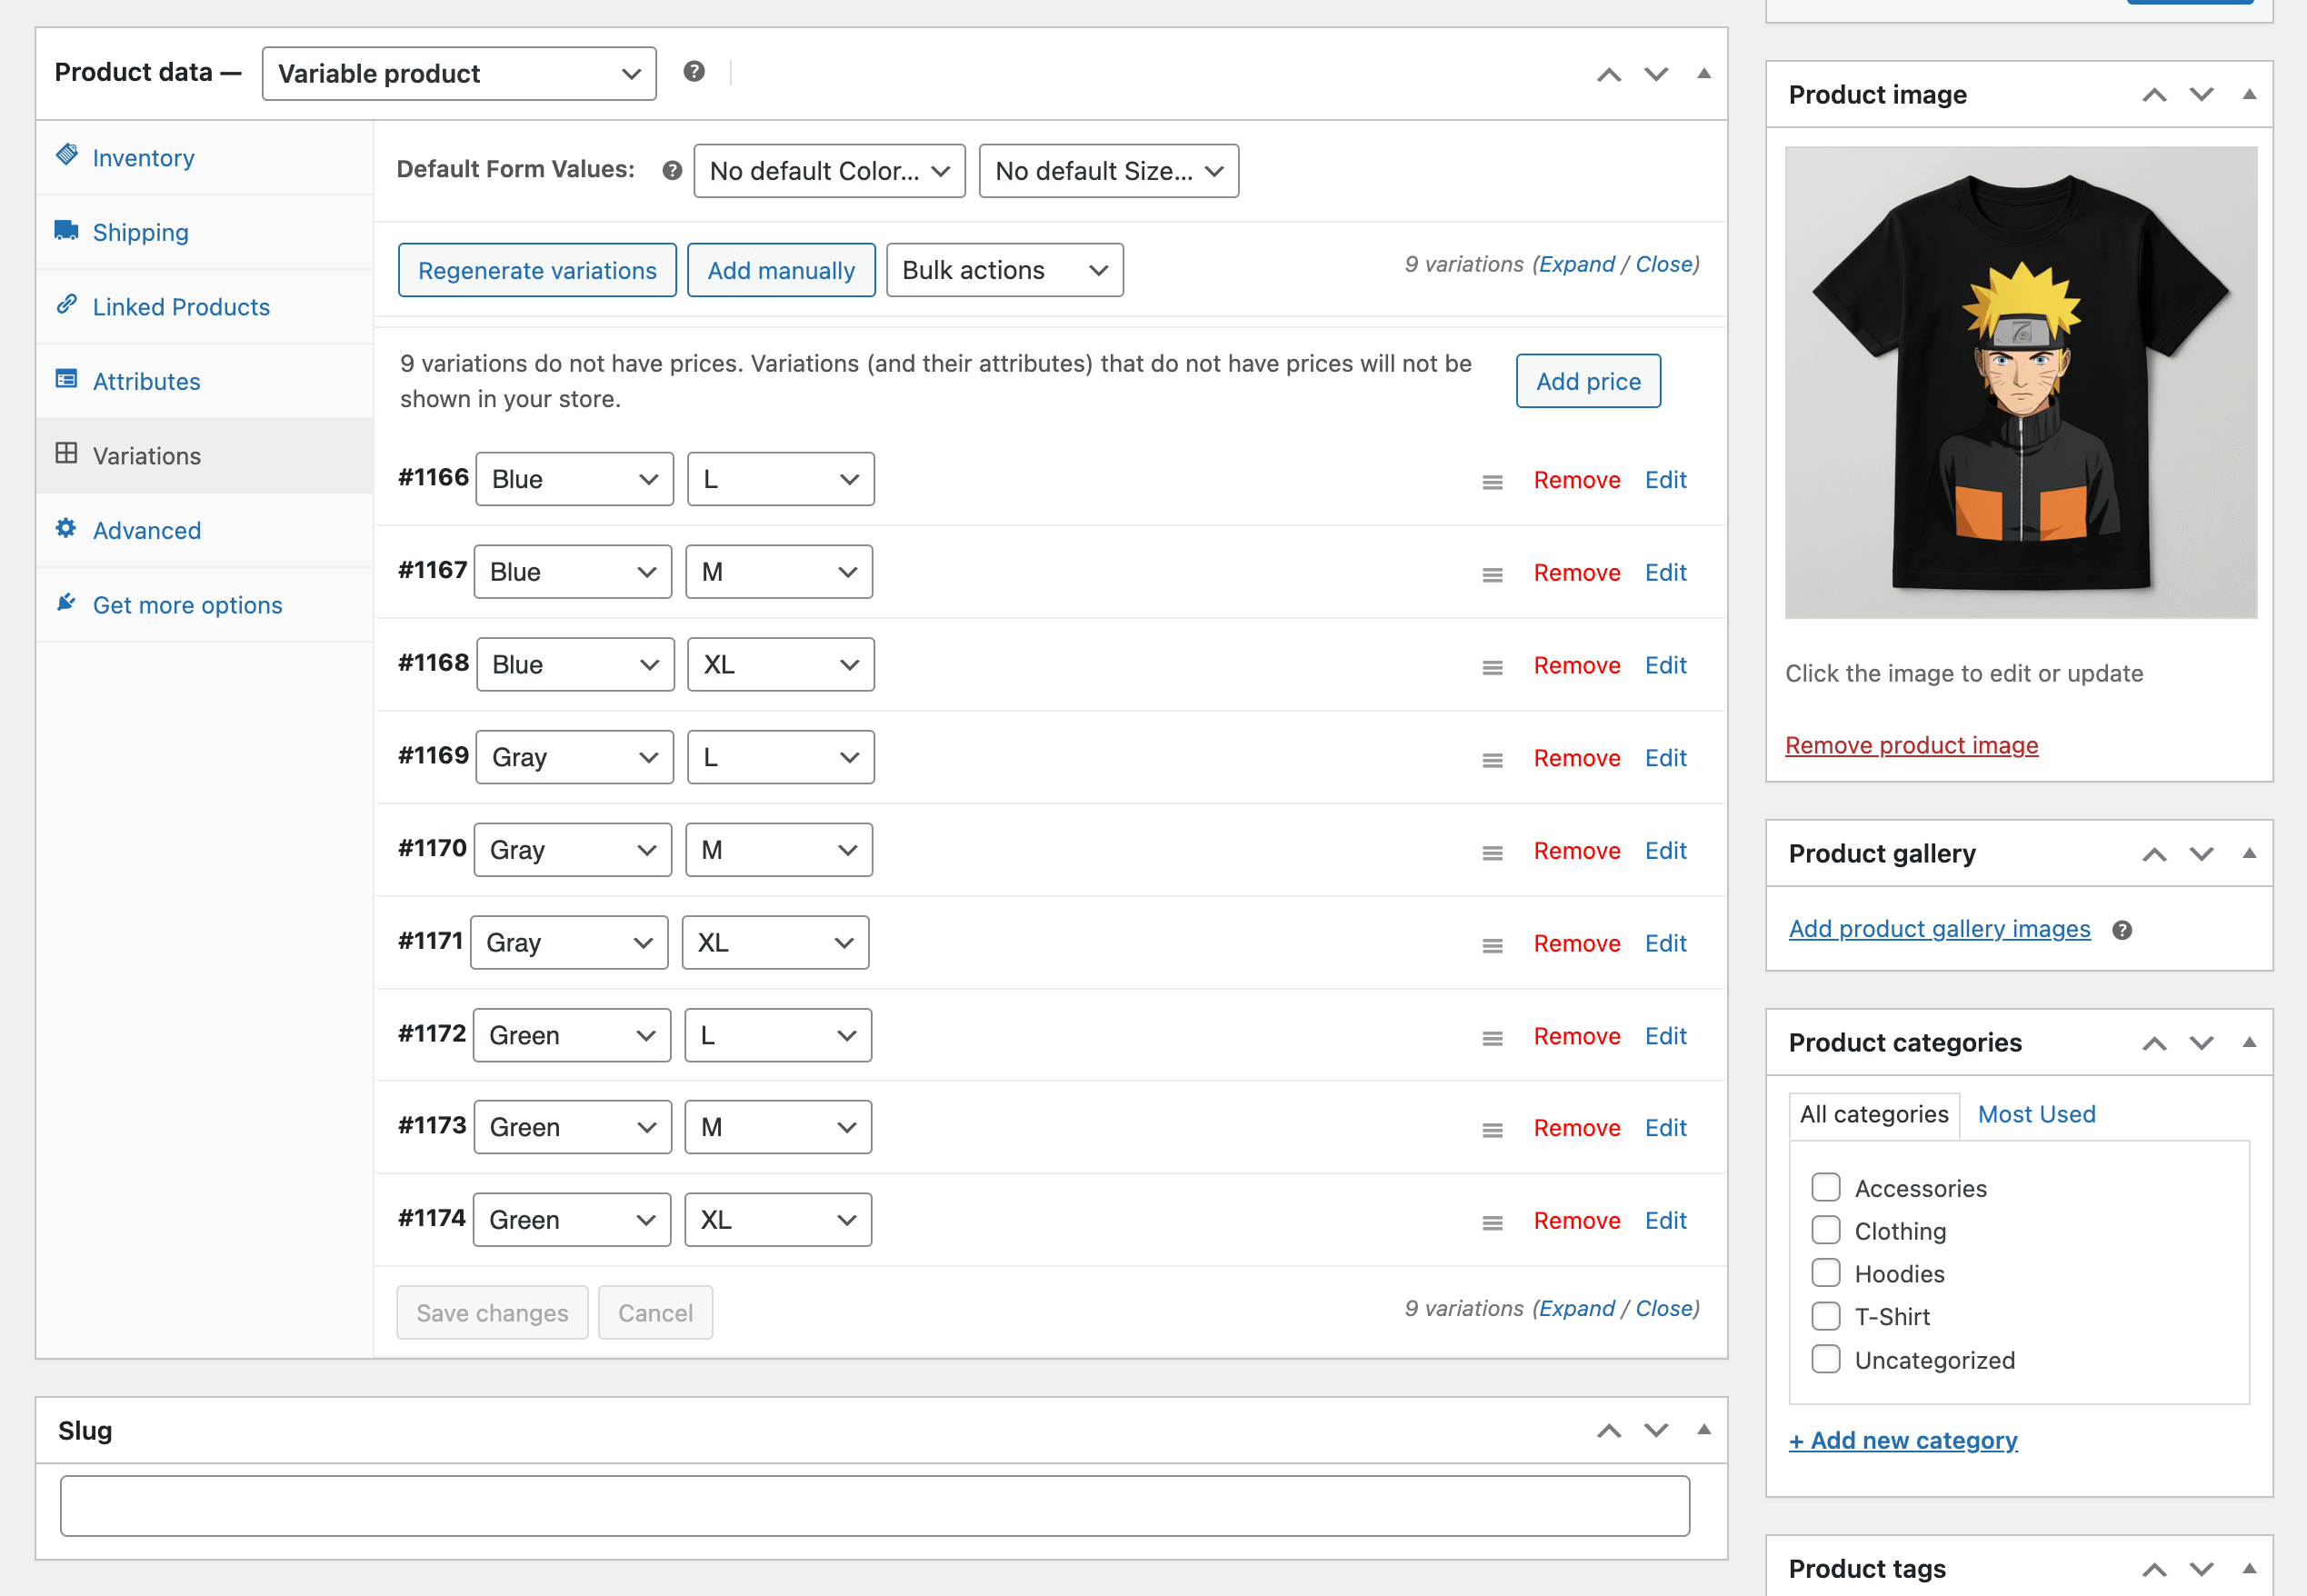
You can now set prices, stock levels, images, and other details for each variation.

Step 5: Save Your Product
Once you’ve set up your variations, click Publish to save your variable product.
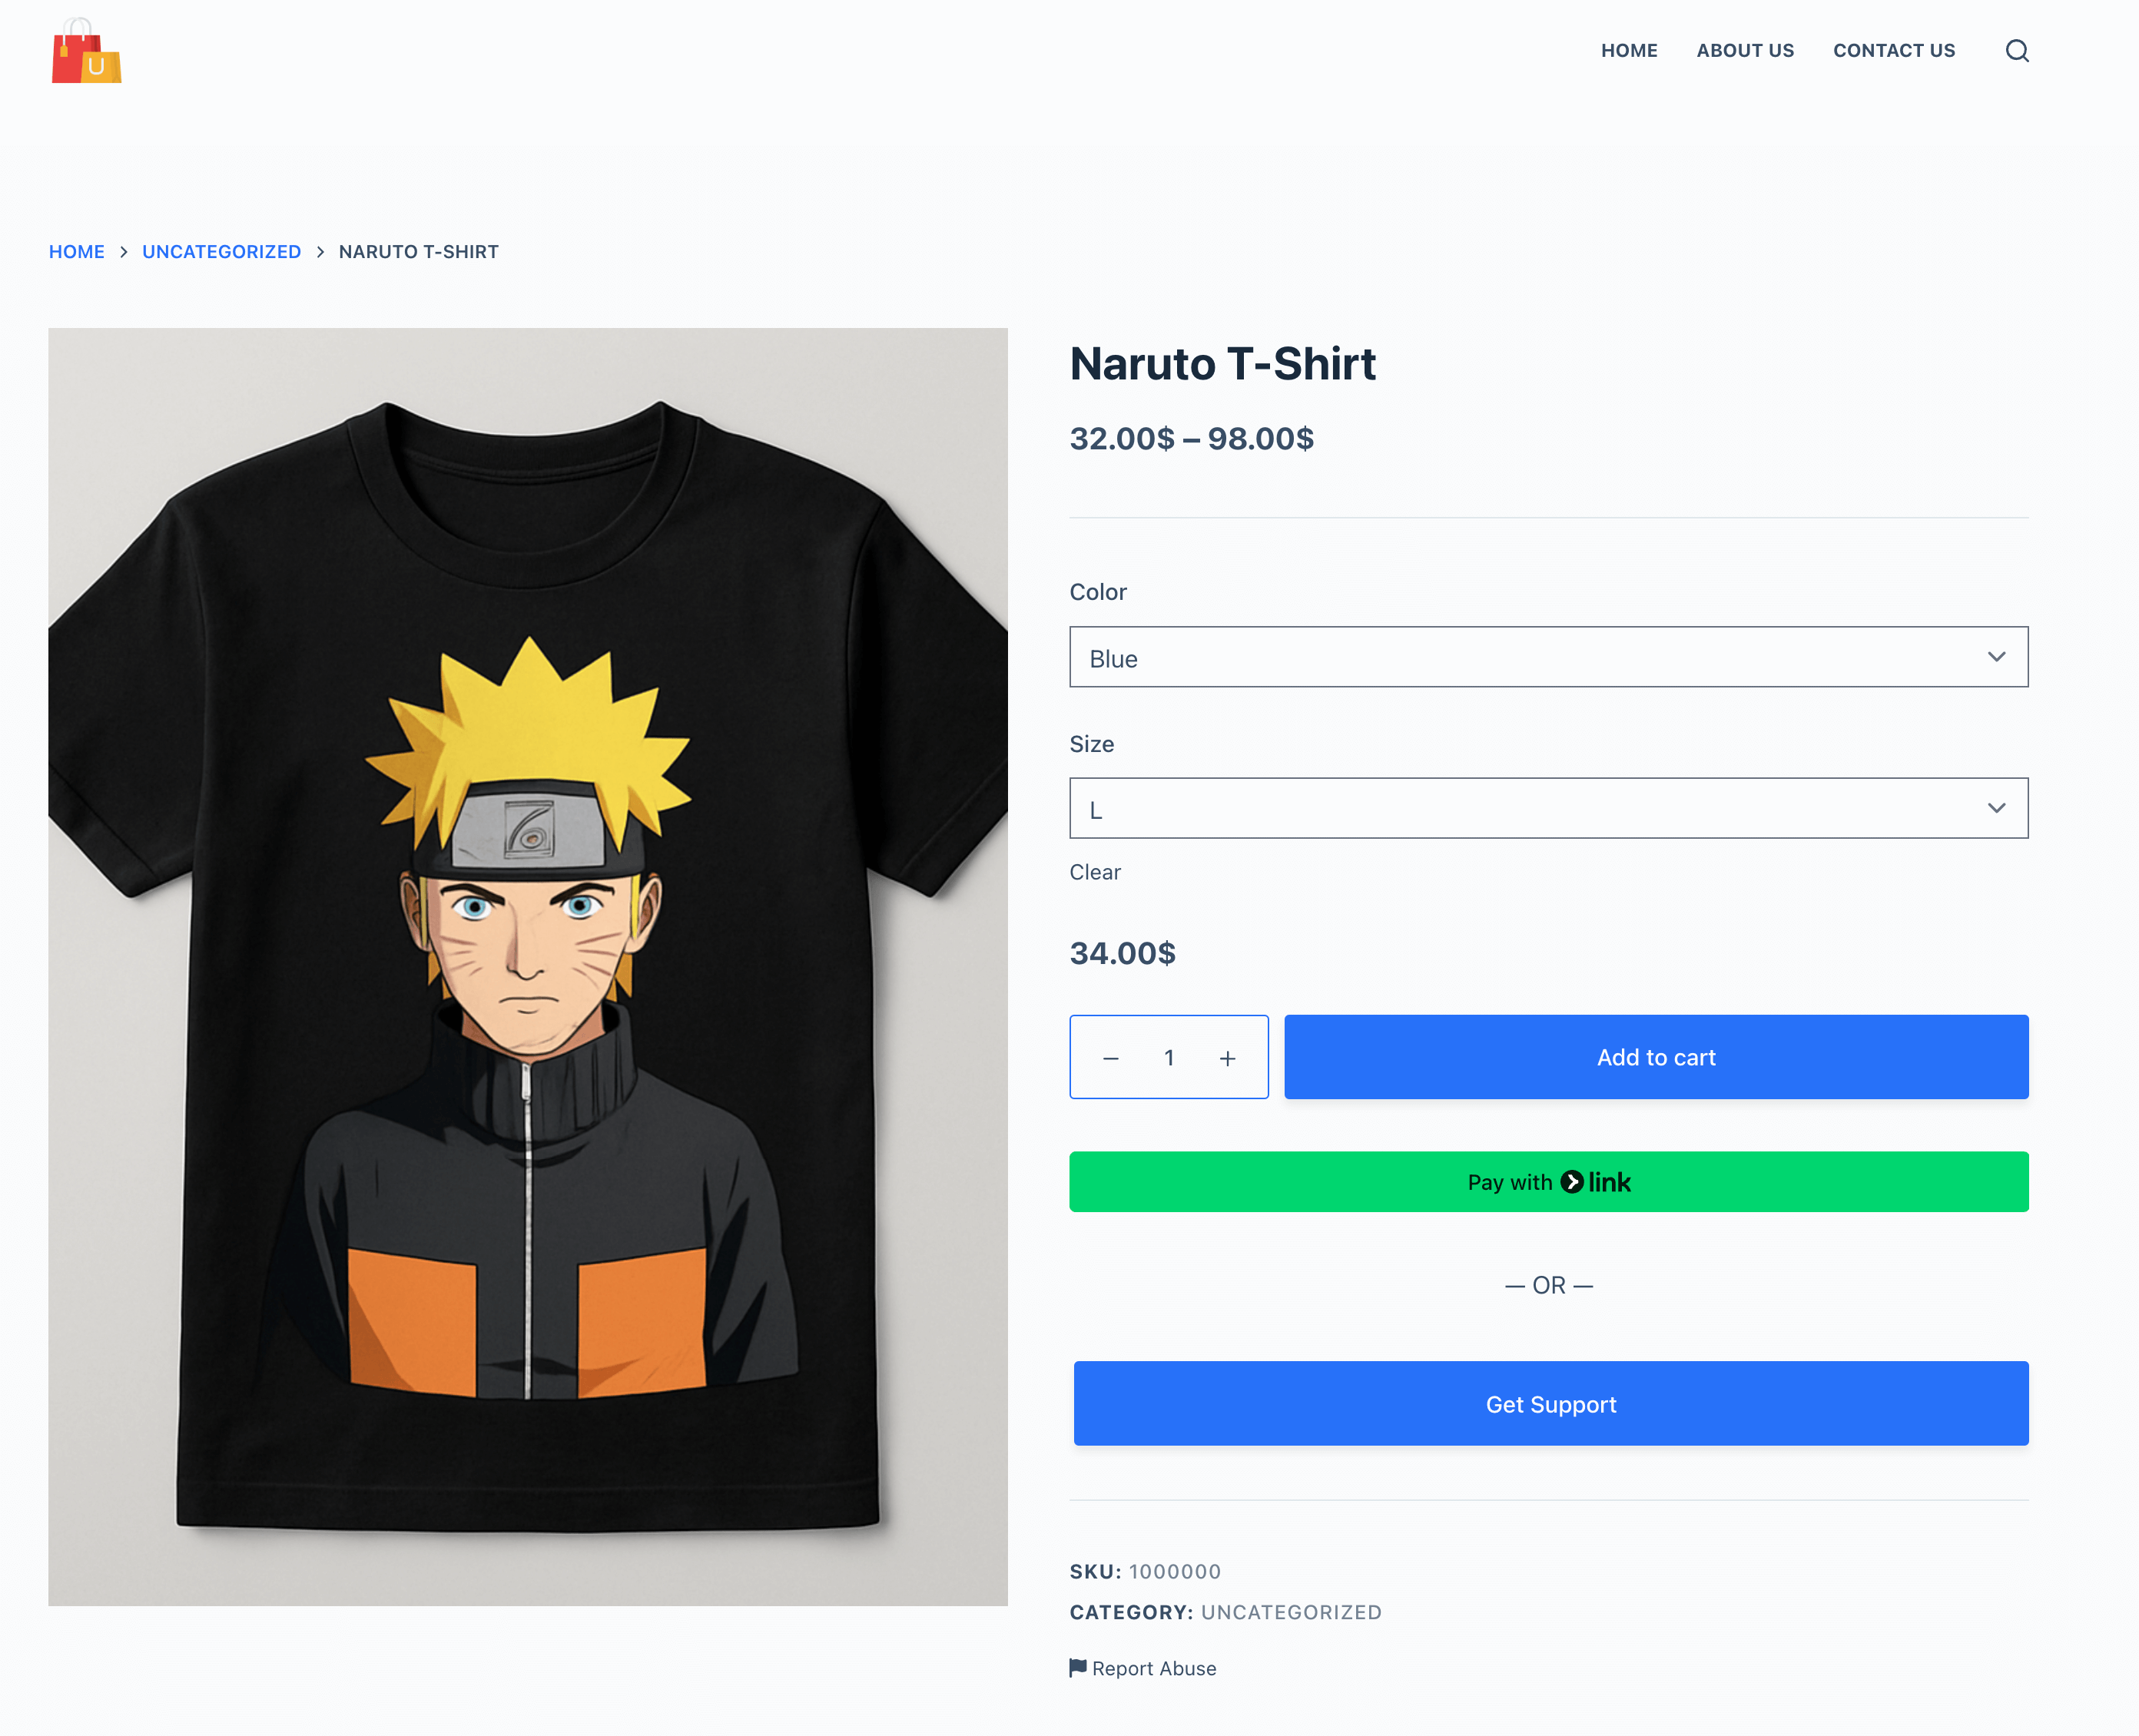
This is how you can create variable products in WooCommerce.
Variation vs Attributes: Differences You Should Know
Understanding attributes and variations is crucial when creating variable products in WooCommerce. Both are important, but serve different roles in your product listings. Here's a detailed breakdown:
| Term | Definition | Example |
|---|---|---|
| Attributes | Attributes are the different characteristics or features of a product that can change. These define the types of options a product has. You can use attributes like size, color, material, etc. Attributes are used to describe a product and show what variations are available. | For a t-shirt, attributes could be Size (Small, Medium, Large) and Color (Red, Blue, Green). They represent the different options you can select for the product. |
| Variations | Variations are the actual product options that come from the combination of your attributes. They represent the specific choices customers can select on the product page, such as a specific size and color combination. Variations can have individual settings like unique prices, stock, weight, images, and SKU numbers. | For a t-shirt, a variation could be Size: Medium, Color: Red. This variation might have a different price or image compared to Size: Large, Color: Blue. |
Key Differences
Attributes define the selectable options a product can have, like size, color, or material. These attributes themselves don’t carry stock, pricing, or SKU information; they simply outline the choices available.
Variations, on the other hand, are the actual combinations of those attributes that customers can purchase. For example, if you offer Size (Small, Medium, Large) and Color (Red, Blue, Green), the variations would be combinations like Small-Red or Large-Blue. Each variation can have its own price, stock level, and SKU.
Attributes are often reused across multiple products (e.g., “Red” might apply to shirts, jackets, and hats), whereas variations are unique to individual products with multiple configurable options.
Offer More Options to Customers With Variable Products!
Learning how to create a variable product in WooCommerce is a great way to offer more options to your customers without cluttering your store. By using attributes and variations, you can ease your product listings and provide a better shopping experience.
- Attributes define the different features of a product (like size or color).
- Variations are the specific combinations of these attributes that customers can choose from.
You can easily set up variable products in WooCommerce, offering more choices to your customers and helping increase your sales. Don't forget to always check your variations for correct pricing, stock levels, and any other unique details for each option.
Take the next step and start building your product catalog with variations that meet your customers' needs.