The Essential Guide on How to Update weDevs Plugins (Free+Premium)
Updating plugins is one of the most crucial things for a WordPress site. Because when a new update comes, it comes with many bug fixes, security patches, or new features. Keeping your plugins updated will keep your site bugs free and advanced.
Our developers sometimes add patches related to other plugins in the new update, so if the plugin is not updated then the integration with other plugins may fail due to some critical error. Nobody wants to get a critical error in their site, do they?
That is why we will be discussing how to update the weDevs plugins automatically and manually. Today you'll learn-
- Updating weDevs Plugin Automatically
- Updating weDevs Plugin Manually
- Updating weDevs Premium Plugins
Note: Do not forget to keep a backup of your full site and database always, before doing a critical update.
You may follow this link to keep a backup of your site: How to Backup Your WordPress Site.
Let's dive into the details-
1. How to Update weDevs Plugin Automatically
You will see all of your updates from the Dashboard > Updates. From there you can update your plugins, WordPress version, and themes.
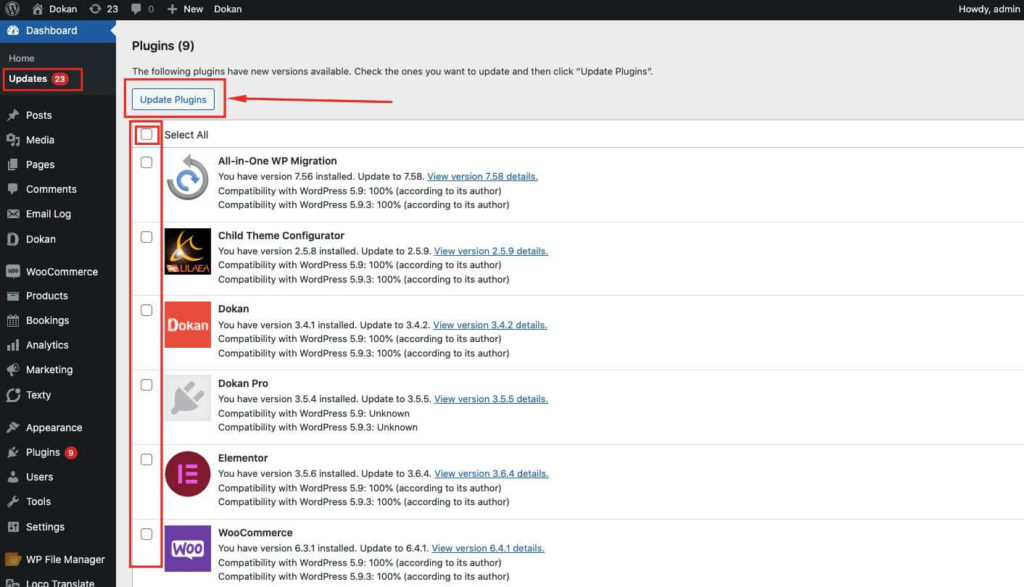
You can also update the plugins from the WP Dashboard > Plugins. When you install a plugin on your WordPress site (Free or Premium), you will see an update button when an update will arrive.
See the image below:
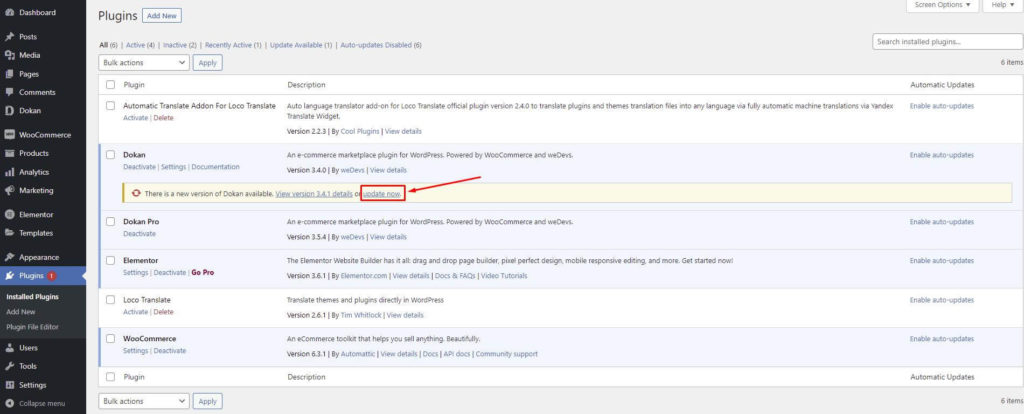
You can click on the “Update now” button to update the plugin.
2. How to Update weDevs Plugin Manually
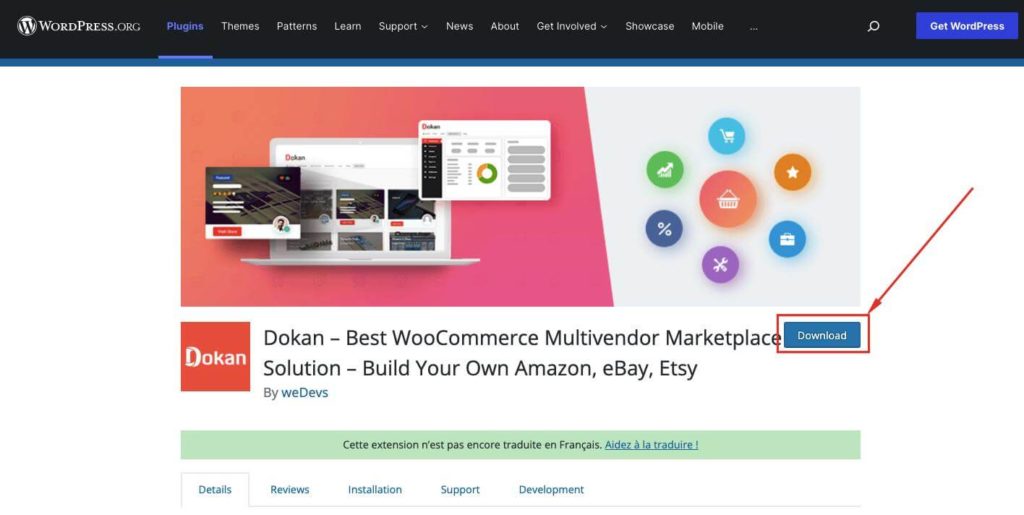
To update a plugin manually you have to download the plugin first. All of our free plugins are available on WordPress.org. You can find and download them from the below link:
weDevs plugins: Download weDevs plugins.
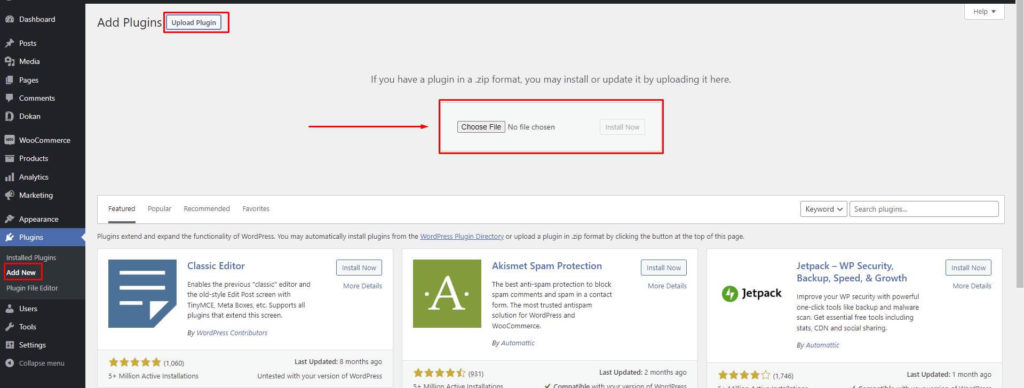
After Downloading the .zip file of the plugin, you can upload it through FTP or direct WP Dashboard > Plugins.
To upload the plugin to your WordPress site, navigate to WP Dashboard > Plugins > Add new plugins > Upload plugin. Choose the plugin you want to install from your PC/Laptop and you can upload the file. Install and Activate the plugin.
Next, let's show you how to update weDevs plugins for pro versions.
3. How to Update weDevs Premium Plugins
Premium plugins have no special guidelines for automatic updates. But for the manual update, you need to download the premium plugin from your weDevs account.
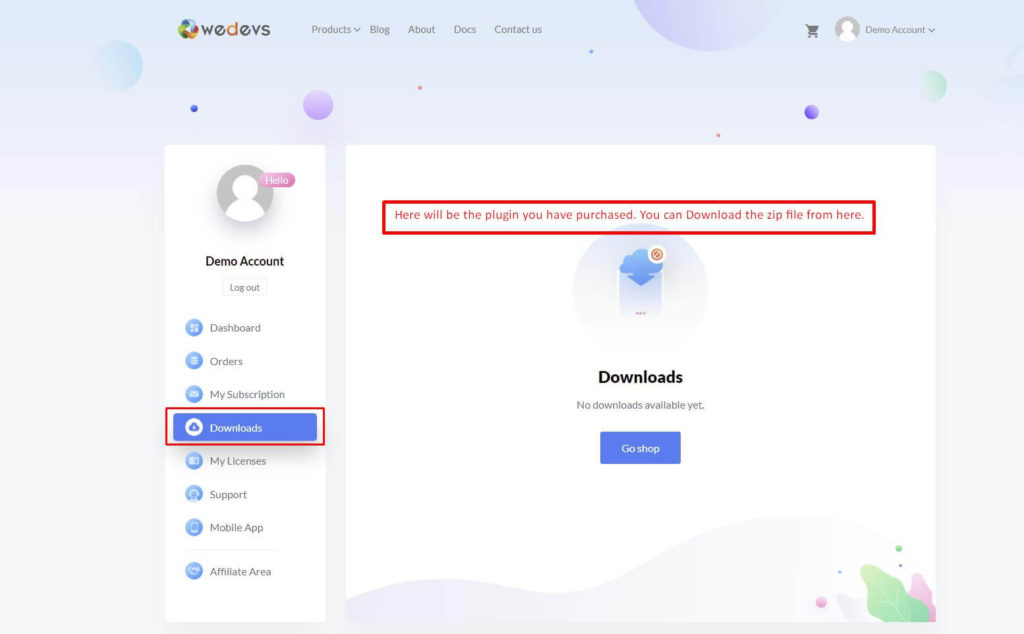
If you do not have any weDevs accounts but you have already purchased the Premium plugin, then you need to create an account with your purchasing email. After that, navigate to your weDevs account > Downloads section. From there you can download the .zip file of the plugin.
After Downloading, you can follow the steps previously mentioned in the Free plugin section to upload it via WP Dashboard. Upload and replace the previously installed premium plugin. The premium plugin will be updated.
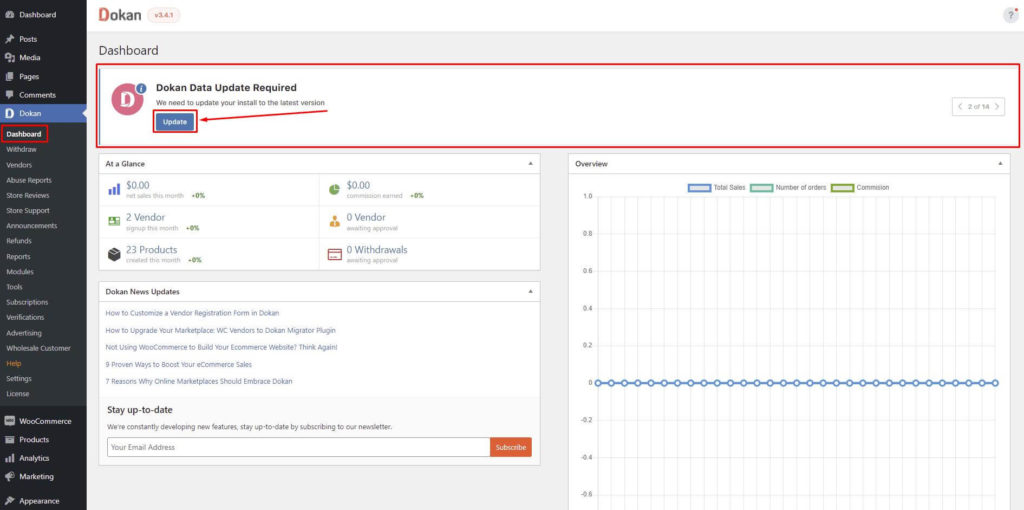
Database Updater
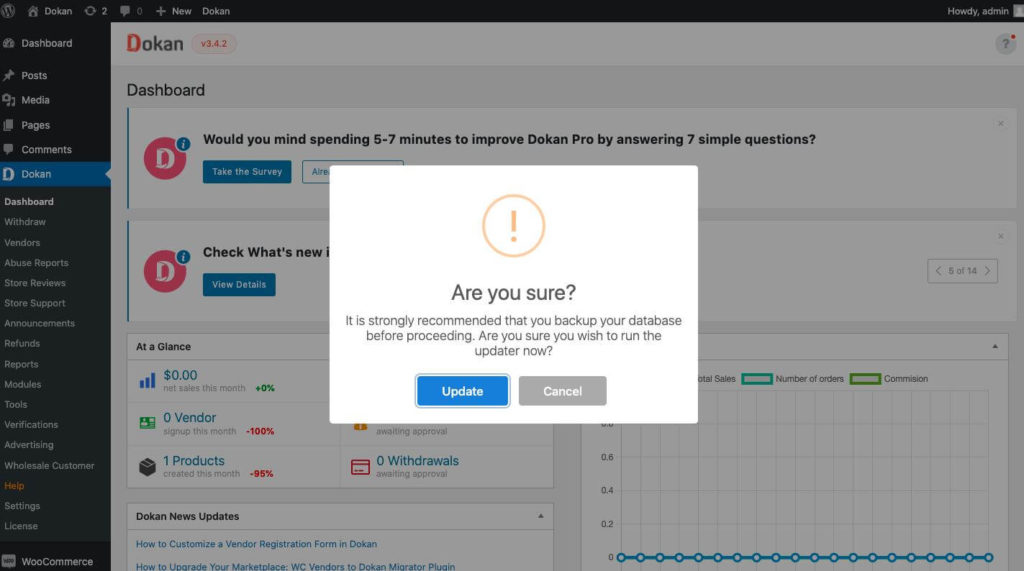
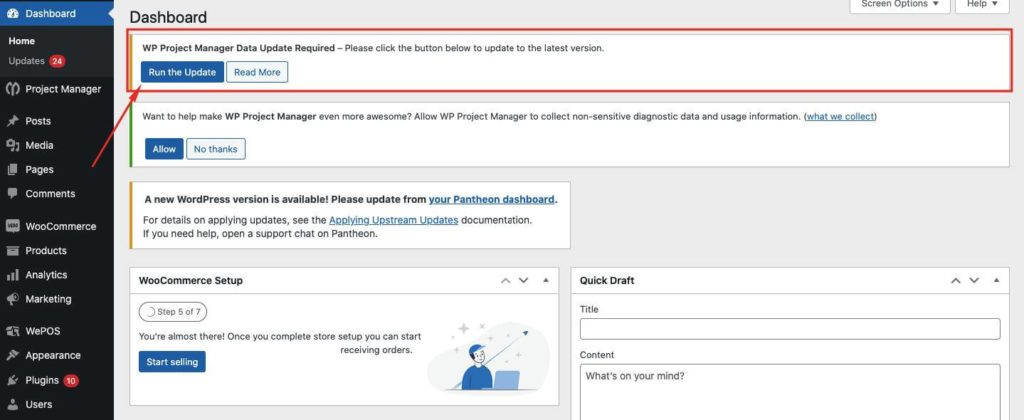
Some plugins may require a database update after updating the plugin. Do not worry. You will find the updater in that plugin’s Dashboard. Updating the database is a must to avoid any disconnection between the updated codebase and the database. After clicking on the Update, you will have to click again on Update on the pop-up image. The database will be updated.
You will get a pop-up,
Here's the WP Project Manager data updater screenshot,
How to Test Updates
Testing updates is one of the most important things before applying the updates on your live website. In that way, many unwanted situations can be avoided. Sometimes after the release of our updates the dependent integrated plugins (such as Elementor, and WooCommerce) also update their codebase. So, the mismatch between these plugins can happen. That is why it is better to test the update before applying it to the live site.
- Local – It is stored on a personal computer and is not usually accessible via the internet.
Learn how to Install WordPress in Localhost - Staging – The place where you test changes are called staging. The server configuration is identical to the live site. (Recommended)
Read: How to create a staging site - Production/Live site – The live site is also called a production site. Where users will be visiting or subscribing.
Testing in a Staging environment is the most recommended. When you test in the staging environment, you can find any error or compatibility issues with your site. Also, if the update does any damage to your site’s frontend UI or database then it will be easy to identify.
The main difference between the Local and staging is that you need to activate some configuration in the live site. Such as, Email SMTP can not be tested in a local environment. SMTP must be configured in a live site, otherwise, it will not work. That is why the Staging Environment is always preferred.
Conclusion
We are at the end of our article and hopefully, now you know how to update weDevs plugins. If you have any queries do let us know in the comment section.
This blog is written by Yusuf Shahriar who is a support engineer at weDevs.
Yusuf specializes in customer support and is responsible for assisting non-tech customers with tech-related issues. He is a powerful force in the workplace and uses her positive attitude and tireless energy to encourage others to work hard and succeed. He is inspired daily by the creation and the creator. In his free time, Yusuf likes petting his budgerigar birds, riding motorbikes, and playing video games with his friends online.