

How to Create Custom Post Types in WordPress
Do you want to know about custom post types and their purpose of using? Basically, they enable you to go behind your posts and pages. And help to build different content types for your WordPress site.
They are necessary if you want to allow your visitors or users to submit content. To provide submission access, you have to know how to add custom post types.
The custom post types convert a WordPress site from the blogging platform into a powerful CMS (Content Management System).
In this article, we will discuss this post type and show you when you will need them. Then finally the ways of adding them to your WordPress site. Therefore, you will get to know two methods and can choose which one seems easier to you.
What is Custom Post Type in WordPress?
A custom post type in WordPress is like creating a new kind of content for your website. Normally, WordPress lets you make posts (like blog articles) and pages (like the “About Us” page). But sometimes, you need something different that fits your website better.
For example, if you have a website about movies, you might want a special section just for movie reviews. Or, if you’re sharing your art, you might want a place just for your artwork. That’s what a custom post type does. It lets you make a new kind of content that’s different from regular posts and pages.
So, instead of using the same layout and settings for everything, you can create a custom post type that is perfect for what you want to show. It’s a way to organize your site better and make it easier for people to find what they’re looking for.
Why Use Custom Post Types in WordPress
If you are still wondering why you should use WordPress custom post types, let us show you a few crucial reasons behind using custom post types.
- Keeps Your Content Organized: Custom post types allow you to separate different kinds of content, making it easier to manage and find specific posts or pages.
- Improves User Experience: Visitors can easily navigate your website when content is neatly categorized, helping them find what they’re looking for faster.
- Customizes Your Site: You can create unique designs and layouts for each type of content, making your website look more professional and tailored to your needs.
- Adds Flexibility: You aren’t limited to just posts and pages—you can create anything from portfolios to product listings, helping you better showcase your content.
- Enhances SEO: Well-organized content can improve your search engine rankings, making your site more visible to people searching for relevant topics.
Convinced to create custom post types for your WordPress site? Awesome, now let's explore how to create custom post types in WordPress!
How to Create Custom Post Types in WordPress
There are two simple ways to create a custom post type in WordPress. One is adding code in your WordPress and the other one is using a plugin.
In this segment, we will show you both ways to create custom posts in WordPress. So, let's get started!
Method 01. Add Custom Post Type by Using Code
To submit a custom post type navigate to function.php file from WordPress for any particular theme. Add the following code there.
The news post-type will automatically appear after adding this code in the admin area of the WordPress dashboard.
Method 02. Add Custom Post Type Using a WordPress Plugin
To create custom post types with a WordPress Plugin, we will show you how to do the job by using WP User Frontend as an example. It is super easy to install WP User Frontend on your site.
After the installation, you need to create a form, then your user can use it from the frontend. Now, follow the steps we are mentioning below to learn how to create custom post types with ease.
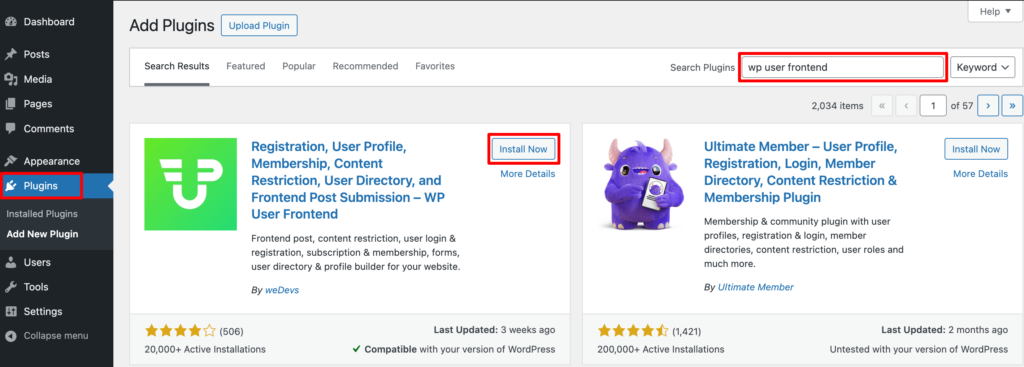
Step 1: Install WP User Frontend
To install the WP User Frontend plugin on your website, go to your WordPress dashboard -> Plugins -> Add New Plugin. Then search WP User Frontend and install it. Also, don't forget to activate the plugin once it's installed.
Step 2: Creating a form
Navigate through WP User Frontend > Post Forms > Add New. Create your form with the necessary form fields. Save the form.
Step 3: Setting Post Status
After creating a form you have to navigate through WP User Frontend > Post Forms.
Edit the existing form by selecting Settings > Post Settings > Post Status.
You will be able to see the custom post types there. Select your post type and save the form.
Step 4: Creating Taxonomy
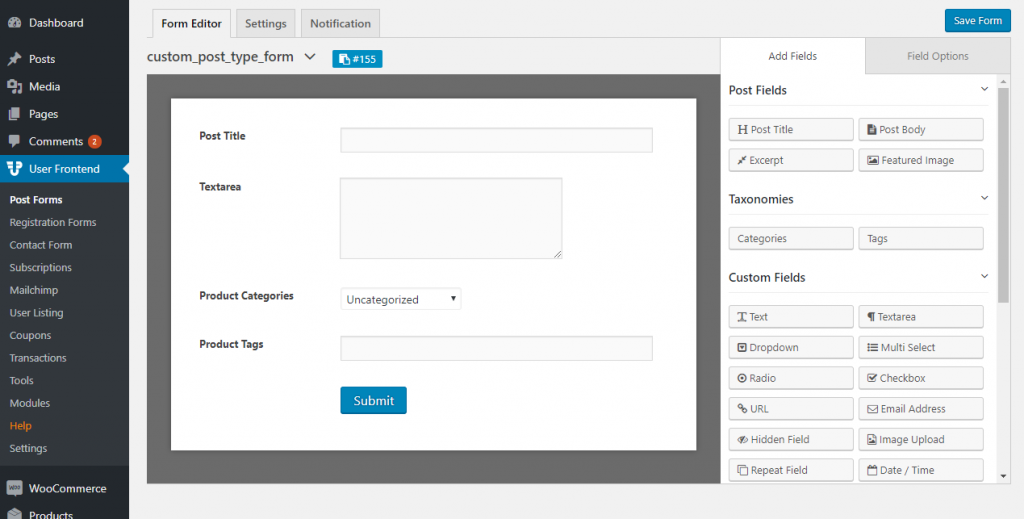
Next, you have to go back to Form Editor, then under the taxonomy section, you can see custom taxonomy.
For Woocommerce there will be product categories, product tags. Now save the form.
Step 4: Create the Page
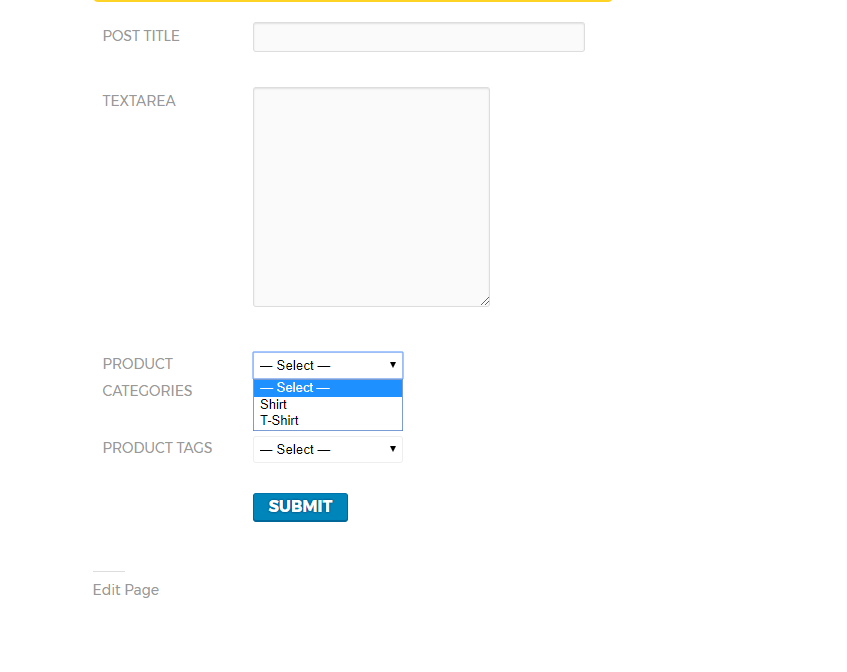
To create a new page, copy the shortcode of your form, or edit an existing one. Paste the shortcode. View the page in the browser. Your custom post-type submission is complete.
For your better understanding there is a short video for you. Go through it and make your Custom Post Type form within a few moments.
Conclusion
So, that's all for now. Are you successful in adding your custom post type form to the frontend of your WordPress site? If so, we hope that your audience will get some awesome frontend user experience.
However, within custom post types in hand, there are a handful of more usabilities of WP User Frontend to give your customers, readers or visitors some excellent experience. You may like to try them anytime.
You can further improve your visitors' experience by adding post reading time on your site. To do that, check our tutorial on how to show post reading time.
If you have any queries or recommendations feel free to ask us in the comments section. We would love to reply as soon as possible.