

WordPress Frontend Style Customizer For WP User Frontend
WP User Frontend was launched, with the mindset of giving the WordPress community an all in one frontend solution plugin. Which they will be able to use for any kind of frontend needs.
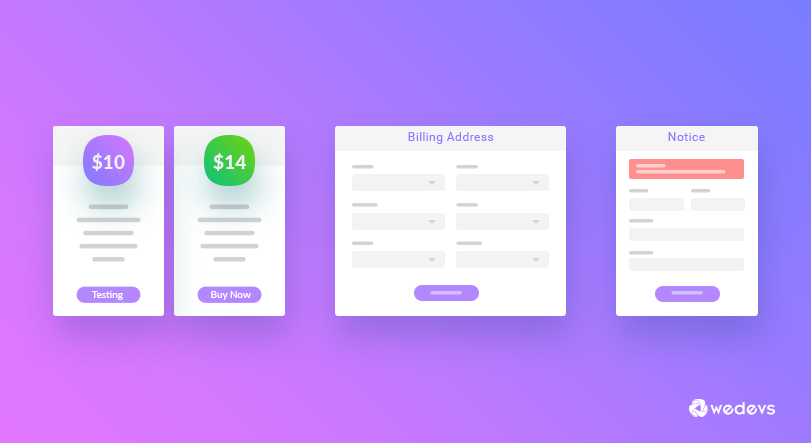
Though most of the features were available in the frontend, there were a few that were not. One such was the ability to customize subscriptions packs design, billing address for that the users interacted with or all the notices that they get each time. We are proud to say that we have that added these feature to the latest version of WP User Frontend using Style Customizer. All these features are available from the frontend from the customization option.
Take a look as we dive deeper into this newest feature.
Why WordPress Frontend Customization Matters & How WP User Frontend Handles It
Everyday mundane tasks are what bores the users. They want to interact with something they feel interested in.
Businesses who take advantage of this get the most benefits out of their efforts. To differentiate yourself from all others out there, you need to provide something unique. In that journey, WP User Frontend now comes with Frontend Style Customizer. Which you can use to customize the look and feel of your Subscription packs, notices that come along with that and the field options of your billing address.
Everything from the customization option made available on the Frontend.
What are the customization options?
WP User Frontend style customizer lets you have three WordPress frontend customization options from the list of features. The Subscription packs that you have set beforehand from the backend of WP User Frontend. The billing address form settings. Choose whether you want to make certain fields hidden, optional, required.
To see the WordPress frontend customizations, all you need to do is go to wp-admin→Appearance→Customize
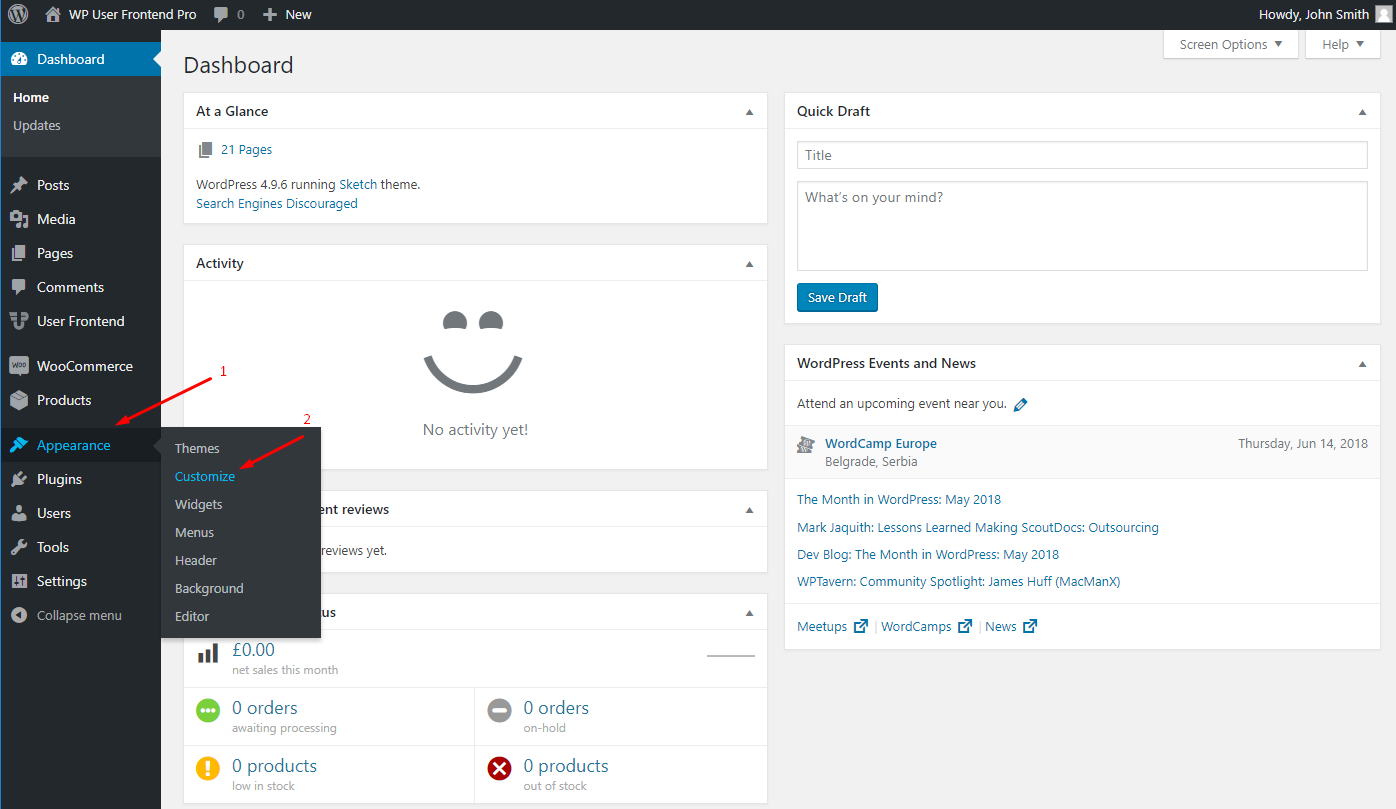
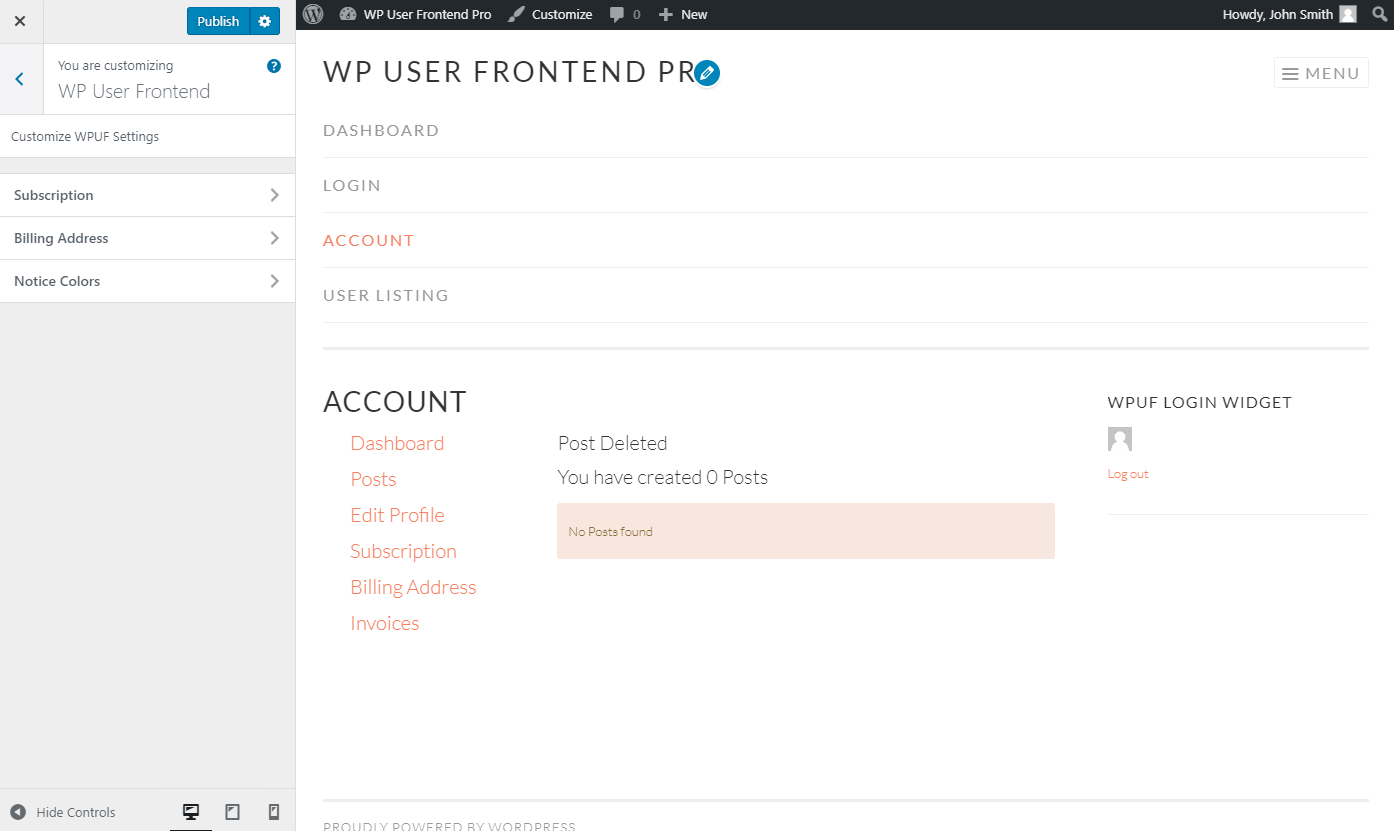
After that, you will see a new menu named WP User Frontend. You will see all your options there.
You can choose directly from the frontend on what you want to customize. So let's see what are the specific things you will be able to with it.
Please note, customization of the billing address is available in the FREE version. The rest are only available in the pro version.
Subscription
This option lets you customize the look of your subscription packs. The subscription packs you have set beforehand in the WP User Frontend menu from the backend. You will be able to change the color of the Header, Body, Footer, Text, Button and lastly the Trial Body color.
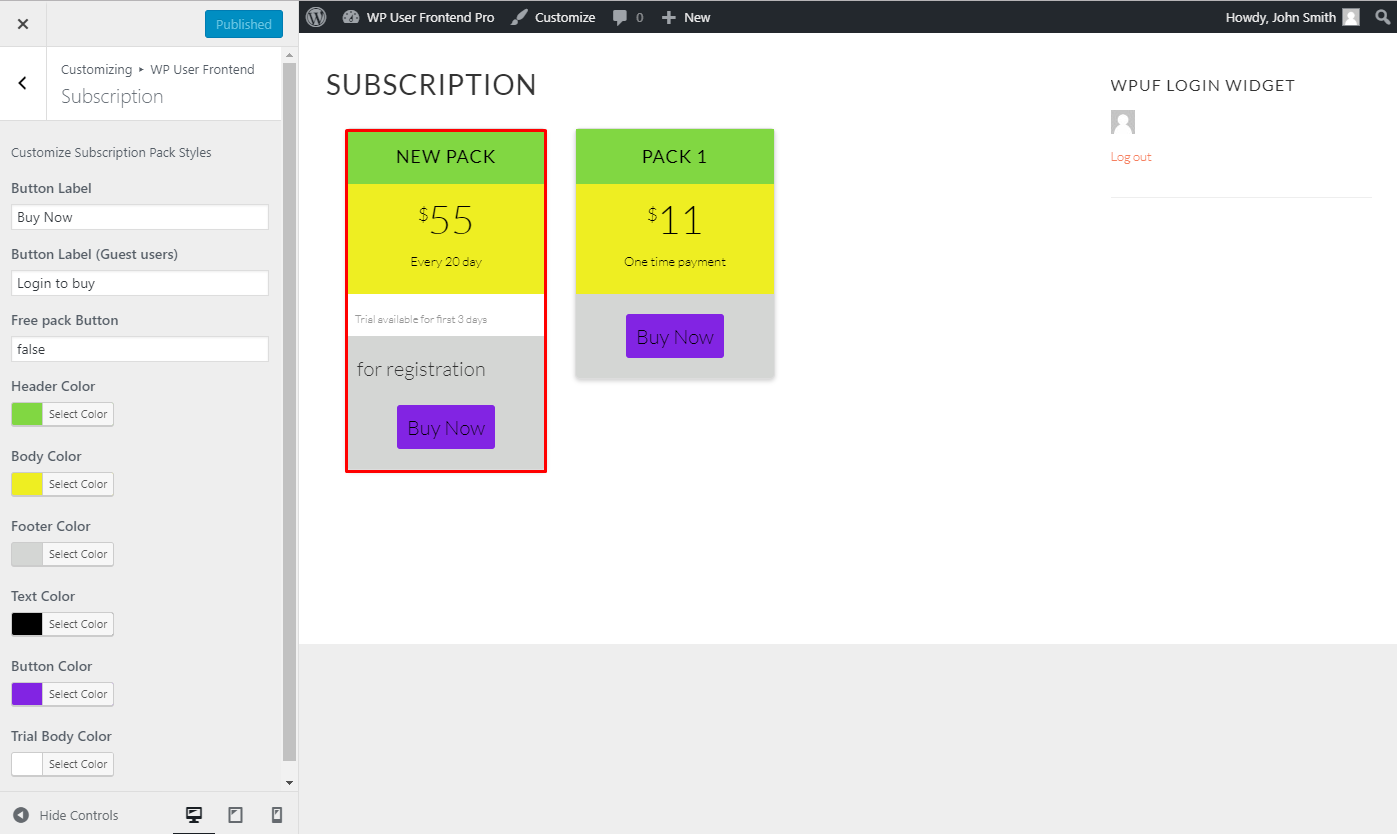
Here is a glimpse of all the features that are available.
- Button Label: Let's you change the text of the button label
- Button Label: You can change the text of the button a guest user will see
- Free Pack button: Choose which color will the button of free subscription packs will be
- Header color: The color of the header
- Body color: the body color of the block you want
- Footer color: Color of the footer
- Text color: Color the text shown in the subscription pack
- Button Color: Choose the button color you want
- Trial body color: Color of the block that shows the Trial Body color. Where the text of the trial text is shown
Billing Address
The new WordPress frontend customization feature has a built-in billing address field customizer. It lets you easily hide, make a field optional, and make a field required simply from the frontend. There is also an option to show or hide the address field completely.
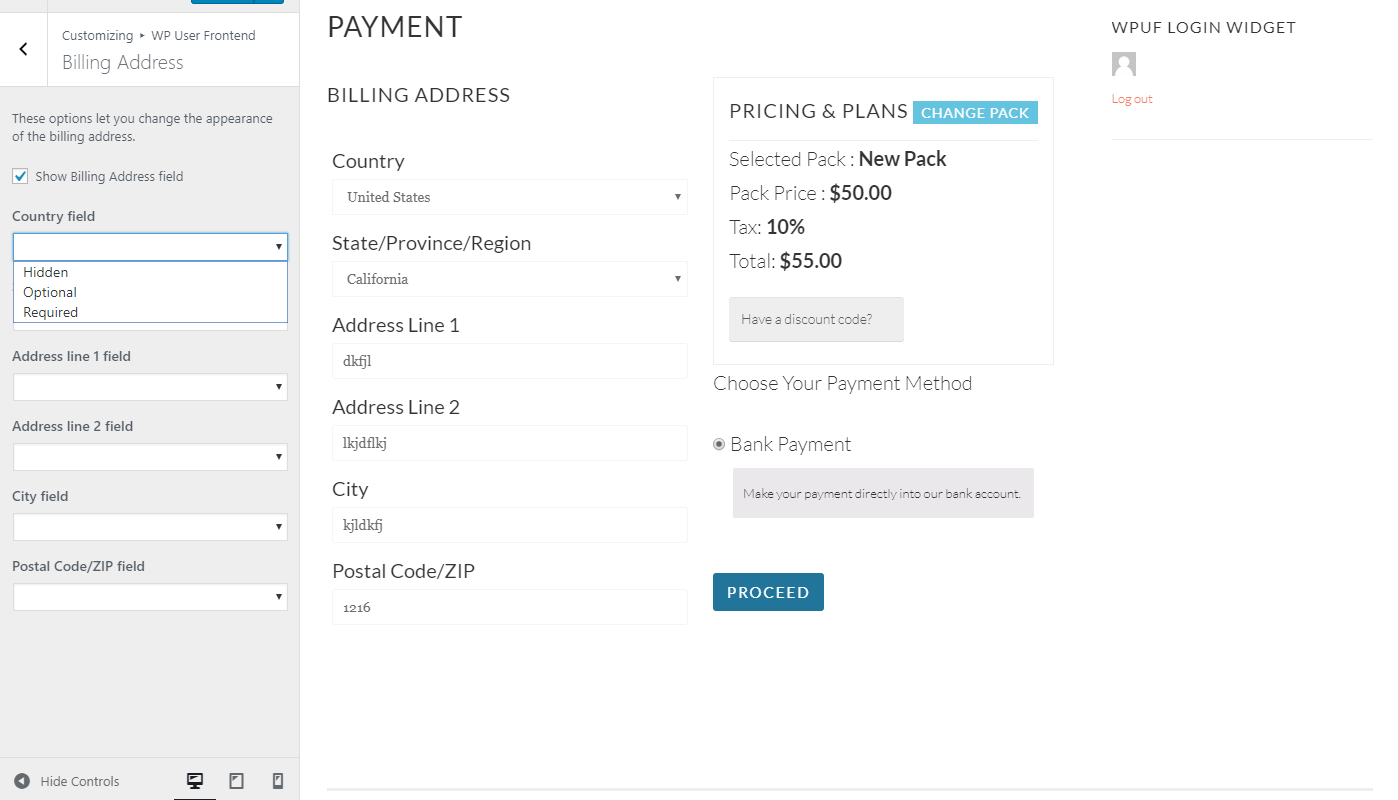
Here is the complete list of things you can customize.
- Checkbox to show address fields: A simple checkbox that you can use to show/hide the address field when making payments.
- Country Field: Hide, make it optional, or make it required to fill up when making payment
- State/Province: Option to make it required, hidden, or optional
- Address line 1/ Address line 2: Same functionality for the address field
- City: Choose among the three options
- Postal Code/Zip Code: Same
Notice Colors
This is the final option when customizing your form. It gives you the option to change the color of the notices you see when an event happens. Events such as success notice, error message, general message, and any information notice that gets featured.
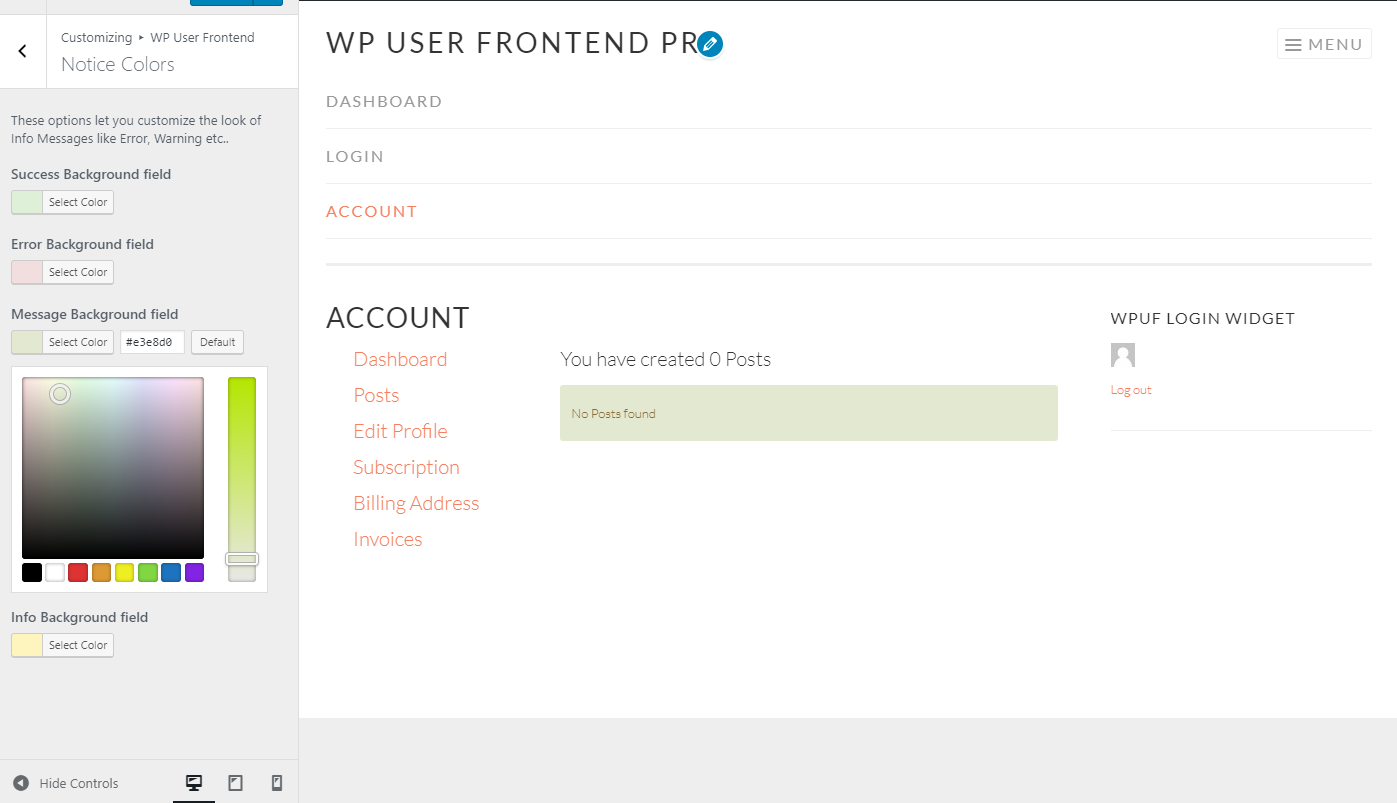
You will be able to change the color of
- Success message background: Choose the color to any you like
- Error message background: The block color of the error message
- Message background: General message background
- Info background: Color code for the info notice background
If you are interested in learning more about these awesome features, you are always welcomed to go through our detailed documentation on this awesome feature.
Ready To Make Your Choice?
We are updating WP User Frontend by working hard every day. What our users are saying, requesting as features they would like to see in the upcoming releases are our fuel.
If you liked this feature and want to learn more about the frontend solution you can always learn more from here.
You can also check out the official demo made just for you