
Create Amazing Customizable Registration Forms for Dokan
None will ever refute the fact that the Registration form is the soul of an online store due to its versatile usage.
If you are using Dokan, this fact becomes even more important because you will have to register each of your vendors in your store.
Luckily, out of the box, you will get a built-in Registration Form with Dokan to do so at ease.
However, as a part of our customer satisfaction campaign, we do surveys on a regular basis. Based on those surveys, we came to know that, some Dokan store owners were expecting flexibility in creating Registration forms.
Meaning that they would like to add more fields, customize the existing fields of the form, use prebuilt registration form templates for quick setup, etc.
The good news is that our developers have made a solution to customize that default registration form so that it aligns with your preferences. In today's post, we will cover how you can easily customize Dokan Registration forms with the help of WP User Frontend Pro.
Why Customize the Fields of A Registration Form?
As a marketplace owner, you might need to customize the fields of a registration form because you may have to –
- collect extra information about your vendors/customers.
- replace the existing field labels with customized ones.
- change the meta keys of fields.
- make a field required or optional.
- use placeholders and give help text or even dynamic values inside the input fields.
- increase or decrease the size of the input tags.
- provide a container class name for a field.
- increase or decrease the size of the fields.
- use conditional logic.
Customizing the Fields of Dokan Registration Form
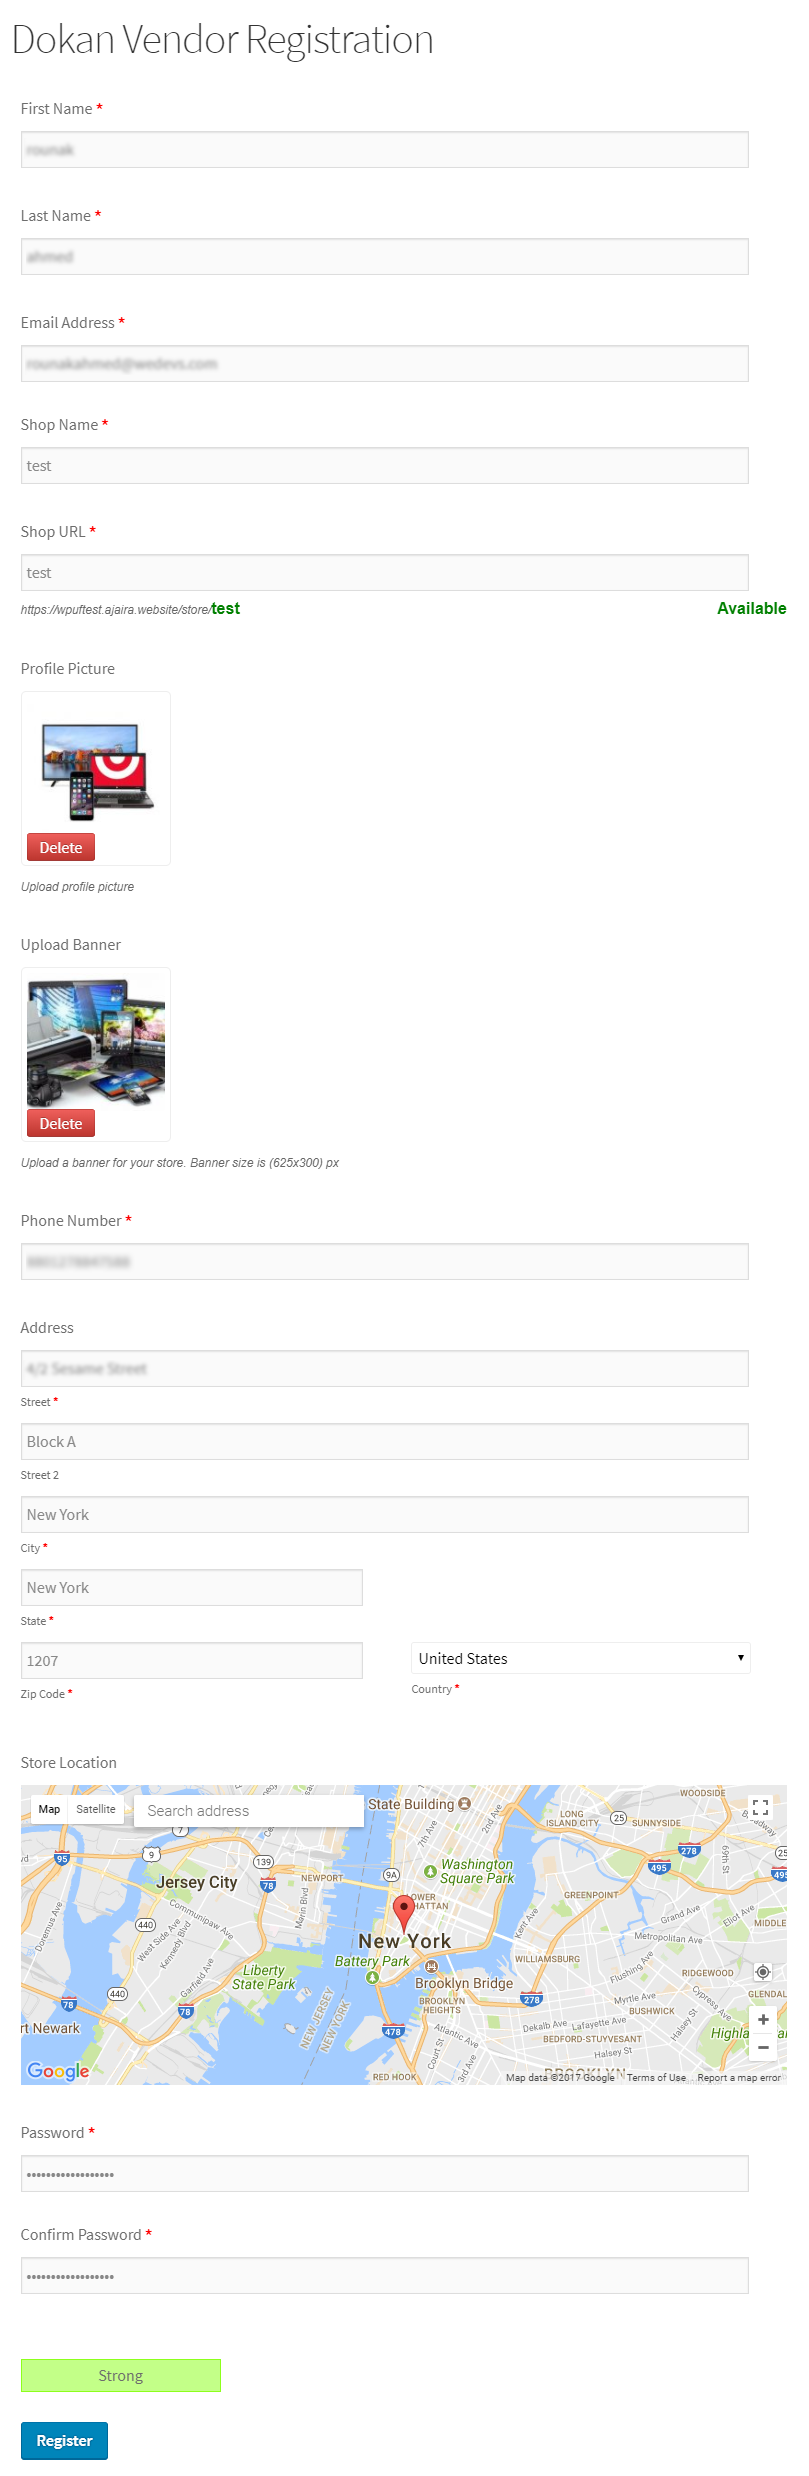
Well, before showing you how to customize, let's have a quick look at the default Registration form of Dokan. Here is a screenshot when a vendor is going to register in your store using the default registration form:
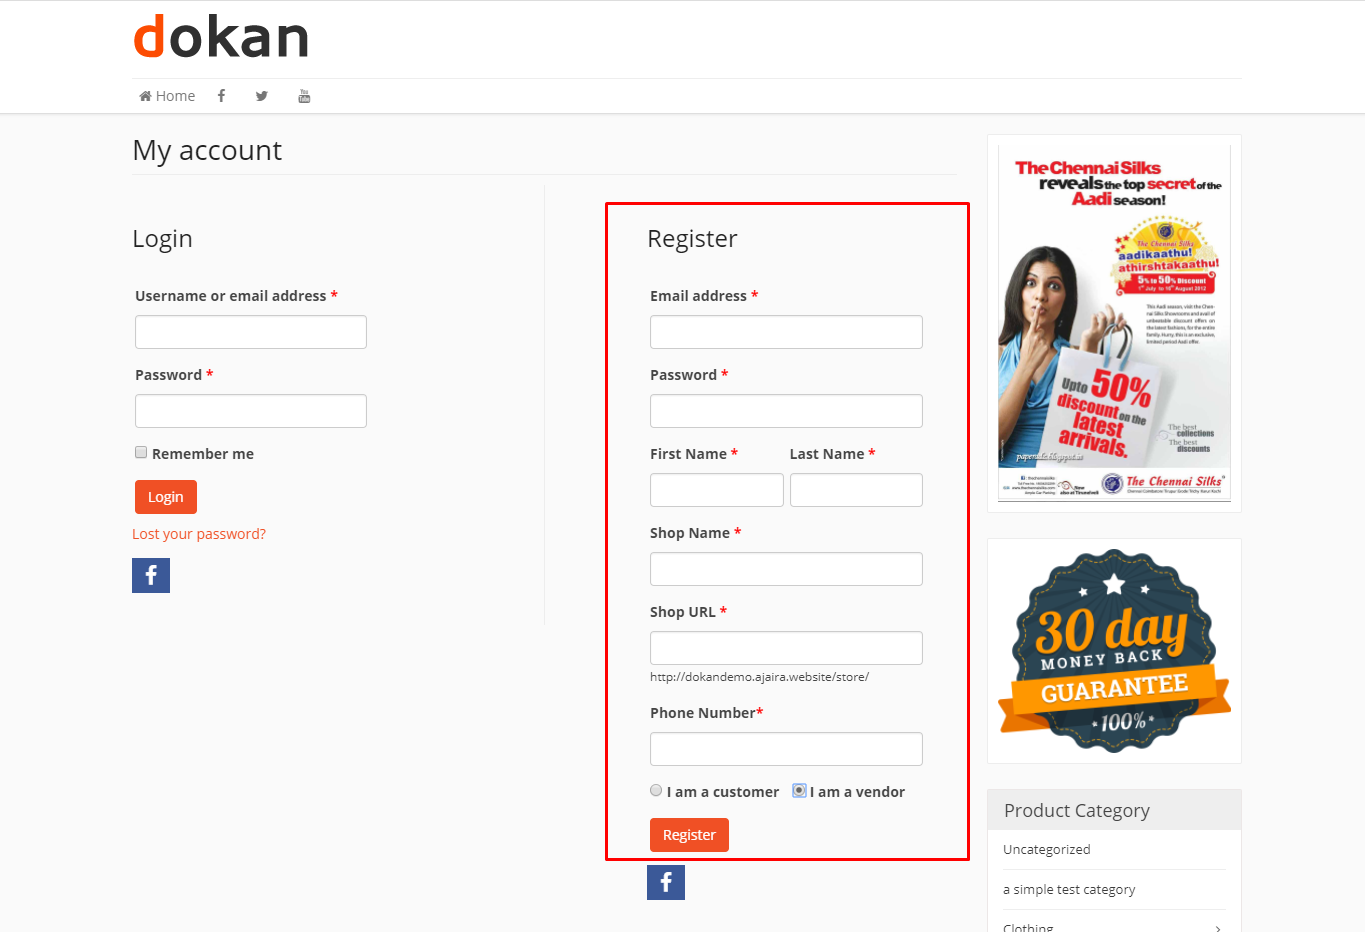
The screenshot above depicts the integrated Vendor Registration form of Dokan which can be easily customized with WP User Frontend Pro. You can add and edit as many fields as you require to create a Registration form for your vendors from scratch. If you are in a hurry, you can use the pre-defined yet customizable templates on the go too. Apart from being able to carry out the basic features (which we mentioned in the “Why Customize the Fields of a Registration Form?” section), WP User Frontend will also enable you to:
- Register vendor
- Use registration form templates
- Add and edit as many fields as you require
The cool thing is that any vendor who registers with the WP User Frontend registration form will automatically get a vendor user role.
How to Customize / Build / Create Dokan Registration Form?
Well, you can do it very easily. Just make sure that you have the following requirements fulfilled:
We assume that you are already using Dokan in your WordPress website.
Installing WP User Frontend
To install WP User Frontend you can check this precise documentation.
Availing the Service
Once you have all of these, navigate to –
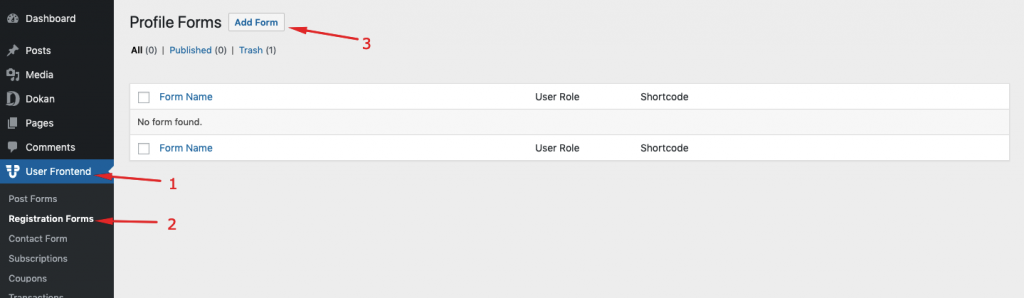
WP Admin Dashboard → WP User Frontend → Registration Forms → Add Form.
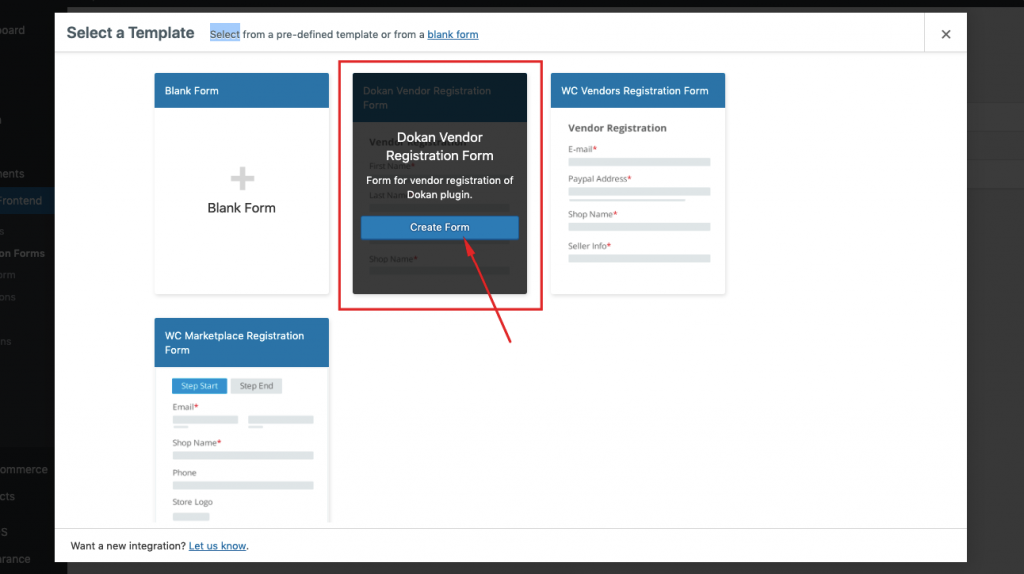
Now, it's time to configure your first registration form with WP User Frontend in Dokan. When you click on Add Form, you will get some predefined templates.
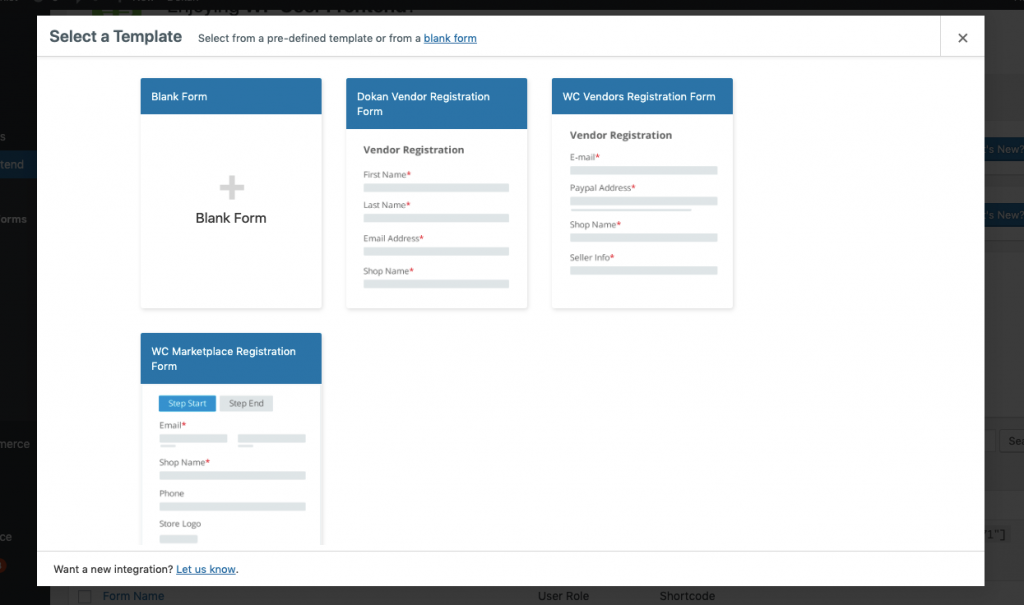
After that, select Dokan Vendor Registration Form and hit the Create Form button to open the predefined template.
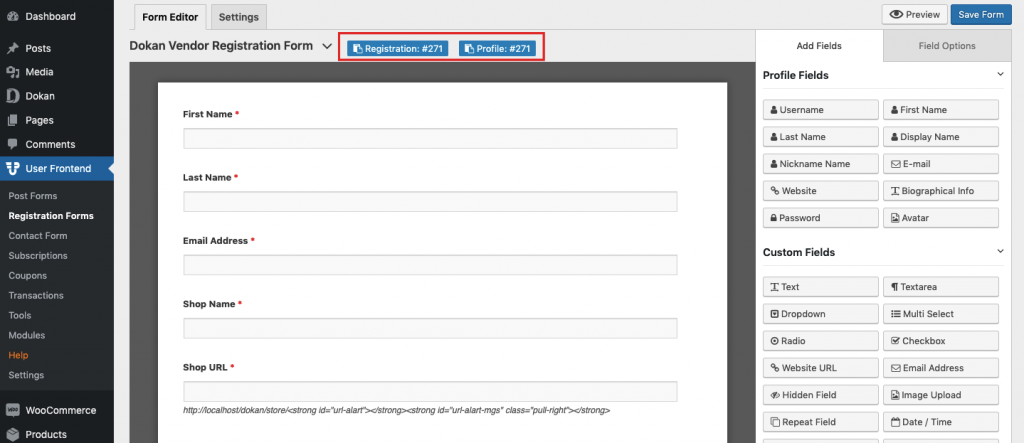
When you open up the registration form or template, as an Admin, you can customize it by adding or removing fields as it was expected.
Using Shortcodes
The most interesting point is that the Registration Form template of WP User Frontend comes with two Shortcodes which can be seen at the top of the form. They are Registration and Profile. Use the ‘Registration' shortcode if you don't want your users to be able to edit the information they enter in the registration form. Otherwise, use both of the shortcodes – ‘Registration' and ‘Profile' while you plan to publish the form.
N.B. Don't change the Meta Key of the existing fields where applicable. You can change the Meta Key of new fields that you add.
Publishing Form
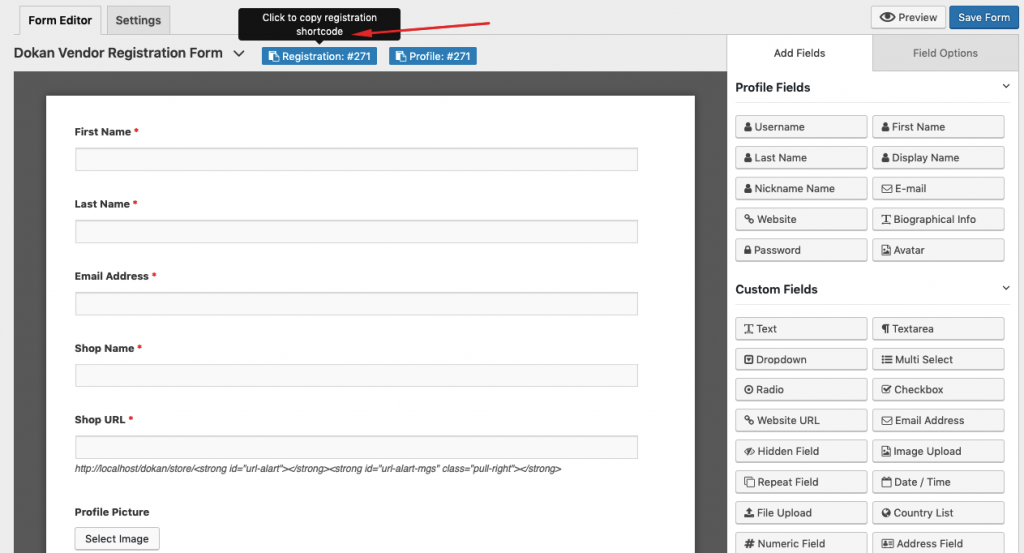
To publish, Save Form and click on the ‘Registration' / ‘Profile' shortcode to copy to the clipboard.
Create a new page then give it a title after that paste the Registration / Profile shortcodes. Then click on the Publish button for publishing your form.
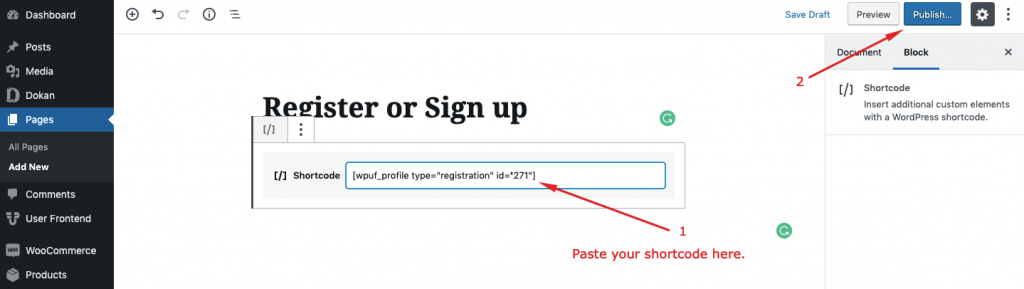
This is it! You have published your very own customized Dokan Vendor Registration form using WP User Frontend.
But How will Your Vendors Experience the Form?
Your vendors will be able to see the form much like this from the frontend:
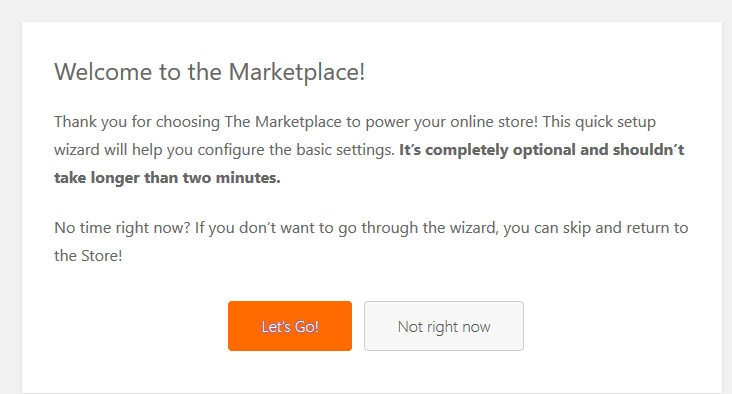
On submission of the form, your vendor will be redirected to the Dokan vendor Setup Wizard for configuring his/her store in the following ways:
Wrapping up
We always try our best to help you with the features that meet your goal. We hope this customization feature of the Dokan Vendor Registration Form will be really convenient for you to create a Registration form according to your choice, not ours!
As a bonus, WP User Frontend will help you get better control over your website from the frontend. It's pretty much like “Killing two birds with one stone.”, isn't it?. ☺
Now, it's up to you whether you want this feature in Dokan. Let us know your stance by leaving a comment below.